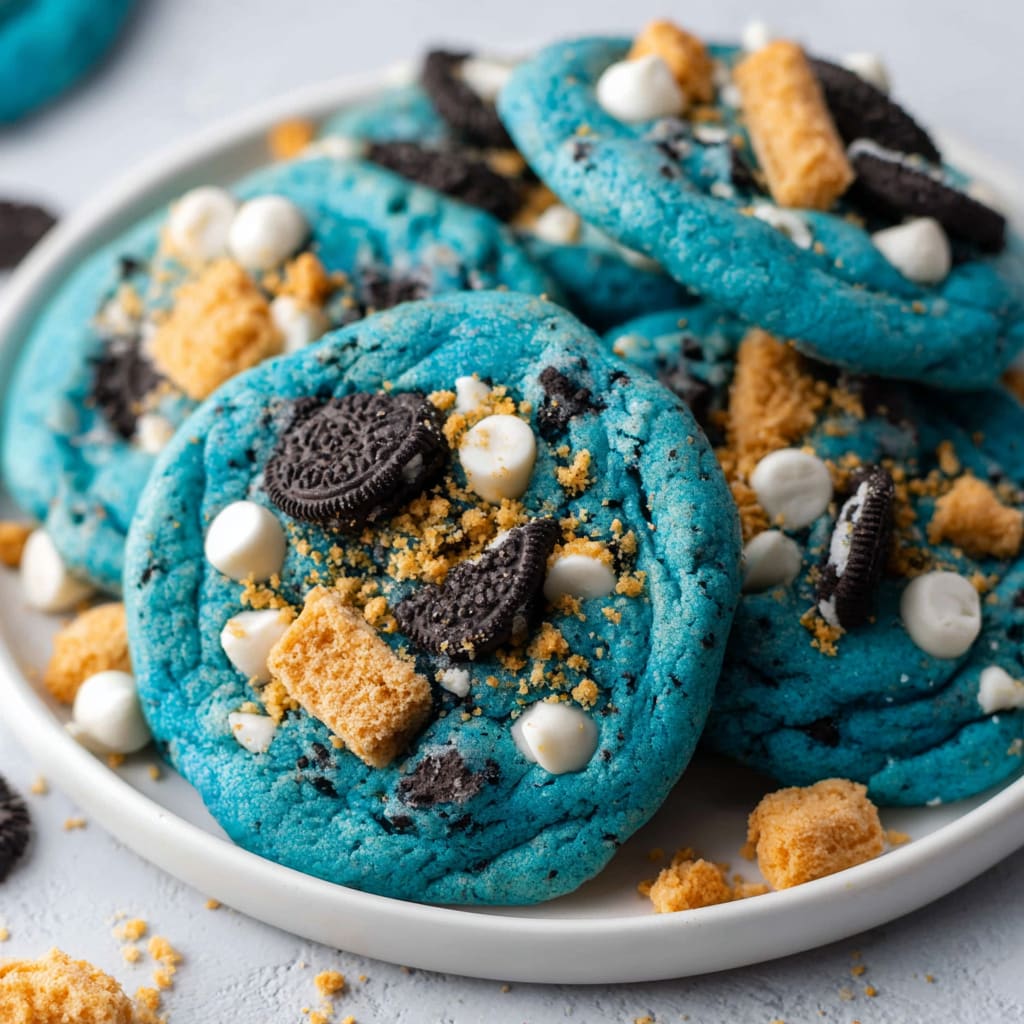
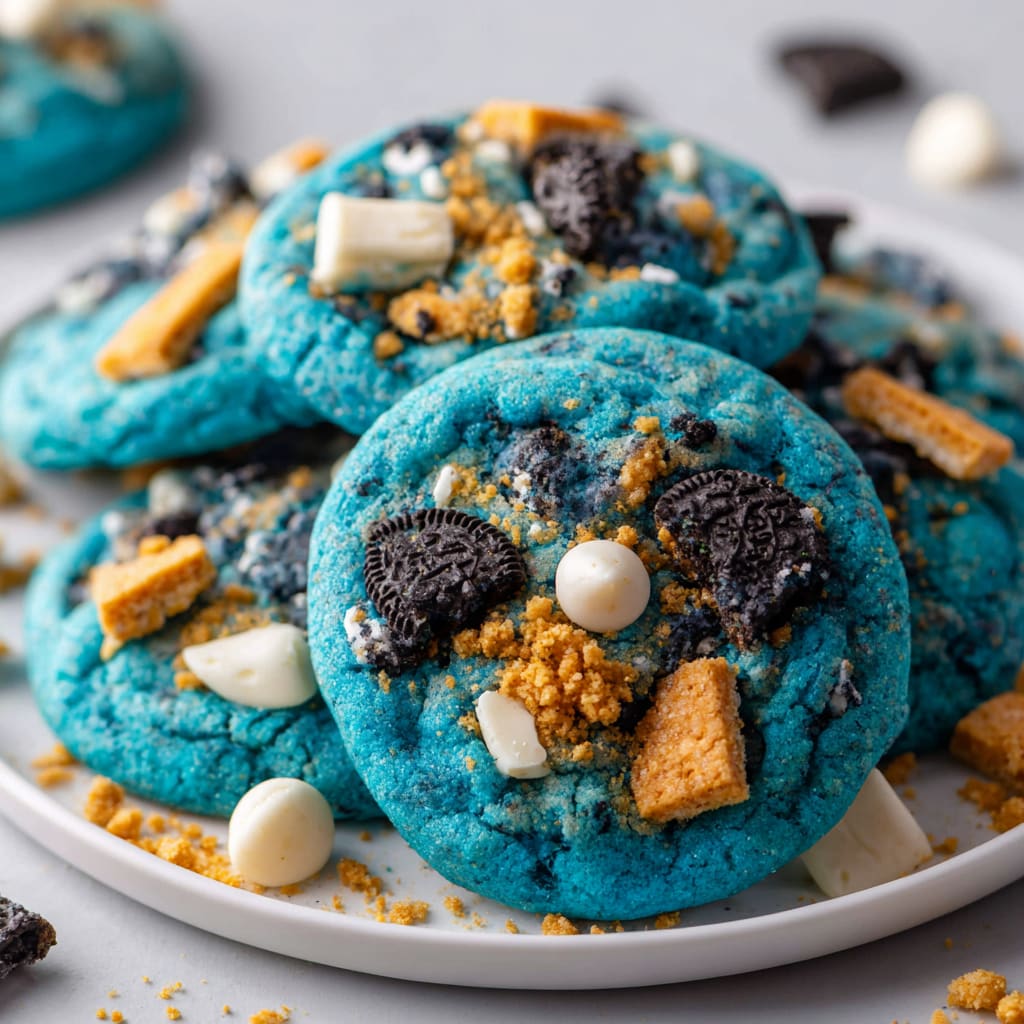
Sink your teeth into the gloriously chewy, utterly indulgent Cookie Monster Cookies that deliver an explosion of blue-tinted sweetness with every bite. These vibrant, eye-catching treats combine the perfect balance of vanilla-scented cookie dough with chocolate chips, white chocolate chunks, and crumbled Oreos—creating a dessert that’s as fun to look at as it is to devour. The striking blue color isn’t just visually stunning; it signals the outrageous flavor combination that awaits. You’ll learn how to create these show-stopping Cookie Monster Cookies that will delight both children and adults alike, with simple ingredients and foolproof techniques that guarantee success every time.
Why You’ll Love This Recipe
These Cookie Monster Cookies are destined to become your new favorite baking project for so many reasons. First, the visual impact is unmatched—the brilliant blue dough studded with three different mix-ins creates an irresistible treat that draws everyone to the cookie jar. The textural contrast between the soft, chewy cookie base and the varied additions (melty chocolate chips, smooth white chocolate chunks, and crunchy Oreo pieces) delivers a multi-dimensional eating experience that standard cookies simply can’t match.
Beyond their impressive appearance, these cookies strike the perfect balance between straightforward preparation and spectacular results. The dough comes together quickly with basic pantry ingredients plus food coloring, making them accessible even for novice bakers. They’re endlessly customizable, perfect for birthdays, school events, or whenever you need a mood-lifting treat. Children especially delight in both making and eating these cookies, making them an ideal family baking activity that creates both memories and delicious rewards.
Ingredients
For perfect Cookie Monster Cookies, you’ll need:
- 2½ cups (310g) all-purpose flour
- 1 teaspoon baking soda
- ½ teaspoon salt
- 1 cup (226g) unsalted butter, softened
- ¾ cup (150g) granulated sugar
- ¾ cup (165g) packed light brown sugar
- 2 large eggs, at room temperature
- 2 teaspoons vanilla extract
- Blue gel food coloring (1-2 teaspoons, depending on desired intensity)
- 1 cup (175g) semi-sweet chocolate chips
- 1 cup (175g) white chocolate chunks
- 15 Oreo cookies, roughly chopped
The high-quality vanilla extract enhances the cookie’s base flavor, creating the perfect canvas for the mix-ins. Gel food coloring works best as it provides vibrant color without changing the dough’s consistency. For the most authentic cookie monster look, choose mini chocolate chips if available, as they distribute more evenly throughout the dough and better mimic the appearance of the beloved character’s signature cookies.
Pro Tips
Get the Color Right: The secret to perfect Cookie Monster Cookies lies in the coloring technique. Add gel food coloring gradually, starting with a small amount and increasing until you achieve the desired bright blue shade. Remember that the color will lighten slightly during baking, so go a touch darker than your target result. Mix thoroughly to ensure no white streaks remain in your dough.
Perfect Cookie Texture: For that ideal chewy center with slightly crisp edges, pay close attention to baking time. These cookies should be pulled from the oven when the edges are set but the centers still look slightly underdone. This typically happens around the 10-minute mark for standard-sized cookies. The residual heat from the baking sheet will continue cooking them to perfection as they cool.
Mix-In Distribution: To achieve the authentic cookie monster look, reserve about ¼ cup each of the chocolate chips, white chocolate chunks, and Oreo pieces. After forming your cookie dough balls, press these reserved mix-ins gently onto the tops of the cookies before baking. This not only creates a more visually striking cookie but also ensures you get all three flavors in every bite.
Instructions
Step 1: Prepare your baking sheets by lining them with parchment paper and preheat your oven to 375°F (190°C). In a medium bowl, whisk together the flour, baking soda, and salt until well combined, then set aside.
Step 2: In a large bowl or stand mixer, cream together the softened butter, granulated sugar, and brown sugar on medium speed until light and fluffy, about 3-4 minutes. Don’t rush this step—proper creaming incorporates air for perfectly textured cookies.
Step 3: Add the eggs one at a time, beating well after each addition. Stir in the vanilla extract, then add the blue gel food coloring gradually until you achieve a vibrant blue color. Remember, the color will lighten slightly during baking.
Step 4: Gradually add the dry ingredient mixture to the blue butter mixture, mixing on low speed just until combined. Overmixing at this stage can make your cookies tough, so stop as soon as no flour streaks remain.
Step 5: Fold in the chocolate chips, white chocolate chunks, and chopped Oreos by hand using a sturdy spatula. Reserve a small portion of each mix-in to press on top of the cookies before baking for that classic cookie monster appearance.
Step 6: Using a cookie scoop or tablespoon, portion the dough into balls about 1½ tablespoons each. Place them on the prepared baking sheets, spacing them about 2 inches apart. Press a few of your reserved mix-ins onto the top of each cookie dough ball.
Step 7: Bake for 9-11 minutes, until the edges are set but the centers still look slightly underdone. Let the cookies cool on the baking sheet for 5 minutes before transferring to a wire rack to cool completely.
Variations
Mini Cookie Monster Bites: Transform these Cookie Monster Cookies into adorable bite-sized treats by using a teaspoon-sized scoop for the dough. Reduce the baking time to 6-7 minutes and serve these miniature versions at children’s parties or package them in small gift bags for delightful party favors. The smaller size makes them perfect for little hands and creates an even more playful presentation.
Cookie Monster Cookie Sandwiches: Take your Cookie Monster Cookies to the next level by turning them into sandwich cookies. Once baked and cooled, spread a layer of vanilla buttercream tinted light blue between two cookies. Roll the exposed edges of the filling in more mini chocolate chips or crushed Oreos for an extra-indulgent treat that doubles down on the cookie monster theme.
Gluten-Free Option: Those with gluten sensitivities can still enjoy these playful treats by substituting the all-purpose flour with a 1:1 gluten-free baking flour blend. Be sure to use gluten-free Oreo alternatives for the mix-ins, and you’ll have created an inclusive version that doesn’t sacrifice any of the fun or flavor of the original Cookie Monster Cookies.
Storage and Serving
Store your Cookie Monster Cookies in an airtight container at room temperature for up to 5 days. To maintain maximum freshness, place a slice of bread in the container—it will release moisture to keep the cookies soft without making them soggy. For longer storage, freeze the baked cookies in a single layer until solid, then transfer to a freezer-safe container with parchment between layers for up to 3 months. Thaw at room temperature for about an hour before serving.
For a showstopping dessert presentation, arrange your Cookie Monster Cookies on a tiered platter, interspersed with small glasses of cold milk with blue and white striped straws. At children’s parties, create a “cookie monster approved” dessert table by surrounding the cookies with bowls of blue candies and additional chocolate chips for nibbling. For a playful after-school treat, serve a warm cookie alongside a scoop of vanilla ice cream and a drizzle of chocolate sauce for an impromptu cookie monster sundae that will delight kids of all ages.
FAQs
Can I make the cookie dough ahead of time?
Yes! The Cookie Monster Cookie dough can be prepared up to 3 days in advance and stored in the refrigerator. Bring it to room temperature for about 30 minutes before scooping and baking. You can also freeze the portioned dough balls for up to 3 months—just add 1-2 minutes to the baking time when baking from frozen.
Why did my cookies spread too much during baking?
Over-spreading typically happens when the butter is too warm or there’s not enough flour. Make sure your butter is softened but still cool to the touch, and always measure your flour correctly. Chilling the dough for 30 minutes before baking can also help prevent excessive spreading.
Can I use liquid food coloring instead of gel?
While liquid food coloring can work, gel coloring is strongly recommended for Cookie Monster Cookies. Liquid coloring may require more product to achieve the vibrant blue, potentially altering the dough’s consistency and resulting in a different texture.
How do I know when the cookies are perfectly done?
The perfect Cookie Monster Cookie should have set edges that are just beginning to turn golden, while the centers remain slightly soft and puffy. They will look underdone in the middle, but will firm up as they cool on the baking sheet.
Can I use different mix-ins while keeping the cookie monster theme?
Absolutely! While the classic combination includes chocolate chips, white chocolate, and Oreos, you can customize the mix-ins while maintaining the signature blue dough. M&Ms, butterscotch chips, or even cookie butter chips work well, just keep the total amount of mix-ins around 3 cups to maintain the proper dough-to-mix-in ratio.

Cookie Monster Cookies
- Prep Time: 20 minutes
- Cook Time: 10 minutes
- Total Time: 30 minutes
- Yield: 24 cookies 1x
- Category: Dessert
- Method: Baking
- Cuisine: Americaine
Description
Cookie Monster Cookies: Indulge in gooey chocolate chip cookies filled with chunks of milk chocolate and buttery toffee. Quick, comforting, and crowd-pleasing!
Ingredients
- 2½ cups (310g) all-purpose flour
- 1 teaspoon baking soda
- ½ teaspoon salt
- 1 cup (226g) unsalted butter, softened
- ¾ cup (150g) granulated sugar
- ¾ cup (165g) packed light brown sugar
- 2 large eggs, at room temperature
- 2 teaspoons vanilla extract
- Blue gel food coloring (1-2 teaspoons, depending on desired intensity)
- 1 cup (175g) semi-sweet chocolate chips
- 1 cup (175g) white chocolate chunks
- 15 Oreo cookies, roughly chopped
Instructions
- Step 1: Prepare your baking sheets by lining them with parchment paper and preheat your oven to 375°F (190°C). In a medium bowl, whisk together the flour, baking soda, and salt until well combined, then set aside.
- Step 2: In a large bowl or stand mixer, cream together the softened butter, granulated sugar, and brown sugar on medium speed until light and fluffy, about 3-4 minutes. Don’t rush this step—proper creaming incorporates air for perfectly textured cookies.
- Step 3: Add the eggs one at a time, beating well after each addition. Stir in the vanilla extract, then add the blue gel food coloring gradually until you achieve a vibrant blue color. Remember, the color will lighten slightly during baking.
- Step 4: Gradually add the dry ingredient mixture to the blue butter mixture, mixing on low speed just until combined. Overmixing at this stage can make your cookies tough, so stop as soon as no flour streaks remain.
- Step 5: Fold in the chocolate chips, white chocolate chunks, and chopped Oreos by hand using a sturdy spatula. Reserve a small portion of each mix-in to press on top of the cookies before baking for that classic cookie monster appearance.
- Step 6: Using a cookie scoop or tablespoon, portion the dough into balls about 1½ tablespoons each. Place them on the prepared baking sheets, spacing them about 2 inches apart. Press a few of your reserved mix-ins onto the top of each cookie dough ball.
- Step 7: Bake for 9-11 minutes, until the edges are set but the centers still look slightly underdone. Let the cookies cool on the baking sheet for 5 minutes before transferring to a wire rack to cool completely.
Notes
Fresh ingredients will always yield the best flavor results.
Nutrition
- Serving Size: 1 cookie
- Calories: 220
- Sugar: 18g
- Sodium: 160mg
- Fat: 12g
- Saturated Fat: 7g
- Unsaturated Fat: 4.5g
- Trans Fat: 0g
- Carbohydrates: 25g
- Fiber: 1g
- Protein: 2g
- Cholesterol: 35mg