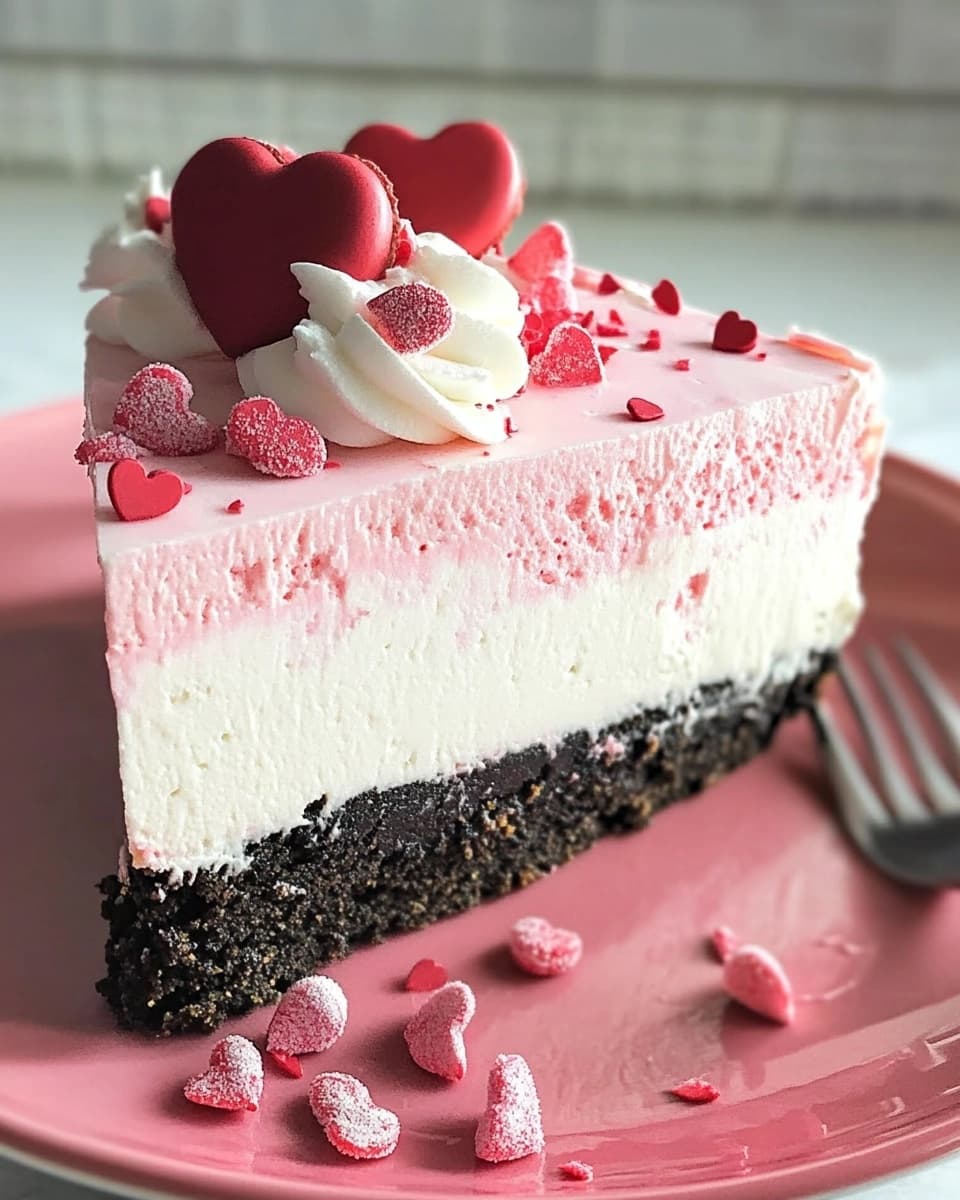
Valentine’s Day Cheesecake is a decadent dessert that combines the creamy, rich texture of cheesecake with the sweetness of a romantic occasion. This dish is special because it is designed to wow your loved one with its indulgent layers and stunning presentation. The combination of a smooth, velvety filling atop a buttery graham cracker crust, topped with fresh fruit or a luscious berry sauce, creates the perfect treat to celebrate love. In this article, you’ll learn how to make this delicious Valentine’s Day cheesecake, along with tips for customizing it and achieving the ideal texture.
Why You’ll Love This Recipe
Valentine’s Day Cheesecake is the epitome of indulgence, with its rich, velvety texture and perfectly balanced flavors. The smooth, creamy filling made with cream cheese, sugar, and vanilla is a contrast to the crunchy, slightly sweet graham cracker crust, making each bite a delightful experience. What makes this cheesecake special is its versatility and how easily it can be customized to suit your preferences. Whether you opt for a classic topping of fresh berries, a drizzle of raspberry sauce, or even chocolate shavings, this cheesecake can be tailored to make your celebration even sweeter.
This cheesecake’s appeal extends beyond its taste; it is visually stunning as well. The smooth, white filling is contrasted with the vibrant red and pink hues of seasonal berries or a glossy berry compote. It’s a dessert that not only tastes amazing but also looks beautiful on the table, making it a perfect showstopper for Valentine’s Day or any romantic gathering. You will also learn how to make a cheesecake that holds up perfectly, with no cracks or texture issues, ensuring that your dessert looks as good as it tastes.
Recipe Details
Making Valentine’s Day Cheesecake involves preparing a buttery graham cracker crust, followed by a creamy filling made from cream cheese, sour cream, sugar, eggs, and vanilla. The crust is simple to make and just requires mixing crushed graham crackers, sugar, and butter. Once pressed into the pan, it’s baked until golden, setting the stage for the creamy filling.
The filling is the star of this cheesecake. It’s made by blending cream cheese, sugar, and eggs until smooth, then adding sour cream and vanilla to create a velvety texture. After pouring the filling into the crust, the cheesecake is baked slowly in a water bath to prevent cracking and ensure an even, creamy texture. This baking method helps the cheesecake set without becoming dry or overcooked.
After baking, the cheesecake must cool completely before being chilled for at least 4 hours or overnight. This resting time allows the cheesecake to set perfectly and develop its rich flavor. Once chilled, you can top the cheesecake with fresh fruit, a berry sauce, or even a drizzle of chocolate to create a beautiful presentation. The result is a dessert that’s as pleasing to the eye as it is to the palate.
Nutritional Information
While Valentine’s Day Cheesecake is undoubtedly rich, it does offer a few nutritional benefits. A typical slice of cheesecake can contain approximately 350-400 calories, depending on the serving size and toppings. The majority of the calories come from the cream cheese, butter, and sugar, which contribute to the cheesecake’s rich and smooth texture.
The cream cheese provides some protein and calcium, while the eggs help add richness to the filling. The fresh berries or fruit topping offer a burst of vitamin C and antioxidants, balancing out the richness of the dessert. Though not low-calorie, this cheesecake can be enjoyed in moderation as part of a celebratory meal. If you’re looking to make it lighter, consider substituting lower-fat cream cheese or using a sugar alternative, although this may slightly alter the texture.
For those interested in customizing the recipe, feel free to swap out ingredients to suit dietary preferences. For instance, a gluten-free graham cracker crust can be used, or a dairy-free cream cheese can be substituted for a vegan option. However, these substitutions may affect the overall texture and flavor, so it’s best to test them in advance if you’re making adjustments.
Ingredients
For the Crust:
- 1 1/2 cups graham cracker crumbs
- 1/4 cup granulated sugar
- 1/2 cup unsalted butter, melted
Filling:
- 3 packages (8 oz each) cream cheese, softened
- 1 cup granulated sugar
- 1 teaspoon vanilla extract
- 1/2 cup sour cream
- 3 large eggs
Topping:
- Fresh berries (strawberries, raspberries, or blueberries)
- 1/4 cup raspberry sauce (optional)
- Chocolate shavings (optional)
This combination of ingredients results in a cheesecake that is rich and smooth with a buttery, slightly sweet graham cracker crust. The filling is perfectly creamy, and the topping can be customized to add freshness and visual appeal.
Equipment Needed
To make Valentine’s Day Cheesecake, you will need the following equipment:
- A 9-inch springform pan (for assembling the cheesecake)
- A mixing bowl (for preparing the crust and filling)
- A hand mixer or stand mixer (for mixing the filling)
- A spatula (for spreading the filling)
- A large roasting pan (for the water bath)
- A cooling rack (for cooling the cheesecake)
The springform pan is key to removing the cheesecake easily once it’s set. The hand mixer or stand mixer helps quickly blend the filling ingredients into a smooth mixture, while the spatula ensures the filling is spread evenly. The water bath helps prevent cracking during baking, which is essential for a smooth, creamy cheesecake.
Pro Tips For Success
- Use Room Temperature Ingredients: Ensure the cream cheese, eggs, and sour cream are at room temperature before mixing. This helps the ingredients combine smoothly and prevents lumps in the filling.
- Bake in a Water Bath: A water bath helps ensure the cheesecake bakes evenly and prevents cracks. To create a water bath, wrap the bottom of the springform pan in aluminum foil to prevent leaks, then place it in a larger roasting pan and add hot water halfway up the sides of the cheesecake pan.
- Don’t Overmix the Filling: Overmixing the filling can cause air bubbles, which may result in cracks as the cheesecake bakes. Mix until the ingredients are just combined.
- Allow Time to Cool: After baking, let the cheesecake cool completely at room temperature before refrigerating. This prevents the cheesecake from becoming too dense and ensures a smooth, creamy texture.
- Chill Before Serving: Allow the cheesecake to chill in the fridge for at least 4 hours, or preferably overnight, before serving. This helps the cheesecake set and enhances its flavor.
Instructions
- Preheat the Oven: Preheat the oven to 325°F (165°C). Grease the sides of a 9-inch springform pan and set it aside.
- Make the Crust: In a medium bowl, combine the graham cracker crumbs, sugar, and melted butter. Stir until the mixture is evenly combined. Press the mixture into the bottom of the prepared pan, creating an even layer. Bake for 8-10 minutes until golden brown. Remove from the oven and set aside to cool.
- Prepare the Filling: In a large bowl, beat the cream cheese until smooth using a hand mixer or stand mixer. Add the sugar and vanilla extract, and continue mixing until combined. Add the sour cream and mix until smooth. Add the eggs one at a time, mixing gently after each addition until fully combined.
- Bake the Cheesecake: Pour the cheesecake filling onto the cooled crust. Place the springform pan into a larger roasting pan and add hot water to the roasting pan, coming halfway up the sides of the springform pan (this is the water bath). Bake for 50-60 minutes, or until the edges are set and the center is slightly jiggly. Turn off the oven and allow the cheesecake to cool in the oven for 1 hour with the door ajar.
- Chill the Cheesecake: After the cheesecake has cooled, remove it from the water bath and refrigerate it for at least 4 hours, or preferably overnight, to fully set.
- Top and Serve: Before serving, top the cheesecake with fresh berries, raspberry sauce, and optional chocolate shavings. Slice and enjoy!
Recipe Variations
- Chocolate Raspberry Cheesecake: Add a chocolate ganache topping or swirl melted chocolate into the filling for a rich, decadent flavor that pairs perfectly with fresh raspberries.
- Caramel Pecan Cheesecake: Top with a drizzle of caramel sauce and chopped pecans for a sweet and nutty addition to the creamy cheesecake.
- Lemon Cheesecake: Add lemon zest to the filling for a citrusy twist, and top with lemon curd and fresh berries.
- Gluten-Free Cheesecake: Use gluten-free graham cracker crumbs to make the crust gluten-free, and ensure all other ingredients are gluten-free as well.
Storage Instructions
Valentine’s Day Cheesecake can be stored in the refrigerator for up to 5 days. Keep it covered with plastic wrap or foil to prevent it from absorbing odors. If you need to store it for a longer period, the cheesecake can be frozen for up to 2 months. To freeze, wrap the cheesecake tightly in plastic wrap and aluminum foil, then place it in a freezer-safe container. Thaw it in the fridge overnight before serving.
Serving Suggestions
Valentine’s Day Cheesecake is perfect on its own, but you can enhance it with a variety of toppings. Serve it with whipped cream, extra fresh fruit, or a drizzle of caramel sauce for an added indulgence. Pair it with a glass of sparkling wine or champagne for a festive touch. This cheesecake is sure to be the star of your Valentine’s Day celebration.
FAQs
- How do I prevent my cheesecake from cracking?
Baking the cheesecake in a water bath and not overmixing the filling will help prevent cracking. - Can I use a different topping?
Absolutely! You can top this cheesecake with any fruit, chocolate ganache, or caramel sauce to suit your preferences. - Can I make a mini cheesecake for two?
Yes, you can halve the recipe and bake it in smaller ramekins or a mini springform pan. - Can I use a pre-made crust?
Yes, you can use a store-bought graham cracker crust to save time, but the homemade crust adds a fresh flavor and texture.
Conclusion
Valentine’s Day Cheesecake is a luxurious dessert that combines rich, creamy filling with a crisp, buttery crust and fresh toppings. This easy-to-make cheesecake is perfect for celebrating love and indulgence, with a beautiful presentation that will impress your guests. Try it today, and enjoy a slice of this creamy, dreamy dessert with someone special!
Print
Valentine’s Day Cheesecake
Description
Delight your loved one with this decadent Valentine’s Day cheesecake, featuring a creamy filling and sweet, fresh berry topping.
Ingredients
For the Crust:
- 1 1/2 cups graham cracker crumbs
- 1/4 cup granulated sugar
- 1/2 cup unsalted butter, melted
For the Filling:
- 3 packages (8 oz each) cream cheese, softened
- 1 cup granulated sugar
- 1 teaspoon vanilla extract
- 1/2 cup sour cream
- 3 large eggs
For the Topping:
- Fresh berries (strawberries, raspberries, or blueberries)
- 1/4 cup raspberry sauce (optional)
- Chocolate shavings (optional)
Instructions
- Preheat the Oven: Preheat the oven to 325°F (165°C). Grease the sides of a 9-inch springform pan and set it aside.
- Make the Crust: In a medium bowl, combine the graham cracker crumbs, sugar, and melted butter. Stir until the mixture is evenly combined. Press the mixture into the bottom of the prepared pan, creating an even layer. Bake for 8-10 minutes until golden brown. Remove from the oven and set aside to cool.
- Prepare the Filling: In a large bowl, beat the cream cheese until smooth using a hand mixer or stand mixer. Add the sugar and vanilla extract, and continue mixing until combined. Add the sour cream and mix until smooth. Add the eggs one at a time, mixing gently after each addition until fully combined.
- Bake the Cheesecake: Pour the cheesecake filling onto the cooled crust. Place the springform pan into a larger roasting pan and add hot water to the roasting pan, coming halfway up the sides of the springform pan (this is the water bath). Bake for 50-60 minutes, or until the edges are set and the center is slightly jiggly. Turn off the oven and allow the cheesecake to cool in the oven for 1 hour with the door ajar.
- Chill the Cheesecake: After the cheesecake has cooled, remove it from the water bath and refrigerate it for at least 4 hours, or preferably overnight, to fully set.
- Top and Serve: Before serving, top the cheesecake with fresh berries, raspberry sauce, and optional chocolate shavings. Slice and enjoy!