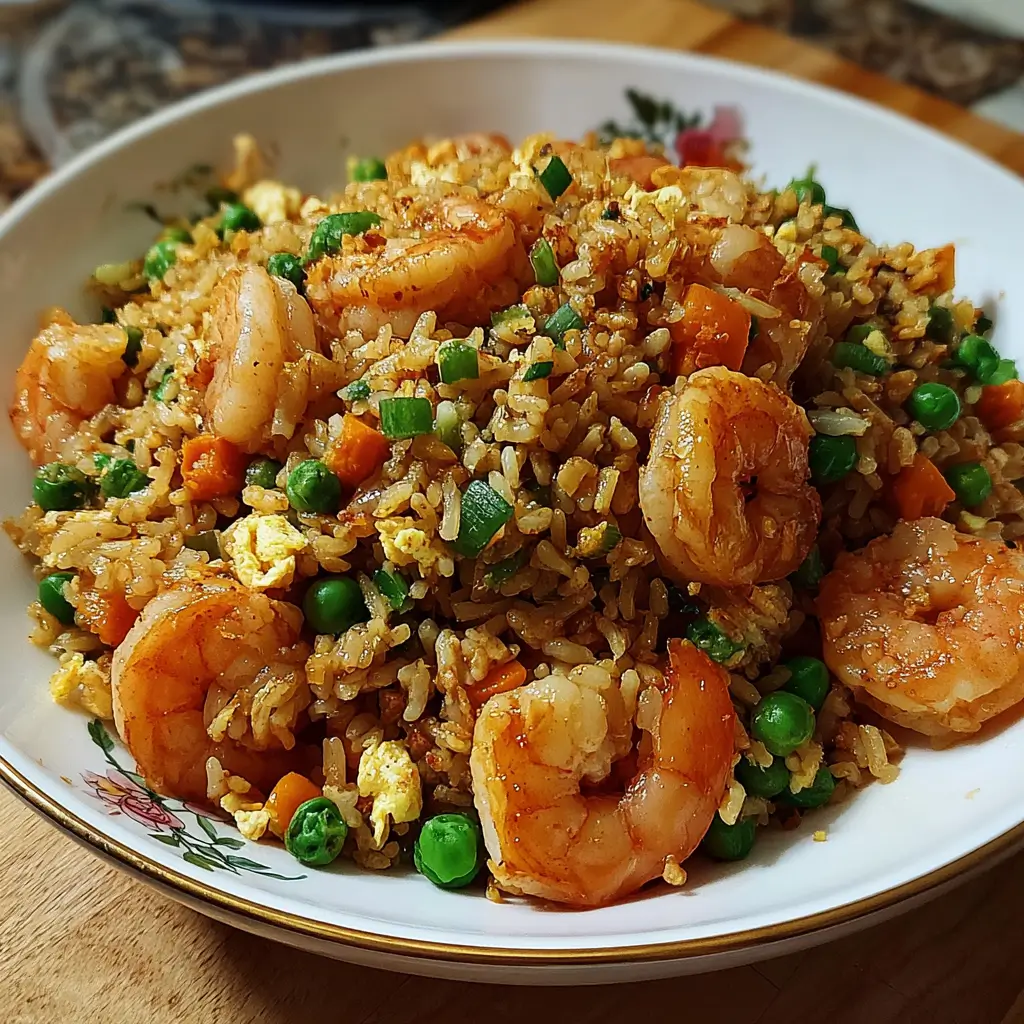
Imagine a bowl of fragrant, perfectly seasoned Shrimp Fried Rice with plump shrimp, fluffy rice, and colorful vegetables, all coming together in a harmonious blend of flavors and textures. This Chinese-inspired classic transforms simple ingredients into a satisfying meal that’s quicker than takeout and tastes even better. Whether you’re looking for a quick weeknight dinner or trying to repurpose leftover rice, this Shrimp Fried Rice Recipe will become your go-to solution. You’ll learn how to achieve restaurant-quality results with the perfect balance of seasonings and cooking techniques right in your own kitchen.
Why You’ll Love This Recipe
This Shrimp Fried Rice strikes the perfect balance between convenience and flavor, making it an instant favorite for busy home cooks. The contrast between the tender, succulent shrimp and the slightly crispy rice creates a textural masterpiece that’s incredibly satisfying. Each bite delivers a medley of flavors from the savory soy sauce, aromatic sesame oil, and fresh vegetables.
Unlike takeout versions that can be greasy or bland, this homemade recipe gives you complete control over the ingredients and flavors. The entire dish comes together in under 30 minutes, making it faster than delivery and much more economical. It’s also incredibly versatile—perfect for using up whatever vegetables you have in your refrigerator.
Best of all, this Shrimp Fried Rice Recipe yields generous portions that reheat beautifully, solving tomorrow’s lunch dilemma while you’re making tonight’s dinner. The combination of protein, vegetables, and carbohydrates makes it a complete meal in one bowl—no side dishes required.
Ingredients
For this perfect Shrimp Fried Rice, you’ll need:
- 1 pound (450g) medium shrimp, peeled and deveined
- 3 cups (600g) cooked and chilled long-grain rice (preferably day-old)
- 3 tablespoons vegetable oil, divided
- 2 large eggs, lightly beaten
- 1 medium onion, finely diced (about 1 cup)
- 2 cloves garlic, minced
- 1 cup (150g) frozen peas and carrots, thawed
- 3 green onions, thinly sliced
- 2-3 tablespoons soy sauce (adjust to taste)
- 1 tablespoon oyster sauce
- 1 teaspoon sesame oil
- ¼ teaspoon white pepper
- Salt to taste
The secret to authentic Chinese shrimp rice is using cold, leftover rice which prevents stickiness and promotes that coveted individual grain texture. High-quality soy sauce provides depth, while sesame oil adds that distinctive nutty aroma that elevates homemade fried rice to restaurant quality.
Pro Tips
Prepare Rice Ahead: For the best texture in your Shrimp Fried Rice, cook the rice a day in advance and refrigerate it overnight. This dries out the grains, preventing them from becoming mushy during stir-frying. If you’re in a hurry, spread freshly cooked rice on a baking sheet and place it in the refrigerator for 1-2 hours to cool and dry out.
Use High Heat: The secret to restaurant-style seafood fried rice is cooking over high heat in a wok or large skillet. This creates the characteristic “wok hei” or breath of the wok—that slightly smoky, charred flavor that’s impossible to achieve over low heat. Make sure your pan is very hot before adding ingredients, and keep everything moving constantly to prevent burning.
Cook Ingredients Separately: For perfect shrimp rice, avoid overcrowding your pan. Cook the shrimp first until just pink, then remove them before cooking other ingredients. Similarly, scramble the eggs separately before incorporating them back into the dish. This ensures each component maintains its distinct texture and prevents the shrimp from becoming rubbery or overcooked in your Shrimp Fried Rice Recipe.
Instructions
Step 1: Prepare the Shrimp and Rice
Begin by ensuring your shrimp are completely thawed, peeled, deveined, and patted dry with paper towels. Season them lightly with salt and pepper. Next, break up any clumps in your cold rice using your fingers, making sure the grains are separated. Having these components ready before heating your wok will ensure your Shrimp Fried Rice comes together smoothly and quickly.
Step 2: Cook the Shrimp
Heat 1 tablespoon of vegetable oil in a large wok or skillet over high heat until it’s almost smoking. Add the shrimp in a single layer and cook for about 1-2 minutes per side until they turn pink and slightly caramelized at the edges. Be careful not to overcook them—they should be just done. Remove the shrimp to a plate and set aside.
Step 3: Scramble the Eggs
In the same wok, add another tablespoon of oil if needed. Pour in the beaten eggs and let them set for a few seconds before gently scrambling them. Cook until they’re just set but still slightly moist, about 30 seconds. Remove the eggs and set them aside with the shrimp.
Step 4: Stir-Fry the Aromatics and Vegetables
Add the remaining tablespoon of oil to the wok. Toss in the diced onions and stir-fry for about 1 minute until they begin to soften. Add the minced garlic and stir for 30 seconds until fragrant. Now add the peas and carrots, stir-frying for another minute until heated through.
Step 5: Add Rice and Seasonings
Add the cold rice to the wok, breaking up any remaining clumps with your spatula. Stir-fry for 2-3 minutes, using a scooping and tossing motion to ensure all the rice grains are separated and coated with oil. Drizzle the soy sauce and oyster sauce around the perimeter of the wok (this allows the sauce to caramelize slightly before hitting the rice) and toss everything together until the rice is evenly coated and lightly browned.
Step 6: Combine All Ingredients
Return the cooked shrimp and scrambled eggs to the wok. Add most of the green onions (save some for garnish), the sesame oil, and white pepper. Gently toss everything together for about 1-2 minutes until well combined and heated through. Taste and adjust seasoning with additional soy sauce or salt if needed.
Step 7: Serve
Transfer your delicious Shrimp Fried Rice to a serving dish or individual bowls. Garnish with the remaining green onions for a fresh finish and pop of color. Serve immediately while hot for the best flavor and texture experience.
Variations
Pineapple Shrimp Fried Rice: For a sweet-savory twist on traditional Shrimp Fried Rice, add 1 cup of diced fresh pineapple during the final minute of cooking. The tropical sweetness pairs beautifully with the savory shrimp and adds a refreshing juiciness to each bite. This Hawaiian-inspired variation is particularly delightful during summer months.
Spicy Sriracha Shrimp Fried Rice: Heat-lovers can transform this classic into a fiery delight by adding 1-2 tablespoons of sriracha sauce along with the soy sauce. For extra dimension, include 1 teaspoon of chili oil and a handful of thinly sliced Thai chilies. The spicy kick contrasts wonderfully with the sweet shrimp in this Shrimp Fried Rice Recipe.
Keto-Friendly Cauliflower Shrimp “Fried Rice”: Replace the rice with 4 cups of cauliflower rice (pulsed in a food processor until rice-sized) for a low-carb version that’s just as satisfying. The cooking process remains the same, though the cauliflower needs less time to cook through—about 3-4 minutes total. This variation creates a lighter dish with all the flavor of traditional seafood fried rice.
Storage and Serving
Store leftover Shrimp Fried Rice in an airtight container in the refrigerator for up to 2 days. When reheating, sprinkle a few drops of water over the rice before microwaving to help restore moisture, or better yet, quickly reheat in a hot skillet with a touch of oil to maintain the coveted texture. For food safety, ensure the shrimp rice reaches an internal temperature of 165°F (74°C) when reheating.
For serving, present your Shrimp Fried Rice as a complete meal in a large bowl with chopsticks for an authentic experience. Alternatively, serve it alongside spring rolls, soup dumplings, or a simple cucumber salad for a more elaborate Chinese-inspired feast. For an eye-catching presentation, pack the rice into a small bowl and invert it onto the plate for a perfect dome shape, then garnish with additional green onions and a sprinkle of sesame seeds.
For an extra touch of restaurant authenticity, serve with small dishes of additional soy sauce, chili oil, and Chinese black vinegar on the side, allowing everyone to adjust the flavors to their preference.
FAQs
Can I use fresh rice instead of day-old rice for Shrimp Fried Rice?
While day-old rice produces the best texture for Shrimp Fried Rice, you can use fresh rice in a pinch. After cooking, spread it on a baking sheet and place it in the refrigerator uncovered for 30-60 minutes to dry out before using it in the recipe.
How do I prevent my shrimp from becoming rubbery in fried rice?
The key is to cook the shrimp separately and briefly—just until they turn pink and opaque (about 1-2 minutes per side). Remove them from the pan while cooking the other ingredients, then add them back at the end just to warm through.
What’s the best substitute for oyster sauce in this recipe?
If you don’t have oyster sauce, combine an extra tablespoon of soy sauce with a teaspoon of brown sugar and a drop of Worcestershire sauce to approximate the sweet-savory flavor profile.
Can I make Shrimp Fried Rice ahead of time for a party?
Yes, you can prepare it up to a day ahead and reheat it in a hot wok or skillet just before serving. Add a splash of water and a drizzle of fresh sesame oil when reheating to revive the flavors and moisture.
How can I make this recipe gluten-free?
Simply substitute regular soy sauce with tamari or coconut aminos, and ensure your oyster sauce is labeled gluten-free (or use the gluten-free substitution mentioned above).
Conclusion
This Shrimp Fried Rice is comfort food at its finest — quick enough for weeknights yet impressive enough for guests, with the perfect balance of savory flavors and satisfying textures in every forkful. It’s the kind of dish that transforms simple ingredients into something truly special, proving that homemade can surpass takeout every time. Whether you’re repurposing leftover rice or creating a quick meal from scratch, this versatile recipe delivers restaurant-quality results with minimal effort. Give it a try tonight, and watch it become a regular request in your household.
Print
Shrimp Fried Rice Recipe
Description
The secret to better-than-takeout shrimp fried rice is in your kitchen! This 30-minute wonder uses cold rice for that perfect texture and juicy shrimp for protein-packed flavor in every bite.
Ingredients
- 1 pound (450g) medium shrimp, peeled and deveined
- 3 cups (600g) cooked and chilled long-grain rice (preferably day-old)
- 3 tablespoons vegetable oil, divided
- 2 large eggs, lightly beaten
- 1 medium onion, finely diced (about 1 cup)
- 2 cloves garlic, minced
- 1 cup (150g) frozen peas and carrots, thawed
- 3 green onions, thinly sliced
- 2–3 tablespoons soy sauce (adjust to taste)
- 1 tablespoon oyster sauce
- 1 teaspoon sesame oil
- ¼ teaspoon white pepper
- Salt to taste
Instructions
- Pat shrimp dry and season lightly with salt and pepper. Break up any clumps in cold rice with your fingers.
- Heat 1 tablespoon oil in a wok over high heat. Cook shrimp 1-2 minutes per side until pink. Remove to a plate.
- Add another tablespoon of oil if needed. Pour in beaten eggs and scramble until just set, about 30 seconds. Remove and set aside.
- Add remaining oil. Stir-fry diced onions for 1 minute, then add garlic for 30 seconds until fragrant. Add peas and carrots, stir-frying for another minute.
- Add cold rice to the wok, breaking up any remaining clumps. Stir-fry for 2-3 minutes until grains are separated and coated with oil.
- Drizzle soy sauce and oyster sauce around the wok and toss until rice is evenly coated and lightly browned.
- Return shrimp and eggs to the wok. Add most of the green onions, sesame oil, and white pepper. Toss for 1-2 minutes until well combined and heated through.
- Transfer to serving dish, garnish with remaining green onions, and serve immediately.


