
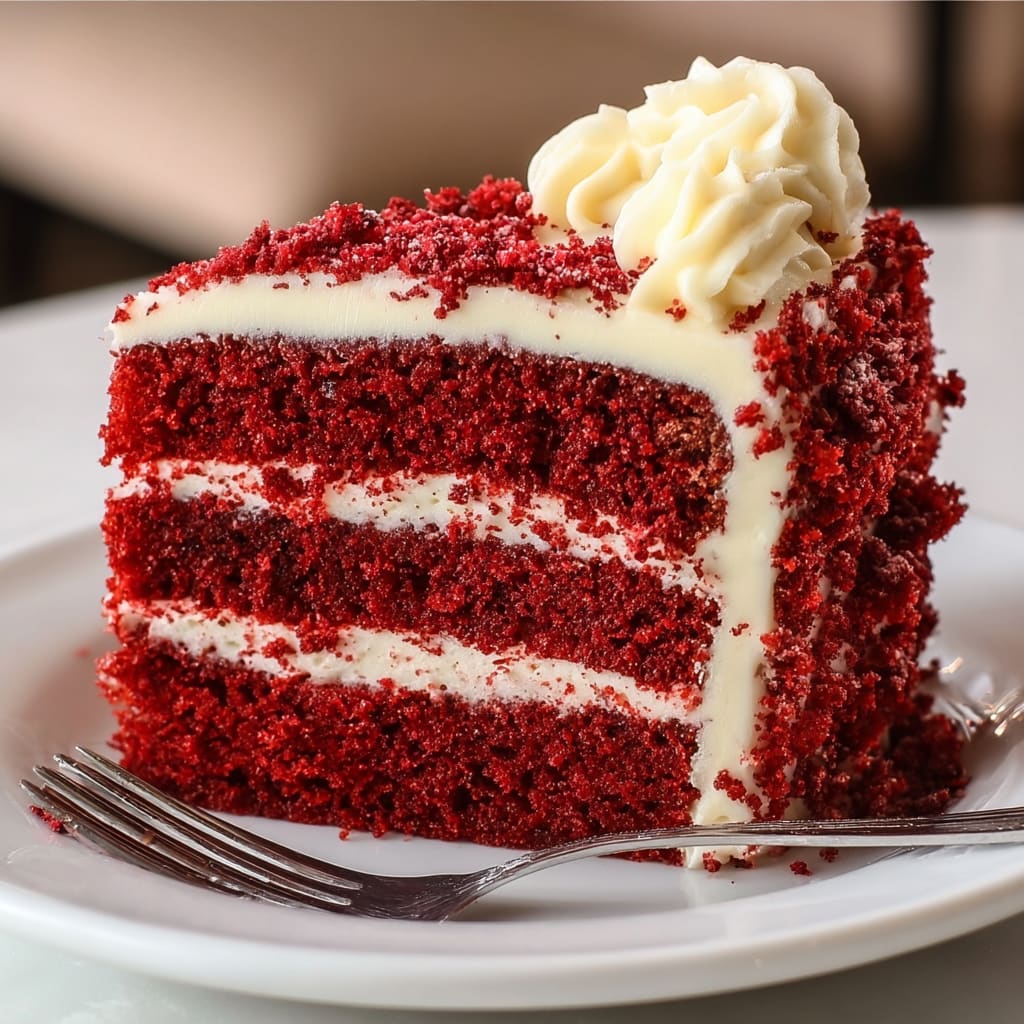
Sink your teeth into the velvety, moist layers of a classic Red Velvet Cake with its distinctive crimson hue and subtle cocoa notes. This iconic dessert strikes the perfect balance between light chocolate flavor and tangy cream cheese frosting, creating a sensory experience that’s both nostalgic and luxurious. The Red Velvet Cake has graced celebration tables for generations, earning its reputation as the perfect showstopper for any special occasion. You’ll learn how to create bakery-quality layers with that perfect crumb texture, achieve that signature red color naturally, and master the silky cream cheese frosting that makes this dessert truly unforgettable.
Why You’ll Love This Recipe
This Red Velvet Cake recipe delivers consistently spectacular results that will impress even the most discerning dessert lovers. The texture is what sets a truly excellent Red Velvet Cake apart – tender and moist with a fine crumb that melts in your mouth, yet sturdy enough to support those glorious layers of frosting. The contrast between the subtle cocoa-infused cake layers and the tangy, creamy frosting creates a perfect harmony of flavors.
What makes this recipe particularly special is its versatility for any occasion – elegant enough for weddings but approachable enough for family gatherings. The vibrant red color makes for a dramatic presentation when sliced, revealing those perfect layers that will earn you serious baking credibility. Despite its impressive appearance, the techniques are straightforward, with clear instructions that even novice bakers can follow confidently.
The buttermilk in this recipe ensures exceptional moisture while the vinegar reacts with the baking soda to create an extra tender crumb. The result is a Red Velvet Cake that maintains its moisture for days (though it rarely lasts that long!), making it perfect for make-ahead occasions.
Ingredients
For the Red Velvet Cake layers:
- 2½ cups (310g) all-purpose flour
- 2 tablespoons (15g) unsweetened cocoa powder
- 1 teaspoon baking soda
- 1 teaspoon salt
- ½ cup (113g) unsalted butter, softened
- 1½ cups (300g) granulated sugar
- 2 large eggs, room temperature
- 1 cup (240ml) buttermilk, room temperature
- 2 tablespoons (30ml) red food coloring (or 1 tablespoon gel coloring)
- 1 teaspoon white vinegar
- 1 teaspoon vanilla extract
For the cream cheese frosting:
- 16 ounces (450g) cream cheese, softened
- ½ cup (113g) unsalted butter, softened
- 4 cups (480g) powdered sugar, sifted
- 1 teaspoon vanilla extract
- Pinch of salt
The buttermilk is crucial as it reacts with the cocoa powder to enhance the cake’s red color while providing tenderness. Traditional Red Velvet Cake recipes use red food coloring, though natural alternatives like beet powder can be substituted. High-quality vanilla extract brings depth to both the cake and frosting, while the combination of cocoa powder and vinegar creates that signature Red Velvet flavor profile.
Pro Tips
Perfect Color Development
For the signature crimson color of authentic Red Velvet Cake, use a high-quality cocoa powder that hasn’t been Dutch-processed. Natural cocoa powder is more acidic and reacts with the buttermilk and vinegar to enhance the red color. When adding food coloring, mix it thoroughly with the wet ingredients before combining with dry ingredients to ensure even distribution and prevent streaking in your finished cake. For a more natural approach, substitute 3 tablespoons of beet powder mixed with 1 tablespoon of water for the food coloring.
Achieving the Perfect Texture
The hallmark of a superb Red Velvet Cake is its fine, tender crumb. To achieve this, always bring refrigerated ingredients to room temperature before beginning. This allows for proper emulsification and prevents a dense, heavy cake. Additionally, measure your flour correctly by spooning it into measuring cups and leveling off with a knife rather than scooping directly from the container. Overmixing the batter after adding flour develops gluten and results in a tough cake, so gently fold the dry ingredients until just combined.
Foolproof Cream Cheese Frosting
For silky-smooth cream cheese frosting that holds its shape, start with cream cheese and butter that are softened but still cool to the touch. Whip them together until completely smooth before gradually adding sifted powdered sugar. If your frosting becomes too soft for piping or spreading, refrigerate it for 15-20 minutes, then briefly rewhip. For a stable frosting in warm conditions, add 1-2 tablespoons of cornstarch to the powdered sugar before incorporating it into the mixture.
Instructions
Step 1: Prepare Your Workspace and Ingredients
Preheat your oven to 350°F (175°C) and position the rack in the center. Grease and line two 9-inch round cake pans with parchment paper. For the best Red Velvet Cake results, measure all ingredients before starting and allow refrigerated items to come to room temperature. Sift together the flour, cocoa powder, baking soda, and salt in a medium bowl, then set aside.
Step 2: Create the Cake Batter Base
In a large mixing bowl, cream the softened butter and sugar together using an electric mixer on medium-high speed until pale and fluffy, about 3-4 minutes. Don’t rush this step – proper creaming incorporates air into the batter, creating that tender Red Velvet Cake texture we’re aiming for. Add eggs one at a time, mixing well after each addition and scraping down the sides of the bowl.
Step 3: Develop the Signature Red Velvet Color
In a separate small bowl, whisk together the buttermilk, red food coloring, vinegar, and vanilla extract until completely combined. With the mixer on low, add the dry ingredients to the butter mixture in three parts, alternating with the buttermilk mixture, beginning and ending with the flour mixture. Mix just until combined after each addition – the batter should be smooth but not overmixed.
Step 4: Bake to Perfection
Divide the batter evenly between the prepared pans, smoothing the tops with an offset spatula. Tap the pans gently on the counter to release any air bubbles. Bake for 25-30 minutes, or until a toothpick inserted in the center comes out clean or with a few moist crumbs. The cake will begin to pull away from the sides of the pan when ready. Allow the cakes to cool in the pans for 10 minutes before inverting onto cooling racks to cool completely.
Step 5: Prepare the Cream Cheese Frosting
While the cakes cool, beat the cream cheese and butter together in a large bowl until smooth and creamy, about 2 minutes. Gradually add the sifted powdered sugar, vanilla extract, and salt, beating on low until incorporated, then on medium-high until light and fluffy. If the frosting seems too soft, refrigerate it for 15-20 minutes before assembling your Red Velvet Cake.
Step 6: Assemble and Decorate
Once the cakes are completely cool, level the tops if needed using a serrated knife. Place one layer on your serving plate and spread about 1 cup of frosting evenly over the top. Place the second layer on top and cover the entire cake with the remaining frosting. For a classic finish, use an offset spatula to create swirls on the top and sides, or pipe decorative borders as desired. For the traditional Red Velvet Cake look, consider garnishing with cake crumbs pressed gently onto the sides.
Variations
Southern-Style Red Velvet
For an even more authentic southern Red Velvet Cake experience, replace the cream cheese frosting with traditional ermine frosting (also called boiled milk frosting). This old-fashioned frosting was the original pairing for red velvet before cream cheese frosting became popular. It’s silky-smooth, less sweet, and complements the subtle cocoa flavor perfectly. To make it, cook a mixture of milk and flour until thick, then beat it into creamed butter and sugar until light and fluffy.
Chocolate Red Velvet
For chocolate lovers, transform your Red Velvet Cake into a more decadent dessert by increasing the cocoa powder to 1/4 cup and adding 4 ounces of melted and cooled semi-sweet chocolate to the batter. The increased chocolate presence still allows the distinctive red velvet flavor to shine through while satisfying intense chocolate cravings. Pair with chocolate cream cheese frosting by adding 1/4 cup cocoa powder to the standard frosting recipe.
Gluten-Free Red Velvet
Create a gluten-free version of this beloved dessert by substituting the all-purpose flour with a high-quality gluten-free 1:1 baking flour blend. Add 1/4 teaspoon xanthan gum if your blend doesn’t already include it to ensure the proper structure for your Red Velvet Cake. The cake may be slightly denser than the traditional version but will maintain its moist, tender quality and distinctive flavor profile.
Storage and Serving
Your finished Red Velvet Cake will stay fresh at room temperature for up to 2 days when stored in an airtight cake container. For longer storage, refrigerate for up to 5 days, but always bring slices to room temperature before serving to experience the full flavor and texture. The cake also freezes beautifully – either whole or in slices – for up to 2 months when wrapped tightly in plastic wrap and aluminum foil. Thaw overnight in the refrigerator before serving.
For an elegant presentation, serve Red Velvet Cake slices on chilled dessert plates with a light dusting of cocoa powder and fresh berries on the side. The vibrant red against white frosting makes a dramatic impact, particularly for Valentine’s Day, Christmas, or other special occasions. For a deluxe dessert experience, pair with a scoop of vanilla bean ice cream or a dollop of lightly sweetened whipped cream.
Transform your Red Velvet Cake into cake pops or truffles by crumbling leftover cake, mixing with a small amount of frosting, rolling into balls, and dipping in white chocolate. These make excellent gifts or party favors that showcase the distinctive red interior against the white coating.
FAQs
Why did my Red Velvet Cake turn out brown instead of red?
This typically happens when using Dutch-processed cocoa, which neutralizes the acidic reaction needed for the red color. Always use natural cocoa powder and ensure your red food coloring is fresh and high-quality. The acid from buttermilk and vinegar helps enhance the red color of your Red Velvet Cake.
Can I make Red Velvet Cake without food coloring?
Yes! For a natural Red Velvet Cake, substitute 3 tablespoons of beet powder mixed with 1 tablespoon water, or 1/2 cup of beet puree (reducing buttermilk by 1/4 cup to compensate). The color won’t be as vibrant but will have a natural reddish hue and additional nutrients.
Why is my cream cheese frosting runny?
Runny frosting usually results from cream cheese or butter that’s too warm. Make sure they’re softened but still cool to the touch. If your frosting becomes too soft, refrigerate it for 15-20 minutes before continuing to beat. Using full-fat cream cheese also provides better structure for your Red Velvet Cake frosting.
Can I make this Red Velvet Cake in advance?
Absolutely! The layers can be baked up to 2 days ahead and wrapped well in plastic wrap, or frozen for up to 1 month. The frosting can be made 1-2 days ahead and refrigerated. Assemble your Red Velvet Cake the day before your event for best results, allowing flavors to meld.
What makes Red Velvet Cake different from chocolate cake?
Red Velvet Cake has a much lower cocoa content than chocolate cake, giving it a subtle chocolate flavor. The addition of buttermilk and vinegar creates a tender, velvety texture and tangy flavor that’s distinctive. Of course, the traditional red color and cream cheese frosting are defining characteristics that separate it from standard chocolate cake.
Red Velvet Cake
- Prep Time: 20 minutes
- Cook Time: 30 minutes
- Total Time: 50 minutes
- Yield: 12 servings 1x
- Category: Dessert
- Method: Baking
- Cuisine: Americaine
Description
Indulge in a luscious Red Velvet Cake with rich cocoa, creamy buttermilk, and a velvety cream cheese frosting. Irresistibly decadent and crowd-pleasing!
Ingredients
- 2½ cups all-purpose flour
- 2 tablespoons unsweetened cocoa powder
- 1 teaspoon baking soda
- 1 teaspoon salt
- ½ cup unsalted butter, softened
- 1½ cups granulated sugar
- 2 large eggs, room temperature
- 1 cup buttermilk, room temperature
- 2 tablespoons red food coloring (or 1 tablespoon gel coloring)
- 1 teaspoon white vinegar
- 1 teaspoon vanilla extract
Instructions
- Step 1: Prepare Your Workspace and Ingredients Preheat your oven to 350°F (175°C) and position the rack in the center. Grease and line two 9-inch round cake pans with parchment paper. For the best Red Velvet Cake results, measure all ingredients before starting and allow refrigerated items to come to room temperature. Sift together the flour, cocoa powder, baking soda, and salt in a medium bowl, then set aside.
- Step 2: Create the Cake Batter Base In a large mixing bowl, cream the softened butter and sugar together using an electric mixer on medium-high speed until pale and fluffy, about 3-4 minutes. Don’t rush this step – proper creaming incorporates air into the batter, creating that tender Red Velvet Cake texture we’re aiming for. Add eggs one at a time, mixing well after each addition and scraping down the sides of the bowl.
- Step 3: Develop the Signature Red Velvet Color In a separate small bowl, whisk together the buttermilk, red food coloring, vinegar, and vanilla extract until completely combined. With the mixer on low, add the dry ingredients to the butter mixture in three parts, alternating with the buttermilk mixture, beginning and ending with the flour mixture. Mix just until combined after each addition – the batter should be smooth but not overmixed.
- Step 4: Bake to Perfection Divide the batter evenly between the prepared pans, smoothing the tops with an offset spatula. Tap the pans gently on the counter to release any air bubbles. Bake for 25-30 minutes, or until a toothpick inserted in the center comes out clean or with a few moist crumbs. The cake will begin to pull away from the sides of the pan when ready. Allow the cakes to cool in the pans for 10 minutes before inverting onto cooling racks to cool completely.
- Step 5: Prepare the Cream Cheese Frosting While the cakes cool, beat the cream cheese and butter together in a large bowl until smooth and creamy, about 2 minutes. Gradually add the sifted powdered sugar, vanilla extract, and salt, beating on low until incorporated, then on medium-high until light and fluffy. If the frosting seems too soft, refrigerate it for 15-20 minutes before assembling your Red Velvet Cake.
- Step 6: Assemble and Decorate Once the cakes are completely cool, level the tops if needed using a serrated knife. Place one layer on your serving plate and spread about 1 cup of frosting evenly over the top. Place the second layer on top and cover the entire cake with the remaining frosting. For a classic finish, use an offset spatula to create swirls on the top and sides, or pipe decorative borders as desired. For the traditional Red Velvet Cake look, consider garnishing with cake crumbs pressed gently onto the sides.
- Variations Southern-Style Red Velvet For an even more authentic southern Red Velvet Cake experience, replace the cream cheese frosting with traditional ermine frosting (also called boiled milk frosting). This old-fashioned frosting was the original pairing for red velvet before cream cheese frosting became popular. It’s silky-smooth, less sweet, and complements the subtle cocoa flavor perfectly. To make it, cook a mixture of milk and flour until thick, then beat it into creamed butter and sugar until light and fluffy. Chocolate Red Velvet For chocolate lovers, transform your Red Velvet Cake into a more decadent dessert by increasing the cocoa powder to 1/4 cup and adding 4 ounces of melted and cooled semi-sweet chocolate to the batter. The increased chocolate presence still allows the distinctive red velvet flavor to shine through while satisfying intense chocolate cravings. Pair with chocolate cream cheese frosting by adding 1/4 cup cocoa powder to the standard frosting recipe. Gluten-Free Red Velvet Create a gluten-free version of this beloved dessert by substituting the all-purpose flour with a high-quality gluten-free 1:1 baking flour blend. Add 1/4 teaspoon xanthan gum if your blend doesn’t already include it to ensure the proper structure for your Red Velvet Cake. The cake may be slightly denser than the traditional version but will maintain its moist, tender quality and distinctive flavor profile.
- Storage and Serving Your finished Red Velvet Cake will stay fresh at room temperature for up to 2 days when stored in an airtight cake container. For longer storage, refrigerate for up to 5 days, but always bring slices to room temperature before serving to experience the full flavor and texture. The cake also freezes beautifully – either whole or in slices – for up to 2 months when wrapped tightly in plastic wrap and aluminum foil. Thaw overnight in the refrigerator before serving. For an elegant presentation, serve Red Velvet Cake slices on chilled dessert plates with a light dusting of cocoa powder and fresh berries on the side. The vibrant red against white frosting makes a dramatic impact, particularly for Valentine’s Day, Christmas, or other special occasions. For a deluxe dessert experience, pair with a scoop of vanilla bean ice cream or a dollop of lightly sweetened whipped cream. Transform your Red Velvet Cake into cake pops or truffles by crumbling leftover cake, mixing with a small amount of frosting, rolling into balls, and dipping in white chocolate. These make excellent gifts or party favors that showcase the distinctive red interior against the white coating.
- FAQs Why did my Red Velvet Cake turn out brown instead of red? This typically happens when using Dutch-processed cocoa, which neutralizes the acidic reaction needed for the red color. Always use natural cocoa powder and ensure your red food coloring is fresh and high-quality. The acid from buttermilk and vinegar helps enhance the red color of your Red Velvet Cake. Can I make Red Velvet Cake without food coloring? Yes! For a natural Red Velvet Cake, substitute 3 tablespoons of beet powder mixed with 1 tablespoon water, or 1/2 cup of beet puree (reducing buttermilk by 1/4 cup to compensate). The color won’t be as vibrant but will have a natural reddish hue and additional nutrients. Why is my cream cheese frosting runny? Runny frosting usually results from cream cheese or butter that’s too warm. Make sure they’re softened but still cool to the touch. If your frosting becomes too soft, refrigerate it for 15-20 minutes before continuing to beat. Using full-fat cream cheese also provides better structure for your Red Velvet Cake frosting. Can I make this Red Velvet Cake in advance? Absolutely! The layers can be baked up to 2 days ahead and wrapped well in plastic wrap, or frozen for up to 1 month. The frosting can be made 1-2 days ahead and refrigerated. Assemble your Red Velvet Cake the day before your event for best results, allowing flavors to meld. What makes Red Velvet Cake different from chocolate cake? Red Velvet Cake has a much lower cocoa content than chocolate cake, giving it a subtle chocolate flavor. The addition of buttermilk and vinegar creates a tender, velvety texture and tangy flavor that’s distinctive. Of course, the traditional red color and cream cheese frosting are defining characteristics that separate it from standard chocolate cake.
Notes
Fresh ingredients will always yield the best flavor results.
Nutrition
- Serving Size: 1 slice
- Calories: 450
- Sugar: 40g
- Sodium: 350mg
- Fat: 20g
- Saturated Fat: 12g
- Unsaturated Fat: 6g
- Trans Fat: 0g
- Carbohydrates: 60g
- Fiber: 1g
- Protein: 5g
- Cholesterol: 85mg


