
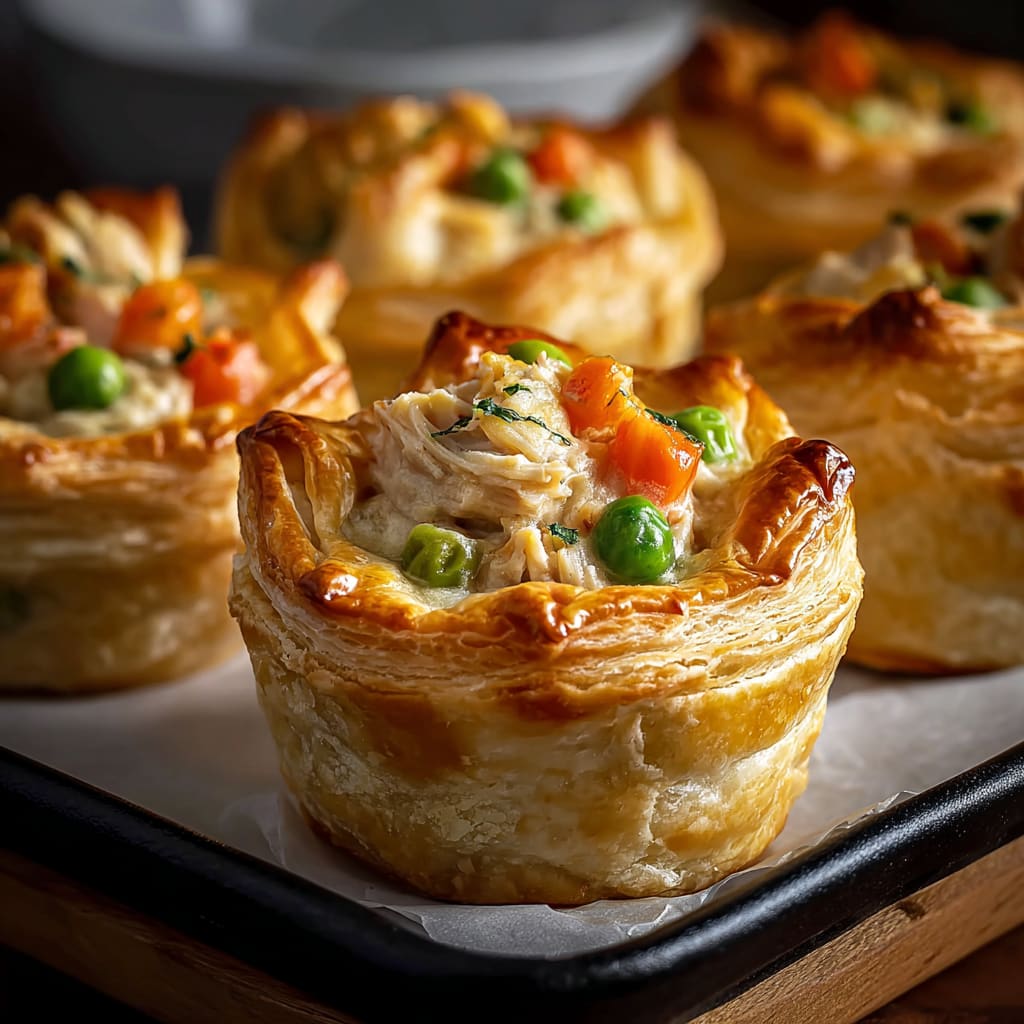
Imagine biting into a golden, flaky crust that gives way to a steaming, creamy filling packed with tender chunks of chicken and colorful vegetables. These mini chicken pot pies are the ultimate comfort food transformed into perfect individual portions. The aroma of herbs and buttery pastry will fill your kitchen, making these savory treats irresistible to everyone at your table. Whether you’re serving a family dinner or looking for impressive party appetizers, these mini chicken pot pies deliver maximum flavor in a charming, portable package. You’ll learn how to create these delightful handheld comfort classics with minimal effort and maximum impact—no fancy equipment required.
Why You’ll Love This Recipe
These mini chicken pot pies are about to become your new favorite go-to dish for countless reasons. First, they offer all the comforting goodness of traditional chicken pot pie but in adorable, portion-controlled servings that eliminate messy serving and make storage a breeze. The contrast between the crispy, buttery exterior and the luscious, velvety filling creates a textural symphony that’s simply irresistible.
Time-strapped home cooks will appreciate that these individual chicken pot pies can be prepared ahead and frozen, making weeknight dinners a snap. The versatility of these little wonders means they work equally well as a satisfying main course paired with a simple salad or as sophisticated finger food for gatherings.
Kids and adults alike fall in love with the fun-sized format, and the homemade filling allows you to control exactly what goes into your meal—no mysterious ingredients or preservatives like you’d find in store-bought alternatives. The perfect balance of protein, vegetables, and comforting carbs makes these personal pot pies a complete meal in one delicious package.
Ingredients
For the filling:
• 2 tablespoons olive oil
• 1 pound (450g) boneless, skinless chicken breasts, diced into ½-inch cubes
• 1 medium onion (about 1 cup), finely diced
• 2 medium carrots (about ¾ cup), diced
• 2 celery stalks (about ½ cup), diced
• 2 cloves garlic, minced
• ¼ cup (30g) all-purpose flour
• 2 cups (480ml) chicken broth, low sodium
• ½ cup (120ml) heavy cream
• 1 cup (130g) frozen peas
• 1 tablespoon fresh thyme leaves (or 1 teaspoon dried)
• 1 teaspoon fresh rosemary, chopped (or ¼ teaspoon dried)
• ½ teaspoon salt
• ¼ teaspoon black pepper
For the crust:
• 2 packages (14.1 oz each) refrigerated pie crusts (4 crusts total)
• 1 large egg, beaten with 1 tablespoon water (for egg wash)
Special equipment:
• 12-cup muffin tin
• 4-inch round cookie cutter or drinking glass
Pro Tips
Creating perfect mini chicken pot pies comes down to mastering a few crucial techniques. First, don’t rush the filling—take your time to develop flavor by allowing the vegetables to soften properly and letting the flour cook with them for a minute before adding liquid. This prevents that raw flour taste that can ruin your pot pies. The fond (those browned bits on the bottom of your pan) contains concentrated flavor, so be sure to scrape it up when you add your broth.
For the flakiest crust, keep everything cold. If your pie dough becomes too warm while you’re working with it, pop it back in the refrigerator for 10-15 minutes. When pressing the dough into your muffin cups, avoid stretching it—instead, gently ease it in to prevent shrinkage during baking. Leave a slight overhang to create that beautiful rustic edge.
Finally, master the venting technique. Proper steam vents in your top crust aren’t just decorative—they’re functional. Without them, steam gets trapped inside and can make your bottom crust soggy. Cut at least two small slits in each top crust, and for the crispiest results, place your muffin tin on a preheated baking sheet to help conduct heat to the bottom of your mini chicken pot pies.
Instructions
Step 1: Prepare Your Workspace
Preheat your oven to 375°F (190°C). Allow your refrigerated pie crusts to come to room temperature for about 15 minutes—just enough to make them pliable but not warm. Meanwhile, prepare your muffin tin with a light coating of cooking spray to ensure easy removal of your mini chicken pot pies after baking.
Step 2: Cook the Chicken and Vegetables
Heat olive oil in a large skillet over medium heat. Add your diced chicken and cook until no longer pink, about 5-6 minutes. Transfer the chicken to a plate and in the same pan, add your onion, carrots, and celery. Cook until the vegetables begin to soften, about 4-5 minutes, stirring occasionally. Add the garlic and cook until fragrant, about 30 seconds—you’ll know it’s ready when the aroma fills your kitchen.
Step 3: Create Your Filling
Sprinkle the flour over your vegetables and stir continuously for 1-2 minutes until no dry flour remains. This creates the base for your creamy sauce. Gradually pour in the chicken broth while stirring constantly to prevent lumps from forming. Bring the mixture to a gentle simmer and cook for 3-4 minutes until it begins to thicken. Stir in the heavy cream, then return the chicken to the pan.
Step 4: Finish the Filling
Add the frozen peas (no need to thaw them first!), thyme, rosemary, salt, and pepper to your filling mixture. Simmer for another 2-3 minutes until everything is well combined and the sauce has thickened to a rich, creamy consistency that coats the back of a spoon. Remove from heat and let cool slightly while you prepare your crusts.
Step 5: Prepare the Crusts
Unroll your pie crusts on a lightly floured surface. Using your cookie cutter or drinking glass, cut out 12 circles about 4 inches in diameter for the bottom crusts. For the top crusts, cut 12 slightly smaller circles (about 3 inches). Press the larger circles gently into the muffin cups, letting the dough come up the sides with a small overhang.
Step 6: Assemble Your Pot Pies
Fill each crust-lined muffin cup with about 3-4 tablespoons of your chicken filling, being careful not to overfill. Place the smaller dough circles on top of each pie and gently press the edges together to seal. Use a fork to crimp the edges for a decorative touch. Cut two small slits in the top of each pie to allow steam to escape during baking.
Step 7: Bake to Golden Perfection
Brush the tops of your mini chicken pot pies with egg wash to achieve that irresistible golden-brown shine. Bake in your preheated oven for 25-30 minutes until the crusts are beautifully golden and the filling is bubbling through the vents. Allow to cool in the tin for 5 minutes before carefully removing to serve.
Variations
Turkey Pot Pies: Perfect for post-holiday meals, simply substitute leftover turkey for the chicken in these individual pot pies. The slightly gamier flavor of turkey pairs wonderfully with the addition of a tablespoon of cranberry sauce stirred into the filling for a subtle sweet-tart note that elevates the entire dish.
Vegetarian Mini Pot Pies: Create a hearty meat-free version by replacing the chicken with a mix of mushrooms (cremini or portobello work beautifully) and adding a cup of diced potato for substance. Use vegetable broth instead of chicken broth, and enhance the umami flavor with a teaspoon of soy sauce or a tablespoon of nutritional yeast stirred into the filling.
Dairy-Free Option: For those avoiding dairy, substitute the heavy cream with full-fat coconut milk or your favorite unsweetened plant-based creamer. The result is still luxuriously creamy with a subtle flavor variation that many testers actually preferred to the original mini chicken pot pie recipe. Just be sure your pie crust is also dairy-free if needed.
Storage and Serving
Your mini chicken pot pies can be stored in an airtight container in the refrigerator for up to 3 days. To reheat, place them in a 350°F oven for 10-15 minutes until heated through—avoid the microwave which will make the crust soggy. For longer storage, freeze unbaked assembled pies on a baking sheet until solid, then transfer to freezer bags for up to 3 months. Bake directly from frozen, adding 10-15 minutes to the baking time.
Serve these individual chicken pot pies piping hot with a crisp side salad dressed with a light vinaigrette to balance the richness of the pies. For an elegant presentation, place each pot pie on a small bed of lightly dressed arugula and garnish with a sprig of fresh thyme.
These savory treats also make excellent portable lunches—pack one alongside some fresh fruit for a complete meal that will be the envy of the break room. For dinner parties, serve these individual savory pies as a starter course with a small glass of crisp white wine or hard cider for a sophisticated beginning to your meal.
FAQs
Can I make these mini chicken pot pies ahead of time?
Absolutely! You can prepare the filling up to 2 days in advance and store it in the refrigerator. Alternatively, assemble the entire pies and refrigerate unbaked for up to 24 hours or freeze for longer storage. Just remember to add the egg wash right before baking.
What’s the best way to prevent a soggy bottom crust?
Place your muffin tin on a preheated baking sheet to help conduct heat to the bottom of the pies. Also, make sure your filling has cooled slightly before adding it to the dough, as hot filling can start melting the crust before it has a chance to bake.
Can I use rotisserie chicken to save time?
Yes! Using shredded rotisserie chicken is a great shortcut. You’ll need about 2 cups of shredded meat, and you can skip the first step of cooking the chicken.
My pie crust breaks when I try to put it in the muffin tin. What am I doing wrong?
Your dough might be too cold. Let it sit at room temperature for a few more minutes. If it’s still breaking, try rolling it slightly thicker, and be gentle when pressing it into the cups—stretching causes breakage.
Can I make these in a regular size muffin tin or do I need jumbo?
Standard 12-cup muffin tins work perfectly for these mini chicken pot pies. If using mini muffin tins for bite-sized versions, reduce both the crust diameter and baking time accordingly.

Mini chicken pot pies
- Prep Time: 15 mins
- Cook Time: 30 mins
- Total Time: 45 mins
- Yield: 4 servings 1x
- Category: Dinner
- Method: Cooking
- Cuisine: Americaine
Description
Satisfy your cravings with delicious mini chicken pot pies! Discover the perfect recipe for a cozy night in.
Ingredients
- 2 tablespoons olive oil
- 1 pound (450g) boneless, skinless chicken breasts, diced into ½-inch cubes
- 1 medium onion (about 1 cup), finely diced
- 2 medium carrots (about ¾ cup), diced
- 2 celery stalks (about ½ cup), diced
- 2 cloves garlic, minced
- ¼ cup (30g) all-purpose flour
- 2 cups (480ml) chicken broth, low sodium
- ½ cup (120ml) heavy cream
- 1 cup (130g) frozen peas
- 1 tablespoon fresh thyme leaves (or 1 teaspoon dried)
- 1 teaspoon fresh rosemary, chopped (or ¼ teaspoon dried)
- ½ teaspoon salt
- ¼ teaspoon black pepper
- 2 packages (14.1 oz each) refrigerated pie crusts (4 crusts total)
- 1 large egg, beaten with 1 tablespoon water (for egg wash)
Instructions
- Step 1: Prepare Your Workspace Preheat your oven to 375°F (190°C). Allow your refrigerated pie crusts to come to room temperature for about 15 minutes—just enough to make them pliable but not warm. Meanwhile, prepare your muffin tin with a light coating of cooking spray to ensure easy removal of your mini chicken pot pies after baking.
- Step 2: Cook the Chicken and Vegetables Heat olive oil in a large skillet over medium heat. Add your diced chicken and cook until no longer pink, about 5-6 minutes. Transfer the chicken to a plate and in the same pan, add your onion, carrots, and celery. Cook until the vegetables begin to soften, about 4-5 minutes, stirring occasionally. Add the garlic and cook until fragrant, about 30 seconds—you’ll know it’s ready when the aroma fills your kitchen.
- Step 3: Create Your Filling Sprinkle the flour over your vegetables and stir continuously for 1-2 minutes until no dry flour remains. This creates the base for your creamy sauce. Gradually pour in the chicken broth while stirring constantly to prevent lumps from forming. Bring the mixture to a gentle simmer and cook for 3-4 minutes until it begins to thicken. Stir in the heavy cream, then return the chicken to the pan.
- Step 4: Finish the Filling Add the frozen peas (no need to thaw them first!), thyme, rosemary, salt, and pepper to your filling mixture. Simmer for another 2-3 minutes until everything is well combined and the sauce has thickened to a rich, creamy consistency that coats the back of a spoon. Remove from heat and let cool slightly while you prepare your crusts.
- Step 5: Prepare the Crusts Unroll your pie crusts on a lightly floured surface. Using your cookie cutter or drinking glass, cut out 12 circles about 4 inches in diameter for the bottom crusts. For the top crusts, cut 12 slightly smaller circles (about 3 inches). Press the larger circles gently into the muffin cups, letting the dough come up the sides with a small overhang.
- Step 6: Assemble Your Pot Pies Fill each crust-lined muffin cup with about 3-4 tablespoons of your chicken filling, being careful not to overfill. Place the smaller dough circles on top of each pie and gently press the edges together to seal. Use a fork to crimp the edges for a decorative touch. Cut two small slits in the top of each pie to allow steam to escape during baking.
- Step 7: Bake to Golden Perfection Brush the tops of your mini chicken pot pies with egg wash to achieve that irresistible golden-brown shine. Bake in your preheated oven for 25-30 minutes until the crusts are beautifully golden and the filling is bubbling through the vents. Allow to cool in the tin for 5 minutes before carefully removing to serve.
Notes
Fresh ingredients will always yield the best flavor results.
Nutrition
- Serving Size: 1 serving
- Calories: 300
- Sugar: 5g
- Sodium: 400mg
- Fat: 10g
- Saturated Fat: 3g
- Unsaturated Fat: 7g
- Trans Fat: 0g
- Carbohydrates: 40g
- Fiber: 5g
- Protein: 15g
- Cholesterol: 50mg


