
Imagine sinking your teeth into a decadent, fudgy brownie base topped with a velvety layer of creamy cheesecake, all in one perfect, portable cup. These Loaded Brownie Cheesecake Cups are the ultimate dessert mashup that combines two beloved classics into one irresistible treat. The contrast between the rich chocolate brownie and the tangy sweetness of cheesecake creates a harmony of flavors that will leave your taste buds dancing. You’ll learn how to create these show-stopping dessert cups that look like they came from a professional bakery but are surprisingly simple to make at home.
Why You’ll Love This Recipe
These Loaded Brownie Cheesecake Cups are about to become your new favorite dessert for so many reasons. First, the textural contrast is simply divine—a fudgy, slightly dense brownie base gives way to a silky, cloud-like cheesecake topping that melts in your mouth. The visual appeal is undeniable too, with striking layers that create an impressive presentation without requiring advanced baking skills.
What truly sets these cups apart is their versatility. They’re elegant enough for special occasions but simple enough for weeknight cravings. Plus, the individual portions make them perfect for serving at parties—no cutting or messy slices required! They’re also make-ahead friendly, solving the eternal dilemma of preparing desserts when entertaining.
For chocolate lovers and cheesecake enthusiasts alike, these brownie cheesecake treats offer the best of both worlds in one perfectly portioned cup. No need to choose between your favorite desserts when you can have them both in one blissful bite.
Ingredients
For the Brownie Base:
- 1/2 cup (113g) unsalted butter, melted
- 1 cup (200g) granulated sugar
- 2 large eggs, room temperature
- 1 teaspoon pure vanilla extract
- 1/2 cup (42g) unsweetened cocoa powder
- 1/2 cup (63g) all-purpose flour
- 1/4 teaspoon salt
- 1/2 cup (90g) semi-sweet chocolate chips
For the Cheesecake Layer:
- 16 oz (450g) cream cheese, softened
- 2/3 cup (135g) granulated sugar
- 2 large eggs, room temperature
- 1 teaspoon pure vanilla extract
- 1/4 cup (60ml) sour cream
For Toppings (Optional):
- 1/4 cup (45g) mini chocolate chips
- 2 tablespoons chocolate sauce for drizzling
- Whipped cream
- Fresh berries
The cream cheese is the star of the cheesecake layer—opt for full-fat for the creamiest texture. For the brownie base, high-quality cocoa powder makes a noticeable difference in the depth of chocolate flavor in these brownie cheesecake dessert cups.
Pro Tips
Room Temperature Ingredients Matter
For the smoothest, creamiest cheesecake layer, ensure your cream cheese is properly softened to room temperature before mixing. Cold cream cheese will result in lumps that won’t smooth out during baking. Place unwrapped cream cheese on the counter for at least an hour before starting, or microwave in 10-second bursts if you’re short on time. This same rule applies to eggs—cold eggs can cause the cheesecake batter to curdle or separate.
The Water Bath Secret
Even though these Loaded Brownie Cheesecake Cups are mini versions, they benefit tremendously from a water bath during baking. Place your muffin tin inside a larger baking pan, then carefully pour hot water into the larger pan until it reaches about halfway up the sides of the muffin cups. This creates a gentle, humid environment that prevents cracking and ensures even baking of your cheesecake layer.
The Perfect Cooling Method
Avoid the temptation to rush cooling. After baking, turn off the oven and prop the door open slightly, allowing the cheesecake cups to cool gradually for about 30 minutes. This prevents the dramatic temperature change that can cause sinking and cracking. Then cool completely at room temperature before refrigerating for at least 4 hours—preferably overnight—for the best texture and flavor development.
Instructions
Step 1: Prepare Your Equipment
Preheat your oven to 325°F (165°C). Line a standard 12-cup muffin tin with paper liners, or use silicone cupcake liners for easier removal. Lightly spray the liners with non-stick cooking spray to ensure your brownie cheesecake cups release cleanly after baking.
Step 2: Make the Brownie Base
In a medium bowl, whisk together the melted butter and sugar until well combined. Add the eggs one at a time, whisking thoroughly after each addition. Stir in the vanilla extract. In a separate bowl, whisk together the cocoa powder, flour, and salt. Gradually fold the dry ingredients into the wet mixture until just combined—don’t overmix! Gently fold in the chocolate chips. The batter should be thick and glossy.
Step 3: Portion the Brownie Batter
Divide the brownie batter evenly among the prepared muffin cups, filling each about 1/3 full (approximately 1.5-2 tablespoons per cup). Use the back of a spoon to gently press the batter into an even layer. Bake for 10-12 minutes until just set but not completely done. They’ll finish baking with the cheesecake layer.
Step 4: Prepare the Cheesecake Layer
While the brownie bases are baking, make your cheesecake filling. In a large bowl, beat the softened cream cheese until completely smooth and fluffy, about 2 minutes. Add the sugar and continue beating until well incorporated. Add the eggs one at a time, mixing on low speed after each addition just until blended. Fold in the vanilla extract and sour cream until smooth. The mixture should be silky and pourable.
Step 5: Assemble and Bake
Remove the partially baked brownie bases from the oven. Pour the cheesecake mixture over each brownie base, filling almost to the top of each liner. If desired, sprinkle mini chocolate chips on top of a few for variety. Prepare a water bath by placing the muffin tin in a larger baking pan and adding hot water to reach halfway up the sides of the muffin cups.
Step 6: Bake and Cool
Carefully transfer the water bath setup to the oven and bake for 20-25 minutes until the edges of the cheesecake are set but the centers still have a slight jiggle. Turn off the oven, crack the door open, and let the Loaded Brownie Cheesecake Cups cool in the oven for 30 minutes. Then remove from the oven and water bath and cool completely at room temperature before refrigerating for at least 4 hours or overnight.
Variations
Peanut Butter Swirl Brownie Cheesecake Cups
For peanut butter lovers, warm 1/4 cup of creamy peanut butter until easily pourable, then swirl it into the cheesecake layer before baking. The combination of chocolate, cheesecake, and peanut butter creates an irresistible flavor profile that elevates these brownie cheesecake treats to a whole new level. You can also sprinkle chopped peanut butter cups on top after baking for extra indulgence.
Mint Chocolate Brownie Cheesecake Cups
Add 1/2 teaspoon of peppermint extract to the cheesecake layer and fold in 1/4 cup of mint chocolate chips or chopped Andes mints. The cool, refreshing mint pairs beautifully with the rich chocolate brownie base, creating a dessert reminiscent of your favorite mint chocolate chip ice cream. Top with a small mint leaf for an elegant finish.
Gluten-Free Option
These cups can easily be made gluten-free by substituting the all-purpose flour in the brownie base with a 1:1 gluten-free flour blend. The cheesecake layer is naturally gluten-free, making this an easy adaptation that doesn’t sacrifice any of the flavor or texture that makes these Loaded Brownie Cheesecake Cups so special.
Storage and Serving
These Loaded Brownie Cheesecake Cups can be stored in an airtight container in the refrigerator for up to 5 days. For the best texture and flavor, allow them to sit at room temperature for about 15-20 minutes before serving. This takes the chill off and allows the flavors to fully bloom on your palate.
For make-ahead convenience, you can freeze these cups for up to 3 months. Wrap each cup individually in plastic wrap, then place in a freezer bag. Thaw overnight in the refrigerator before serving.
For an elegant dessert presentation, serve each cup on a small dessert plate with a dollop of whipped cream and fresh berries. A light dusting of cocoa powder or a drizzle of chocolate sauce adds a professional finishing touch.
These cups also make fantastic additions to dessert boards—pair them with fresh fruit, chocolate-dipped strawberries, and small cookies for an impressive spread that will have everyone reaching for seconds.
FAQs
Can I make these in a regular cheesecake pan instead of as cups?
Yes! This recipe can be adapted to a 9-inch springform pan. Double the recipe, extend the baking time to 45-55 minutes, and follow the same water bath and cooling procedures.
Why did my cheesecake layer crack?
Cracking is usually caused by drastic temperature changes or overmixing. Always use room temperature ingredients, avoid overmixing (especially after adding eggs), use a water bath, and cool gradually as directed.
Can I use box brownie mix for the base?
Absolutely! For a time-saving shortcut, prepare your favorite boxed brownie mix according to package directions and use it for the base layer.
How do I know when the cheesecake cups are done baking?
The edges should be set, but the centers should still have a slight jiggle (like Jell-O). They’ll continue to set as they cool. If they’re completely firm in the center while baking, they’re overbaked.
Can I make these without a water bath?
While possible, a water bath provides even heat distribution and moisture that prevents cracking and creates the creamiest texture. If skipping it, reduce temperature to 300°F and watch carefully for doneness.
Conclusion
These Loaded Brownie Cheesecake Cups are comfort food at its finest — decadent little packages of joy that combine the fudgy richness of brownies with the creamy indulgence of cheesecake. It’s the kind of dessert that turns ordinary moments into celebrations and makes special occasions even more memorable. Whether you’re serving them at a dinner party, bringing them to a potluck, or simply treating yourself after a long day, these perfectly portioned desserts deliver maximum flavor with minimum fuss. Make a batch today and discover why the brownie-cheesecake combination is truly a match made in dessert heaven.
Print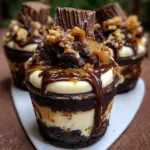
Loaded Brownie Cheesecake Cup
Description
Dive into dessert heaven with these Loaded Brownie Cheesecake Cups that give you the best of both worlds in every bite. No choosing between favorites when you can have fudgy brownies AND creamy cheesecake in one perfect portion!
Ingredients
- 1/2 cup (113g) unsalted butter, melted
- 1 cup (200g) granulated sugar
- 2 large eggs, room temperature
- 1 teaspoon pure vanilla extract
- 1/2 cup (42g) unsweetened cocoa powder
- 1/2 cup (63g) all-purpose flour
- 1/4 teaspoon salt
- 1/2 cup (90g) semi-sweet chocolate chips
- 16 oz (450g) cream cheese, softened
- 2/3 cup (135g) granulated sugar
- 2 large eggs, room temperature
- 1 teaspoon pure vanilla extract
- 1/4 cup (60ml) sour cream
- 1/4 cup (45g) mini chocolate chips (optional)
- 2 tablespoons chocolate sauce for drizzling (optional)
- Whipped cream (optional)
- Fresh berries (optional)
Instructions
- Preheat oven to 325°F (165°C) and line a 12-cup muffin tin with paper liners. Spray liners lightly with cooking spray.
- In a medium bowl, whisk together melted butter and sugar, then add eggs one at a time, whisking well after each. Stir in vanilla.
- In a separate bowl, whisk together cocoa powder, flour, and salt. Fold into wet ingredients until just combined, then fold in chocolate chips.
- Divide brownie batter among muffin cups (about 1/3 full) and bake for 10-12 minutes until just set but not fully baked.
- While brownies bake, beat cream cheese until smooth and fluffy. Add sugar and beat until incorporated. Add eggs one at a time on low speed, then fold in vanilla and sour cream.
- Pour cheesecake mixture over partially baked brownie bases, filling almost to the top. Sprinkle with mini chocolate chips if desired.
- Place muffin tin in a larger baking pan and add hot water to create a water bath halfway up the sides of the muffin tin.
- Bake for 20-25 minutes until edges are set but centers still jiggle slightly.
- Turn off oven, crack door open, and let cool in oven for 30 minutes. Remove from oven and water bath, cool completely at room temperature.
- Refrigerate for at least 4 hours or overnight before serving with optional toppings.


