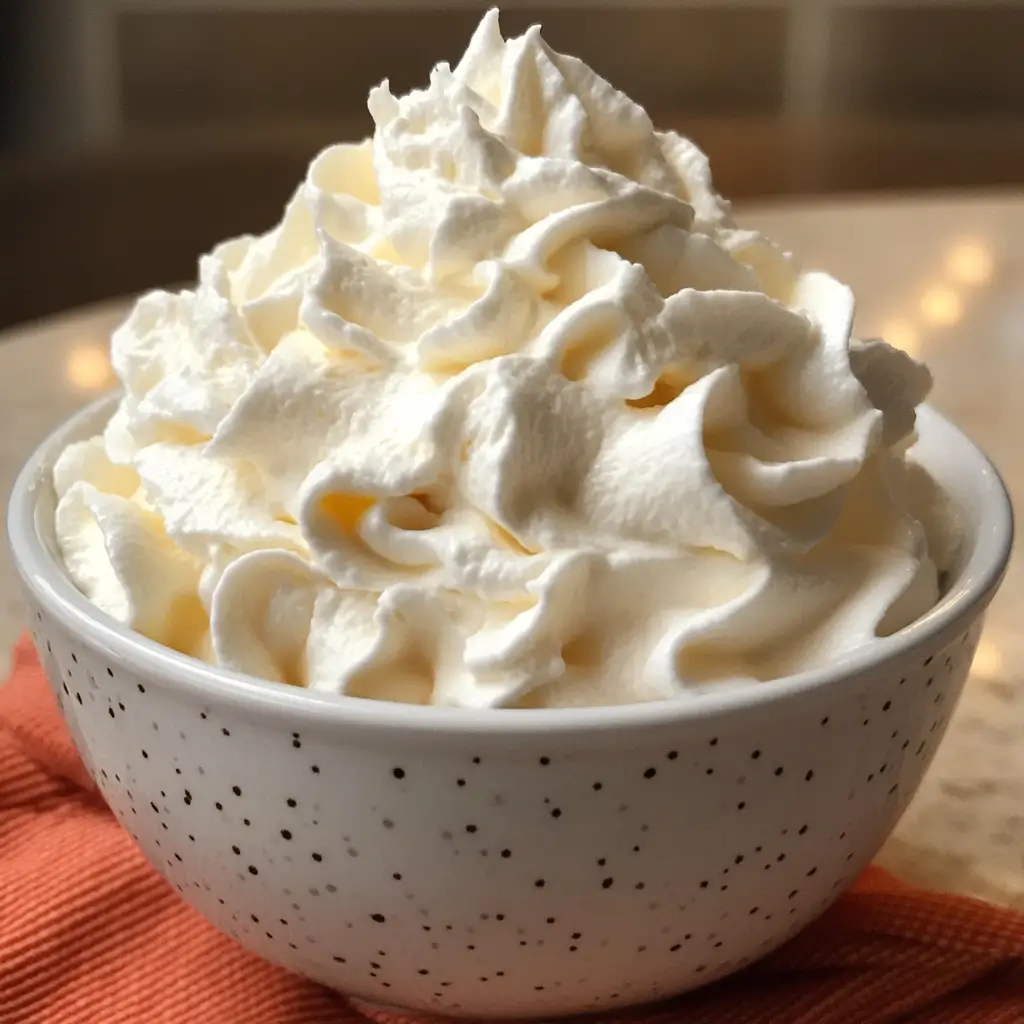
Light, airy, and utterly cloud-like, homemade vanilla whipped cream transforms ordinary desserts into extraordinary treats with just a few whisks. The silky texture and delicate vanilla aroma elevate everything from morning pancakes to elegant evening trifles. Unlike store-bought versions, this homemade vanilla whipped cream recipe delivers pure, fresh flavor without any artificial ingredients or preservatives. You’ll learn how to achieve perfect peaks every time, customize the sweetness to your preference, and discover simple techniques that ensure whipping success even for beginners.
Why You’ll Love This Recipe
This homemade vanilla whipped cream will revolutionize your dessert game with its versatility and pure flavor. The billowy texture creates the perfect contrast against warm pies, tart berries, or rich chocolate desserts. What makes this recipe special is its perfect balance of sweetness and vanilla that enhances without overwhelming your base dessert.
The simplicity is another reason to fall in love—with just three ingredients and about five minutes, you’ll create a topping that tastes infinitely better than anything from a can or plastic tub. The process is surprisingly therapeutic too; watching the transformation from liquid cream to soft, pillowy peaks provides a moment of kitchen magic that never fails to delight both novice and experienced bakers alike.
Even better, this fresh vanilla cream can be made in advance and holds its shape beautifully when properly prepared, making it perfect for both casual family desserts and impressive entertaining.
Ingredients
For this simple yet transformative homemade vanilla whipped cream recipe, you’ll need:
- 1 cup (240ml) heavy whipping cream, cold from the refrigerator (at least 36% fat content for best results)
- 2-3 tablespoons (25-37g) granulated sugar or powdered sugar (adjust to taste)
- 1 teaspoon (5ml) pure vanilla extract or seeds from 1/2 vanilla bean
The quality of ingredients matters significantly in this minimal recipe. For the cream, look for “heavy whipping cream” rather than just “whipping cream” for the best stability. The higher fat content creates more stable peaks that hold their shape longer. Real vanilla extract provides the most authentic flavor, though a vanilla bean split and scraped delivers even more aromatic complexity if you have one available. For a smoother texture, powdered sugar dissolves more readily than granulated, but either works beautifully.
Pro Tips
Cold is crucial – The single most important factor for successful whipped cream is temperature. Chill everything: the cream, the mixing bowl, and even the beaters or whisk for at least 15 minutes before starting. The colder the ingredients and equipment, the faster your cream will whip and the more stable it will be. On hot days, you can even place your mixing bowl over another bowl filled with ice while whipping.
Watch the peaks – The difference between soft, medium, and stiff peaks determines your cream’s final texture. For most dessert toppings, aim for medium peaks—when you lift the whisk, the cream should form a peak that gently curls over at the tip. Continue to stiff peaks (where the peak stands straight up) if you’re piping the cream or need it to hold its shape for several hours. Be vigilant, as over-whipping can quickly turn your silky cream into butter.
Add flavors at the right time – Always add vanilla and sugar when the cream starts to thicken but before it forms soft peaks. This allows the sugar to fully dissolve and the flavors to incorporate evenly without deflating your carefully whipped air bubbles. For delicate flavors like vanilla, this timing maximizes aroma retention.
Instructions
Step 1: Prepare Your Equipment
Begin by placing your mixing bowl and beaters or whisk attachment in the freezer for 15 minutes. This simple step dramatically improves whipping efficiency. While waiting, measure out your sugar and vanilla extract so they’re ready to add at the perfect moment. Pour the cold heavy cream into your chilled bowl and position it on your stand mixer or prepare your hand mixer.
Step 2: Start Whipping
Begin beating the cream on medium-low speed for about 30 seconds to introduce air gradually. This gentle start creates smaller, more stable bubbles than immediately whipping at high speed. Once the cream starts to thicken slightly, increase to medium speed. Watch carefully as the texture changes from liquid to a consistency similar to melted ice cream.
Step 3: Add Flavoring
When the cream begins to thicken but before it holds shape (about 1 minute in), add your sugar and vanilla extract. Continue beating on medium speed. The sugar dissolves better at this stage, and the vanilla fragrance gets perfectly captured in the developing air bubbles, creating that characteristic vanilla-scented cloud we’re aiming for.
Step 4: Achieve Perfect Peaks
Continue whipping, watching attentively as the cream transforms. For soft peaks (ideal for folding into mousses), stop when the cream forms gentle mounds that slump over. For medium peaks (perfect for most dessert toppings), continue until the cream forms a peak that curls at the tip when the beater is lifted. For stiff peaks (best for piping and longer-term stability), whip until the cream stands firmly without drooping. The entire process typically takes 3-4 minutes, but visual cues are more important than timing.
Step 5: Use or Store
Use your homemade vanilla whipped cream immediately for the freshest texture, or store it in the refrigerator for up to 24 hours. If the cream begins to soften after refrigeration, a quick few seconds of gentle re-whipping will restore its texture. When serving, use a large spoon to create beautiful, billowy dollops that showcase the cream’s light, airy structure.
Variations
Chocolate Whipped Cream – For a decadent chocolate version, sift 2 tablespoons of unsweetened cocoa powder with your sugar before adding to the cream. This creates a rich, not-too-sweet topping that pairs beautifully with strawberries, vanilla cake, or as a filling for cream puffs. For an even more intense chocolate experience, add 1/4 teaspoon of instant espresso powder to enhance the chocolate depth.
Citrus Whipped Cream – Replace the vanilla extract with 1 teaspoon of fresh lemon, orange, or lime zest for a bright, refreshing variation. The natural oils in the zest infuse the cream with vibrant flavor that complements fruit desserts perfectly. For extra punch, add a small splash (1/4 teaspoon) of corresponding citrus juice just before the cream reaches soft peaks.
Stabilized Whipped Cream – For special occasions when the cream needs to hold its shape for hours, create a stabilized version by dissolving 1 teaspoon of unflavored gelatin in 1 tablespoon of cold water, then heating briefly until clear. Cool slightly before drizzling into the cream during whipping. This creates a more durable whipped cream that maintains its texture for up to 48 hours without weeping or deflating.
Storage and Serving
Short-term storage: Your freshly made homemade vanilla whipped cream will maintain its texture in the refrigerator for up to 24 hours when stored in an airtight container. Place a paper towel under the lid to absorb excess moisture and help preserve the fluffy texture.
Longer preservation: For extending storage up to 3 days, use the stabilized variation with gelatin. Alternatively, you can freeze dollops of whipped cream on a parchment-lined baking sheet, then transfer the frozen mounds to a freezer bag for up to one month—perfect for impromptu hot chocolate toppings.
Serve this ethereal cream atop warm apple pie where it slowly melts into the spiced filling, creating delightful temperature and texture contrasts. For breakfast indulgence, crown fluffy pancakes or waffles with a generous spoonful alongside fresh berries. The cream also transforms ordinary coffee into a coffeehouse-worthy treat—float a dollop on hot coffee and watch it slowly melt into a creamy cap. For elegant entertaining, fill stemmed glasses with alternating layers of whipped cream and macerated berries for a simple yet impressive dessert.
FAQs
Why didn’t my cream whip properly?
The most common culprit is insufficient fat content—ensure you’re using heavy whipping cream (36-40% fat). Room temperature or warm equipment can also prevent proper whipping. If your cream won’t thicken, try chilling everything again before making another attempt.
Can I make whipped cream without a mixer?
Absolutely! A chilled balloon whisk and cold metal bowl work wonderfully, though it requires more elbow grease. For a fascinating alternative, place cold cream in a mason jar with a tight lid and shake vigorously for 3-5 minutes until thickened.
Is powdered sugar better than granulated sugar for whipped cream?
Powdered sugar contains cornstarch that helps stabilize the cream slightly and dissolves more readily. However, granulated sugar works perfectly well and some prefer its cleaner taste. The choice is primarily about personal preference.
Can I make whipped cream in advance for a party?
Yes, especially if you use the stabilized variation. Prepare it up to 4 hours ahead and store in the refrigerator. If it softens slightly, a few quick strokes with a whisk will refresh the texture just before serving.
Why did my whipped cream turn grainy and separate?
This indicates over-whipping, which happens when cream is whipped past the stiff peak stage. The fat globules begin sticking together, separating from the liquid and forming butter. Unfortunately, this can’t be fixed—but you’ve accidentally made fresh butter, which is delicious on bread!
Conclusion
This Homemade Vanilla Whipped Cream is simplicity transformed into luxury — cloud-like, delicately sweet, and perfumed with vanilla. It’s the kind of recipe that proves how superior homemade versions can be, elevating everyday desserts into special treats with minimal effort. Whether dolloped on summer berries, crowning a slice of holiday pie, or making your morning coffee feel indulgent, this versatile cream brings a touch of elegance to the table. Master this basic recipe, and you’ll find yourself reaching for the whisk instead of the store-bought can every time a dessert calls for that perfect finishing touch.
Print
Homemade Vanilla Whipped Cream Recipe
Description
The perfect cloud of homemade vanilla whipped cream is just minutes away. Skip the canned stuff and treat yourself to this billowy dream topping that makes everything taste better.
Ingredients
- 1 cup (240ml) heavy whipping cream, cold
- 2–3 tablespoons (25-37g) granulated sugar or powdered sugar
- 1 teaspoon (5ml) pure vanilla extract or seeds from 1/2 vanilla bean
- Pinch of salt (optional, enhances flavor)
Instructions
- Chill your mixing bowl and beaters in the freezer for 15 minutes before starting.
- Pour cold heavy cream into the chilled bowl and begin beating on medium-low speed for 30 seconds.
- When cream starts to thicken slightly, add sugar and vanilla extract.
- Increase to medium speed and continue beating until desired consistency is reached (3-4 minutes total).
- Stop when cream forms medium peaks (tip curls over when beater is lifted) for most uses, or stiff peaks (tip stands straight) for piping.
- Use immediately or refrigerate in an airtight container for up to 24 hours.


