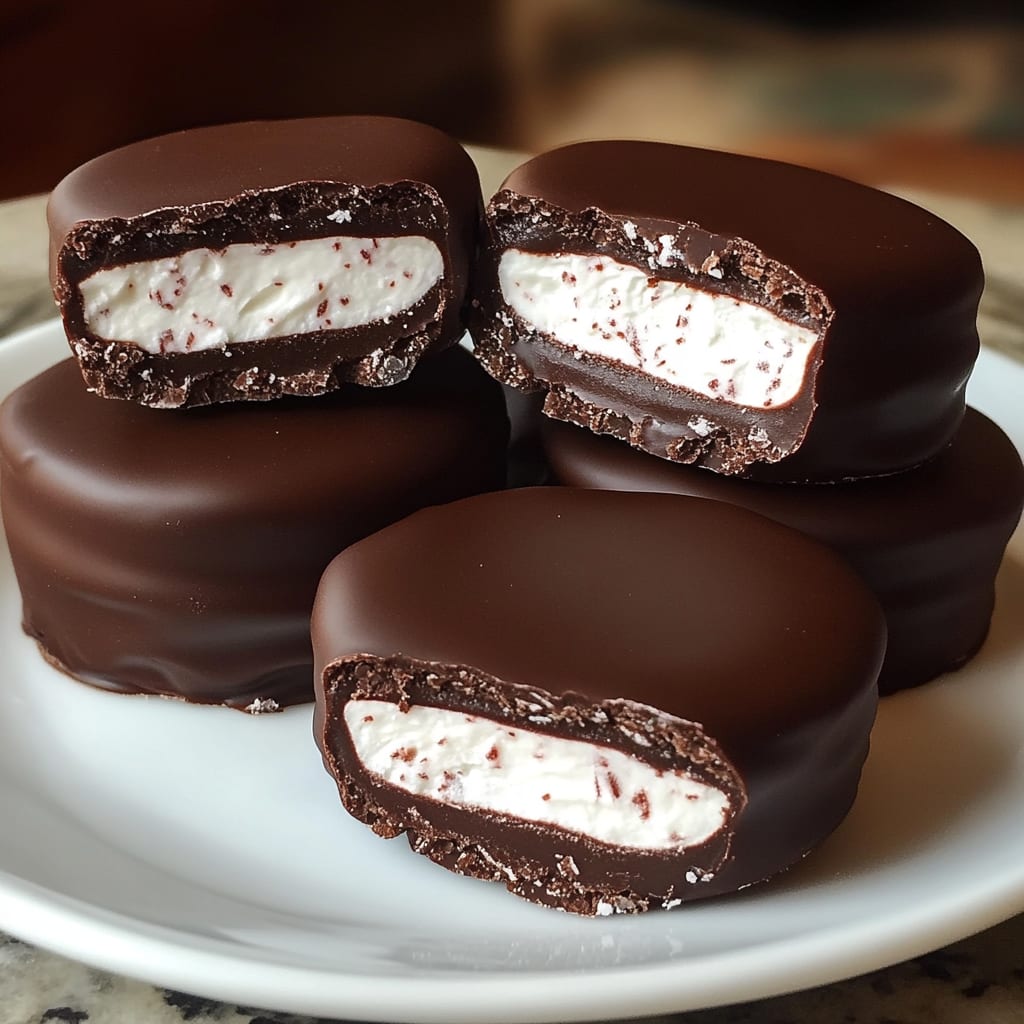
There’s something irresistibly refreshing about biting into a cool, minty Homemade Peppermint Patty covered in rich chocolate. That perfect contrast between the smooth, creamy peppermint filling and the crisp chocolate coating creates a confection that’s far superior to anything store-bought. These Homemade Peppermint Patties are surprisingly simple to make yet deliver professional-quality results that will impress friends and family alike. You’ll learn how to create these classic treats with just a handful of ingredients and no special equipment needed.
Why You’ll Love This Recipe
Making your own Homemade Peppermint Patties is truly a game-changer for anyone with a sweet tooth. The freshness of the peppermint center is unmatched, delivering a cooling sensation that dances on your palate before melting away into pure sweetness. Unlike commercial versions, you control the mint intensity and sweetness level, allowing you to customize these treats to your exact preference.
The textural contrast is what makes these candies irresistible – the initial snap of the chocolate shell giving way to the soft, almost melting consistency of the peppermint filling creates a sensory experience that’s utterly satisfying. Plus, there’s something deeply rewarding about transforming simple ingredients into such an elegant treat.
These peppermint chocolate patties require no baking and no complicated techniques – just mix, shape, dip and chill. The process is straightforward enough for beginners yet produces results that look professionally crafted. They’re perfect for holiday gift-giving, special occasions, or simply treating yourself to a little homemade luxury.
Ingredients
For the Peppermint Filling:
- 2¼ cups (270g) powdered sugar, plus extra for dusting
- 1½ tablespoons (22ml) light corn syrup
- 1½ tablespoons (22ml) water
- 1½ teaspoons (7ml) pure peppermint extract
- 1 tablespoon (14g) vegetable shortening, softened
For the Chocolate Coating:
- 12 ounces (340g) semisweet or dark chocolate, chopped
- 1 tablespoon (14g) vegetable shortening
The powdered sugar creates the smooth, melt-in-your-mouth texture that defines these peppermint chocolate coins. Pure peppermint extract is essential for authentic flavor – avoid using mint flavoring or mint extract, which can taste artificial. The shortening in both components helps achieve the proper consistency and ensures the chocolate coating sets with the perfect snap. For the best results, use high-quality chocolate chips or bars rather than candy melts.
Pro Tips
Getting your Homemade Peppermint Patties just right requires attention to a few key techniques:
First, when mixing your peppermint filling, aim for a consistency similar to play-dough – firm enough to hold shape but pliable enough to roll without cracking. If your mixture is too dry, add water a few drops at a time; if too sticky, incorporate more powdered sugar gradually. Testing a small piece before rolling out the entire batch can save you time and ingredients.
Temperature control is crucial when working with chocolate. Use a double boiler method (or microwave in short bursts) to melt your chocolate, never exceeding 115°F (46°C) to prevent scorching. Letting the melted chocolate cool slightly to about 90°F (32°C) before dipping creates a thinner coating that sets properly with a beautiful shine. Using a fork to dip each patty allows excess chocolate to drain through the tines for a more professional finish.
Patience during the chilling stages pays enormous dividends. Allow the shaped peppermint centers to chill thoroughly before dipping (at least 30 minutes), and give the chocolate-coated patties adequate time to set (minimum 1 hour). Rushing these steps leads to melty centers and smudged coatings.

Instructions
Step 1: Prepare the Peppermint Filling
In a large mixing bowl, combine the powdered sugar, corn syrup, water, peppermint extract, and shortening. Mix first with a spoon, then get in there with your hands to knead until it forms a smooth, pliable dough. The texture should resemble a soft play-dough that holds together well but isn’t sticky. If it’s too dry, add a few drops of water; if too sticky, sprinkle in more powdered sugar until the consistency is right.
Step 2: Shape the Patties
Dust your work surface with powdered sugar. Divide the peppermint mixture in half to make it more manageable. Roll each portion to about ¼-inch thickness between two sheets of parchment paper. Remove the top sheet and use a 1½-inch round cookie cutter (or the rim of a small glass) to cut out circles. Gather scraps and reroll until all dough is used. You should get approximately 24-30 patties depending on your cutter size.
Step 3: Chill the Patty Centers
Carefully transfer the cut peppermint rounds to a baking sheet lined with parchment paper. Place them in the refrigerator for at least 30 minutes or up to overnight. This crucial chilling time helps them firm up and makes them easier to handle during the dipping process.
Step 4: Prepare the Chocolate Coating
When you’re ready to dip, melt the chocolate and shortening together in a heat-proof bowl set over barely simmering water, stirring occasionally until smooth. Alternatively, microwave in 30-second intervals, stirring between each, until fully melted. Let the chocolate cool slightly for about 5 minutes before dipping.
Step 5: Dip and Finish
Working with one peppermint round at a time (keeping the others refrigerated), place it on a fork and lower it into the melted chocolate. Gently tap the fork on the edge of the bowl to remove excess chocolate, then use a toothpick to help slide the patty onto a parchment-lined baking sheet. For a decorative touch, you can swirl a pattern on top with the tines of a fork while the chocolate is still wet. Return the dipped Homemade Peppermint Patties to the refrigerator to set completely, about 1 hour.
Variations
Dark Chocolate Orange Patties: For a sophisticated twist on these mint chocolate patties, substitute orange extract for the peppermint and add 1 teaspoon of fresh orange zest to the filling. The chocolate-orange combination creates a refreshing alternative with a bright citrus note that pairs beautifully with the dark chocolate coating. You might also add a tiny drop of orange food coloring for visual appeal.
Mocha Peppermint Patties: Coffee lovers can enhance their Homemade Peppermint Patties by adding 1 tablespoon of instant espresso powder to the melted chocolate coating. This creates a subtle coffee undertone that complements the cool peppermint filling perfectly. For an extra touch, sprinkle a few crushed coffee beans on top while the chocolate is still wet.
Holiday Peppermint Patties: Make these treats festive by mixing crushed candy canes into the peppermint filling (about 2 tablespoons). Top the chocolate-dipped patties with holiday sprinkles, crushed candy canes, or a light dusting of edible shimmer powder while the chocolate is still tacky for a beautiful presentation perfect for gift-giving.
Storage and Serving
Your Homemade Peppermint Patties will stay fresh when stored in an airtight container in the refrigerator for up to 2 weeks. Place parchment paper between layers to prevent sticking. They can also be frozen for up to 3 months – simply thaw in the refrigerator overnight before serving.
For the best taste experience, allow the patties to sit at room temperature for about 5-10 minutes before eating. This slight warming helps develop the full flavor profile and creates that signature melt-in-your-mouth texture that makes Homemade Peppermint Patties so irresistible.
Serve these elegant treats on a decorative platter alongside after-dinner coffee for a sophisticated dessert option. They also make a beautiful addition to holiday cookie platters or homemade gift boxes. For a special dessert, try crumbling them over vanilla ice cream or using them as a garnish for hot chocolate – the peppermint slowly melting into your drink creates a delightful flavor infusion.
FAQs
Can I use milk chocolate instead of dark chocolate?
Absolutely! While dark chocolate provides a nice contrast to the sweet peppermint filling, milk chocolate works beautifully for a sweeter, more kid-friendly version of these Homemade Peppermint Patties.
Why did my chocolate coating crack or bloom?
Temperature fluctuations are usually the culprit. Make sure your patties are completely chilled before dipping, and allow the chocolate to cool slightly before coating. Store at a consistent temperature to prevent chocolate bloom (whitish streaks).
Can I make these without corn syrup?
Yes, you can substitute honey or glucose syrup in equal amounts, though this may slightly alter the flavor and texture of the traditional peppermint chocolate patties.
How do I get a thinner chocolate coating?
Add an additional 1-2 teaspoons of shortening to your melted chocolate to create a thinner consistency. Also, tapping the fork firmly after dipping helps remove excess chocolate.
Are these gluten-free?
Most ingredients in these Homemade Peppermint Patties are naturally gluten-free, but always check your specific brands of powdered sugar and chocolate to ensure they don’t contain gluten or cross-contamination warnings.
Conclusion
These Homemade Peppermint Patties are comfort food at its finest — cool, refreshing treats that deliver the perfect balance of chocolate decadence and minty freshness. They’re the kind of confection that transports you back to childhood while still satisfying your grown-up taste buds. Whether you’re making them for holiday gifts, special occasions, or simply to treat yourself, these homemade candies prove that sometimes the simplest pleasures are the most memorable. With just a handful of ingredients and some patience, you’ve created something truly special that captures the essence of classic candy-making in your very own kitchen.
Print
Homemade Peppermint Patties Recipe
- Prep Time: 30 minutes
- Cook Time: 0 minutes
- Total Time: 1 hour 30 minutes
- Yield: 24–30 patties 1x
- Category: Dessert
- Method: Mixing, Rolling, Dipping
- Cuisine: Americaine
Description
Homemade Peppermint Patties: Easy recipe with refreshing mint and rich chocolate, perfect for satisfying sweet cravings.
Ingredients
- 2¼ cups (270g) powdered sugar, plus extra for dusting
- 1½ tablespoons (22ml) light corn syrup
- 1½ tablespoons (22ml) water
- 1½ teaspoons (7ml) pure peppermint extract
- 1 tablespoon (14g) vegetable shortening, softened
- 12 ounces (340g) semisweet or dark chocolate, chopped
- 1 tablespoon (14g) vegetable shortening
Instructions
- Step 1: Prepare the Peppermint Filling In a large mixing bowl, combine the powdered sugar, corn syrup, water, peppermint extract, and shortening. Mix first with a spoon, then get in there with your hands to knead until it forms a smooth, pliable dough. The texture should resemble a soft play-dough that holds together well but isn’t sticky. If it’s too dry, add a few drops of water; if too sticky, sprinkle in more powdered sugar until the consistency is right.
- Step 2: Shape the Patties Dust your work surface with powdered sugar. Divide the peppermint mixture in half to make it more manageable. Roll each portion to about ¼-inch thickness between two sheets of parchment paper. Remove the top sheet and use a 1½-inch round cookie cutter (or the rim of a small glass) to cut out circles. Gather scraps and reroll until all dough is used. You should get approximately 24-30 patties depending on your cutter size.
- Step 3: Chill the Patty Centers Carefully transfer the cut peppermint rounds to a baking sheet lined with parchment paper. Place them in the refrigerator for at least 30 minutes or up to overnight. This crucial chilling time helps them firm up and makes them easier to handle during the dipping process.
- Step 4: Prepare the Chocolate Coating When you’re ready to dip, melt the chocolate and shortening together in a heat-proof bowl set over barely simmering water, stirring occasionally until smooth. Alternatively, microwave in 30-second intervals, stirring between each, until fully melted. Let the chocolate cool slightly for about 5 minutes before dipping.
- Step 5: Dip and Finish Working with one peppermint round at a time (keeping the others refrigerated), place it on a fork and lower it into the melted chocolate. Gently tap the fork on the edge of the bowl to remove excess chocolate, then use a toothpick to help slide the patty onto a parchment-lined baking sheet. For a decorative touch, you can swirl a pattern on top with the tines of a fork while the chocolate is still wet. Return the dipped **Homemade Peppermint Patties** to the refrigerator to set completely, about 1 hour.
Notes
Fresh ingredients will always yield the best flavor results.
Nutrition
- Serving Size: 1 peppermint patty
- Calories: 140 calories
- Sugar: 15 grams
- Sodium: 15 mg
- Fat: 6 grams
- Saturated Fat: 3.5 grams
- Unsaturated Fat: 2.5 grams
- Trans Fat: 0 grams
- Carbohydrates: 22 grams
- Fiber: 0.5 grams
- Protein: 1 gram
- Cholesterol: 0 mg


