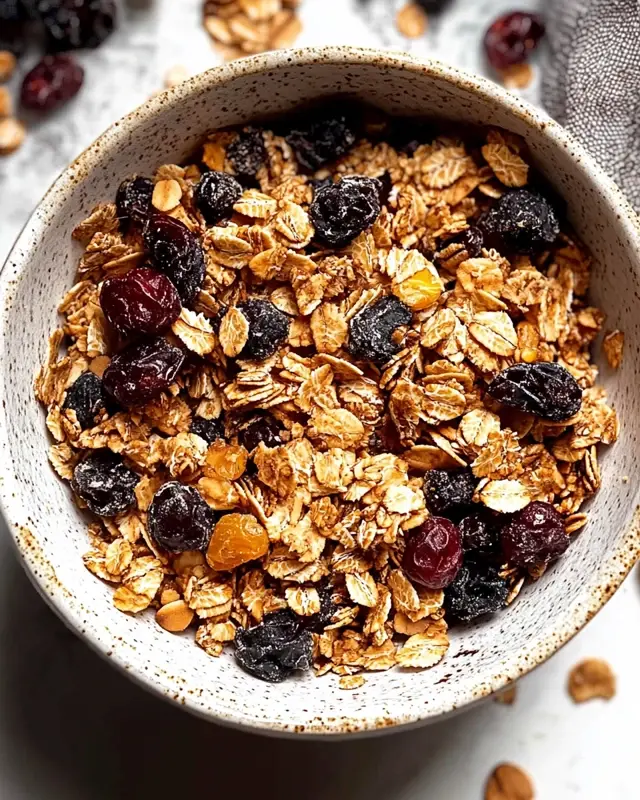
Golden clusters of oats, nuts, and seeds toasted to perfection, releasing an irresistible aroma of honey and cinnamon that fills your kitchen. This homemade granola transforms ordinary breakfast routines into something extraordinary with its perfect balance of sweetness and crunch. Unlike store-bought versions loaded with preservatives and excess sugar, this homemade granola gives you complete control over ingredients and flavors. You’ll learn how to create the perfect batch with just the right amount of sweetness and clusters that suit your exact preferences.
Why You’ll Love This Recipe
This homemade granola recipe stands out for its incredible versatility and superior freshness. The texture is truly what makes it special—crunchy clusters that maintain their structure even when mixed with milk or yogurt, providing that satisfying bite every spoonful. The natural sweetness comes from honey and maple syrup rather than refined sugars, giving it a complex flavor profile that store-bought varieties simply can’t match.
The aroma while baking is reason enough to make your own granola—warm cinnamon, toasty nuts, and caramelizing honey create a scent that transforms your home into the coziest bakery. Budget-friendly yet premium-tasting, a batch costs significantly less than artisanal store versions while delivering fresher, more vibrant flavors.
Perhaps best of all is how easy it is to customize. Whether you prefer it extra nutty, fruit-forward, or with chocolate additions, this base recipe adapts effortlessly to your preferences. Once you’ve mastered this basic homemade granola, you’ll never want to purchase the pre-packaged kind again.
Ingredients
For this perfect homemade granola, you’ll need:
- 3 cups (270g) old-fashioned rolled oats (not quick-cooking)
- 1 cup (120g) raw nuts, roughly chopped (almonds, pecans, walnuts, or a mix)
- ½ cup (70g) raw seeds (sunflower, pumpkin, or flax)
- ¾ teaspoon ground cinnamon
- ½ teaspoon sea salt
- ⅓ cup (80ml) neutral oil (coconut oil or light olive oil work best)
- ⅓ cup (80ml) liquid sweetener (honey, maple syrup, or a combination)
- 1 teaspoon pure vanilla extract
- ½ cup (80g) dried fruit, chopped if large (optional)
The rolled oats provide the essential base and structure, while the combination of nuts and seeds delivers protein and healthy fats. Use raw, unsalted varieties to control sodium levels. The oil helps achieve that perfect golden crispness, while the natural sweeteners create those desirable clusters. Dried fruit should be added after baking to prevent burning.
Pro Tips
Use Old-Fashioned Oats Only: Quick-cooking or instant oats will turn mushy and won’t create those desirable crunchy clusters in your homemade granola. Old-fashioned rolled oats maintain their structure during baking, resulting in the perfect texture. Steel-cut oats, while nutritious, are too hard and won’t soften properly for granola.
Perfect Your Clustering Technique: For those coveted large clusters of granola, press the mixture firmly onto your baking sheet before putting it in the oven. Do not stir during the first 20 minutes of baking—this allows the clusters to set. After removing from the oven, let the granola cool completely before breaking it apart, which helps maintain cluster integrity.
Master the Baking Temperature and Time: Bake your homemade granola at a lower temperature (300°F/150°C) for longer rather than a high temperature for a short time. This ensures even toasting without burning the edges. The granola might not look fully crisp when you remove it from the oven but will continue to crisp up as it cools. Trust the process and resist the urge to overbake, as nuts and seeds can quickly go from golden to burnt.
Instructions
Step 1: Prepare Your Ingredients
Preheat your oven to 300°F (150°C) and line a large rimmed baking sheet with parchment paper. In a large mixing bowl, combine the oats, nuts, seeds, cinnamon, and salt. Stir thoroughly so the spices distribute evenly throughout the dry ingredients. This ensures every bite of your homemade granola will have that perfect flavor balance.
Step 2: Mix Wet Ingredients
In a small saucepan over low heat, warm the oil and liquid sweetener (honey, maple syrup, or a combination) until they become easier to stir together—about 1 minute. Remove from heat and whisk in the vanilla extract. This warming step helps the sweetener incorporate evenly throughout the granola mixture, promoting better clustering.
Step 3: Combine and Prep for Baking
Pour the warm liquid mixture over your dry ingredients and stir thoroughly with a wooden spoon or rubber spatula until every bit is lightly coated. This is crucial for achieving evenly toasted granola. Transfer the mixture to your prepared baking sheet and use your spatula or the back of a measuring cup to press it firmly into an even layer. Compressing the mixture now encourages those delicious clusters to form during baking.
Step 4: Bake to Golden Perfection
Place your baking sheet in the preheated oven and bake for 20 minutes without disturbing it. After the initial 20 minutes, gently flip sections of the granola with a spatula (don’t stir or you’ll break up the clusters) and rotate the pan. Continue baking for another 5-10 minutes until the entire batch is golden brown and aromatic. Remember that your homemade granola will continue to crisp as it cools, so it’s better to slightly underbake than risk burning.
Step 5: Cool and Add Dried Fruit
Remove from the oven and let the granola cool completely on the baking sheet—this is when the magic happens and those perfect clusters set. Once cooled (at least 45 minutes), gently break the granola into your desired cluster size and fold in dried fruits if using. Store in an airtight container at room temperature, where it will stay fresh for up to two weeks.
Variations
Chocolate Lover’s Granola: Transform your homemade granola into a more indulgent treat by adding ¼ cup cocoa powder to the dry ingredients before baking. After cooling completely, fold in ½ cup dark chocolate chips or chunks and a handful of dried cherries for a delicious chocolate-cherry combination. The chocolate chips will partially melt into the still-warm granola, creating delicious chocolate-coated clusters.
Tropical Paradise Granola: For a vacation-inspired twist, substitute coconut oil in the base recipe and add 1 cup of unsweetened coconut flakes during the last 5 minutes of baking (to prevent burning). After cooling, mix in ½ cup each of dried pineapple chunks and dried mango pieces. This bright, tropical granola variation brings sunshine to your breakfast bowl any time of year.
Protein-Packed Granola: To boost the protein content of your homemade granola, add ½ cup of vanilla or unflavored protein powder to the dry ingredients. Increase the wet ingredients slightly (about 2 additional tablespoons each of oil and sweetener) to maintain the right consistency. After baking, fold in 3 tablespoons of hemp seeds for additional protein. This variation makes your granola more satisfying and sustaining for active lifestyles.
Storage and Serving
Store your homemade granola in airtight containers at room temperature for optimal freshness and crunch. Glass jars with tight-fitting lids work exceptionally well, maintaining crispness for up to two weeks. For longer storage, freeze portions in zip-top bags for up to 3 months—the granola will maintain its flavor and texture beautifully.
For a classic breakfast, serve your granola with cold milk (dairy or plant-based) and fresh seasonal berries. The contrast between the crunchy granola and juicy fruit creates a perfect textural balance. For a protein-rich option, layer it with Greek yogurt and a drizzle of honey to create a simple parfait that’s both satisfying and nutritious.
Transform your homemade granola into an on-the-go snack by pressing it into bars while still warm and slightly sticky. Once cooled and cut, wrap individual bars in parchment paper for convenient, energy-boosting treats. You can also sprinkle it over ice cream or frozen yogurt for a delightful dessert with contrasting temperatures and textures.
FAQs
Why isn’t my granola forming clusters?
The secret to clustery homemade granola lies in three factors: enough binding sweetener, proper compression before baking, and cooling completely before handling. Make sure you’re using sufficient honey or maple syrup, press the mixture firmly onto the baking sheet, and resist stirring during the first 20 minutes of baking. Let it cool entirely before breaking into clusters.
Can I reduce the sugar in this recipe?
Yes, you can reduce the sweetener in your homemade granola by up to 25% while maintaining good flavor. However, be aware that this may result in fewer clusters as the sweetener acts as a binding agent. Consider adding an egg white (whisked until frothy) to the wet ingredients to help with clustering if reducing the sweetener significantly.
How do I know when my granola is done baking?
Your granola is done when it reaches a golden-brown color and smells fragrant. It won’t feel completely crisp in the oven but will continue to crisp as it cools. If you wait until it feels totally crunchy while hot, it will likely be overdone and taste burnt once cooled.
Can I use quick oats instead of rolled oats?
Quick oats are not recommended for homemade granola as they’re partially cooked and cut finer, resulting in a powdery texture rather than satisfying clusters. Always use old-fashioned rolled oats for the best results.
Why did my granola burn even though I followed the recipe?
Oven temperatures vary significantly, so your oven might run hotter than the recipe developer’s. Next time, reduce the temperature by 25°F and check your granola every 5 minutes after the first 15 minutes of baking. Also, position the rack in the middle of the oven, not too close to the heating element.
Conclusion
This homemade granola is breakfast perfection reimagined — crunchy, aromatic clusters of toasted oats and nuts that make your morning routine something to look forward to. It’s the kind of recipe that transforms ordinary ingredients into something extraordinary, proving that sometimes the simplest foods made with care are the most satisfying. Whether enjoyed with yogurt, milk, or by the handful, this granola brings both nourishment and pleasure to your day, reminding us that making foods from scratch connects us to the simple joy of eating well.
Print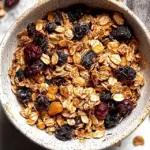
Homemade Granola
Description
Crunchy, sweet, and endlessly customizable – this homemade granola recipe will make you question why you ever bought the store-bought stuff!
Ingredients
- 3 cups (270g) old-fashioned rolled oats
- 1 cup (120g) raw nuts, roughly chopped (almonds, pecans, walnuts, or a mix)
- ½ cup (70g) raw seeds (sunflower, pumpkin, or flax)
- ¾ teaspoon ground cinnamon
- ½ teaspoon sea salt
- ⅓ cup (80ml) neutral oil (coconut oil or light olive oil)
- ⅓ cup (80ml) liquid sweetener (honey, maple syrup, or a combination)
- 1 teaspoon pure vanilla extract
- ½ cup (80g) dried fruit, chopped if large (optional)
Instructions
- Preheat your oven to 300°F (150°C) and line a large rimmed baking sheet with parchment paper.
- In a large mixing bowl, combine the oats, nuts, seeds, cinnamon, and salt.
- In a small saucepan over low heat, warm the oil and sweetener until easy to stir, about 1 minute. Remove from heat and whisk in the vanilla.
- Pour the liquid mixture over your dry ingredients and stir thoroughly until everything is coated.
- Transfer the mixture to your prepared baking sheet and press it firmly into an even layer.
- Bake for 20 minutes undisturbed, then gently flip sections of the granola with a spatula and rotate the pan.
- Continue baking for 5-10 more minutes until golden brown throughout.
- Remove from the oven and let cool completely on the baking sheet without disturbing (at least 45 minutes).
- Once cooled, break the granola into your desired cluster size and fold in dried fruits if using.
- Store in an airtight container at room temperature for up to two weeks.

