
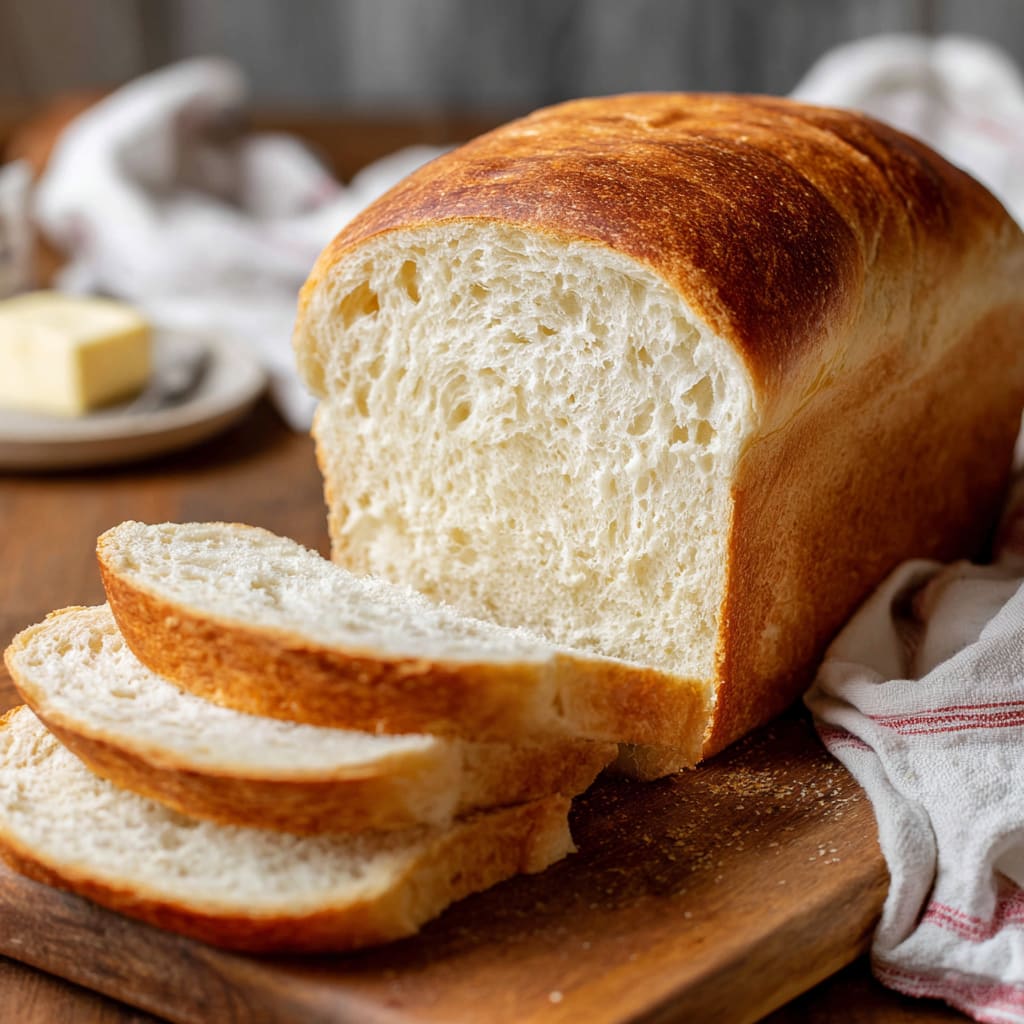
The irresistible aroma of freshly baked homemade bread wafting through your kitchen is one of life’s simple yet profound pleasures. Each slice of this perfectly golden, tender-crumbed homemade bread offers a warm, comforting experience that store-bought varieties simply cannot match. This classic homemade bread recipe produces two beautiful loaves with a soft interior and satisfying crust that will transform your sandwiches, morning toast, or dinner table. You’ll learn how to create bakery-quality bread with basic ingredients and straightforward techniques that even novice bakers can master.
Why You’ll Love This Recipe
This homemade bread recipe stands out for its foolproof approach and consistently excellent results. The texture achieves that perfect balance—a slightly chewy crust that yields to a pillowy-soft interior with a fine, even crumb structure. What makes this recipe particularly special is its versatility and forgiving nature. Unlike complicated artisan bread recipes, this one accommodates minor measuring variations while still producing beautiful loaves.
The honey adds just a hint of sweetness that complements both sweet toppings like jam and savory applications like sandwiches or garlic bread. Many home bakers appreciate that this recipe requires only basic pantry staples—no specialty ingredients needed. The tactile experience of kneading the dough becomes almost meditative, while the pride of pulling golden loaves from your oven brings immense satisfaction. Best of all, the entire house fills with that intoxicating freshly-baked bread scent that simply cannot be bottled.
Ingredients List for the Homemade Bread Recipe
The beauty of this homemade bread lies in its simple, high-quality ingredients that work together to create the perfect texture and flavor. Each component serves a specific purpose in developing the bread’s structure and taste:
- 2 cups warm water (105–115°F) (474g)
1 Tablespoon active dry yeast
- 1/4 cup honey or sugar (85g honey, 50g sugar)
- 2 teaspoons salt
- 2 Tablespoons oil (canola or vegetable) (30 ml)
4–5 1/2 cups all-purpose or bread flour (500g–688g)
Pro Tips
For truly exceptional homemade bread, focus on these three critical techniques that make all the difference:
First, pay careful attention to water temperature when activating your yeast. Too cold and the yeast won’t activate properly; too hot and you’ll kill the yeast organisms. The ideal range of 105-115°F feels warm but not hot to the touch—like warm bathwater. Use a thermometer if you’re unsure, as proper yeast activation is the foundation of successful bread.
Second, develop proper gluten structure through adequate kneading. The dough should become smooth and elastic, passing the “windowpane test”—when a small piece can be stretched thin enough to see light through without tearing. This indicates the gluten network has developed sufficiently to trap the gases that will create your bread’s airy texture.
Finally, be patient with rising times. A proper rise develops flavor and texture. Rather than watching the clock, look for visual cues: the dough should roughly double in size during the first rise, and climb about an inch above the pan rim during the second rise. Rising times vary based on kitchen temperature and humidity, so trust your eyes over strict timing.
Instructions
Step 1: Prepare the Dough: In a large bowl or stand mixer, combine the yeast, water, and a pinch of sugar or honey. Let it rest for 5-10 minutes until foamy and bubbly. (This “proofs” the yeast to ensure it is active. If it doesn’t foam, start over with fresh yeast.)
Step 2: Mix Ingredients: Add the remaining sugar or honey, salt, oil, and 3 cups of flour. Mix to combine. Add another cup of flour and mix again. With the mixer running, add more flour, ½ cup at a time, until the dough begins to pull away from the sides of the bowl. The dough should be smooth, elastic, and slightly sticky to the touch.
Step 3: Knead the Dough: Mix on medium speed for 4-5 minutes, or knead by hand on a lightly floured surface for 5-8 minutes.
Step 4: First Rise: Grease a large bowl with oil or cooking spray and place the dough inside, turning to coat. Cover with a dish towel or plastic wrap and let rise in a warm place until doubled in size, about 1 ½ hours.
Step 5: Prepare Pans: Spray two 9×5” bread pans generously with cooking spray. (Optional: line the bottoms with parchment paper.)
Step 6: Shape the Loaves: Punch down the dough to remove air bubbles. Divide into two equal portions. Shape each into a long loaf and place into the prepared pans.
Step 7: Second Rise: Cover pans with a lightweight, dry dish towel (or lightly sprayed plastic wrap). Allow dough to rise for 45 minutes to 1 hour, until risen about 1 inch above the pans.
Step 8: Bake: Preheat oven to 350°F. Bake for 30-33 minutes, or until golden brown. Tap the top of a loaf; it should sound hollow.
Step 9: Cool and Finish: Invert the loaves onto a wire cooling rack. Brush tops with butter and let cool for at least 10 minutes before slicing.
Step 10: Store: Once cooled, keep in an airtight container at room temperature for 2-3 days, or up to 5 days in the refrigerator.
Variations
This versatile homemade bread recipe can be easily adapted to create exciting flavor variations. For a rustic Herb and Garlic Bread, add 2 tablespoons of dried herbs (rosemary, thyme, and oregano work beautifully) and 2-3 minced garlic cloves to the dough during Step 2. The aromatic result pairs perfectly with Italian meals.
For a slightly heartier option, try Multigrain Bread by replacing 1 cup of the regular flour with whole wheat flour and adding 1/3 cup of mixed seeds (sunflower, flax, and pumpkin) plus 1/4 cup of old-fashioned oats. This creates a more nutritious loaf with wonderful texture contrasts.
Those with a sweet tooth might enjoy Cinnamon Swirl Bread—after the first rise, roll out each portion of dough into a rectangle, spread with a mixture of 1/4 cup sugar and 1 tablespoon cinnamon, then roll up tightly before placing in pans for the second rise.
Storage and Serving
Your freshly baked homemade bread will maintain peak quality when stored properly. For everyday storage, allow the bread to cool completely before placing it in a paper bag or bread box. This preserves the crust while preventing the interior from drying out. For longer storage, place completely cooled bread in a sealed plastic bag at room temperature for up to 3 days.
To freeze this homemade bread, wrap cooled loaves tightly in plastic wrap, then aluminum foil, and freeze for up to 3 months. Thaw at room temperature for several hours before serving, or refresh frozen slices directly in the toaster.
Serve this versatile bread alongside hearty soups or stews where it shines as a dipping companion. For breakfast, toast thick slices and top with avocado and a sprinkle of everything bagel seasoning. It also makes exceptional French toast—slightly stale bread actually works best for this preparation, soaking up the egg mixture without falling apart.
FAQs
Can I use instant yeast instead of active dry yeast?
Yes! Substitute the same amount of instant yeast (1 tablespoon) and skip the proofing step. Add the yeast directly with the dry ingredients.
Why didn’t my bread rise properly?
Several factors affect rising: inactive yeast, water that’s too hot or cold, insufficient kneading, or a kitchen that’s too cold. Check your yeast’s expiration date and ensure your kitchen is around 75°F for optimal rising.
Can I make this homemade bread with whole wheat flour?
Yes, but start by replacing only half the all-purpose flour with whole wheat. Whole wheat absorbs more moisture, so you may need to add an extra 2-3 tablespoons of water to achieve the right consistency.
How do I achieve a crispier crust?
For a crispier crust on your homemade bread, place a shallow pan of water on the bottom rack of your oven during preheating and baking. The steam creates a beautiful, artisan-style crust.
Can I make this recipe by hand if I don’t have a stand mixer?
Absolutely! Mix with a wooden spoon until too difficult, then turn onto a floured surface and knead by hand for 8-10 minutes until smooth and elastic. The tactile experience of hand-kneading can be quite satisfying!
Homemade Bread Recipe
- Prep Time: 15 mins
- Cook Time: 30 mins
- Total Time: 45 mins
- Yield: 4 people 1x
- Category: Breakfast
- Method: Cooking
- Cuisine: American
Description
Looking for the perfect Homemade Bread Recipe? Discover how to bake delicious bread at home today!
Ingredients
- 2 cups warm water (105–115°F) (474g)
- 1 Tablespoon active dry yeast*
- 1/4 cup honey or sugar (85g honey, 50g sugar)
- 2 teaspoons salt
- 2 Tablespoons oil (canola or vegetable) (30 ml)
- 4–5 1/2 cups all-purpose or bread flour* (500g–688g)
Instructions
- Step 1- Prepare the Dough: In a large bowl or stand mixer, combine the yeast, water, and a pinch of sugar or honey. Let it rest for 5-10 minutes until foamy and bubbly. (This “proofs” the yeast to ensure it is active. If it doesn’t foam, start over with fresh yeast.)
- Step 2- Mix Ingredients: Add the remaining sugar or honey, salt, oil, and 3 cups of flour. Mix to combine. Add another cup of flour and mix again. With the mixer running, add more flour, ½ cup at a time, until the dough begins to pull away from the sides of the bowl. The dough should be smooth, elastic, and slightly sticky to the touch.
- Step 3– Knead the Dough: Mix on medium speed for 4-5 minutes, or knead by hand on a lightly floured surface for 5-8 minutes.
- Step 4- First Rise: Grease a large bowl with oil or cooking spray and place the dough inside, turning to coat. Cover with a dish towel or plastic wrap and let rise in a warm place until doubled in size, about 1 ½ hours.
- Step 5– Prepare Pans: Spray two 9×5” bread pans generously with cooking spray. (Optional: line the bottoms with parchment paper.)
- Step 6– Shape the Loaves: Punch down the dough to remove air bubbles. Divide into two equal portions. Shape each into a long loaf and place into the prepared pans.
- Step 7- Second Rise: Cover pans with a lightweight, dry dish towel (or lightly sprayed plastic wrap). Allow dough to rise for 45 minutes to 1 hour, until risen about 1 inch above the pans.
- Step 8– Bake: Preheat oven to 350°F. Bake for 30-33 minutes, or until golden brown. Tap the top of a loaf; it should sound hollow.
- Step 9– Cool and Finish: Invert the loaves onto a wire cooling rack. Brush tops with butter and let cool for at least 10 minutes before slicing.
- Step 10– Store: Once cooled, keep in an airtight container at room temperature for 2-3 days, or up to 5 days in the refrigerator.
Notes
Try This Recipe and Leave a comment Below, your opinion matters to me!
Nutrition
- Serving Size: 4 serving
- Calories: 400
- Sugar: 5g
- Sodium: 400mg
- Fat: 10g
- Saturated Fat: 3g
- Unsaturated Fat: 7g
- Trans Fat: 0g
- Carbohydrates: 40g
- Fiber: 5g
- Protein: 15g
- Cholesterol: 50mg


