Imagine the sizzling sound of perfectly seasoned rice hitting a scorching hot griddle, releasing an intoxicating aroma that immediately transports you to your favorite Japanese steakhouse. Hibachi fried rice combines fluffy grains of rice with savory soy sauce, fresh vegetables, and protein of your choice, all cooked at high heat to create that signature charred flavor you crave. This beloved dish isn’t just restaurant fare—it’s something you can master at home with the right techniques. You’ll learn how to recreate authentic hibachi fried rice with that distinctive smoky flavor and perfect texture that makes this dish so irresistibly delicious.
Why You’ll Love This Recipe
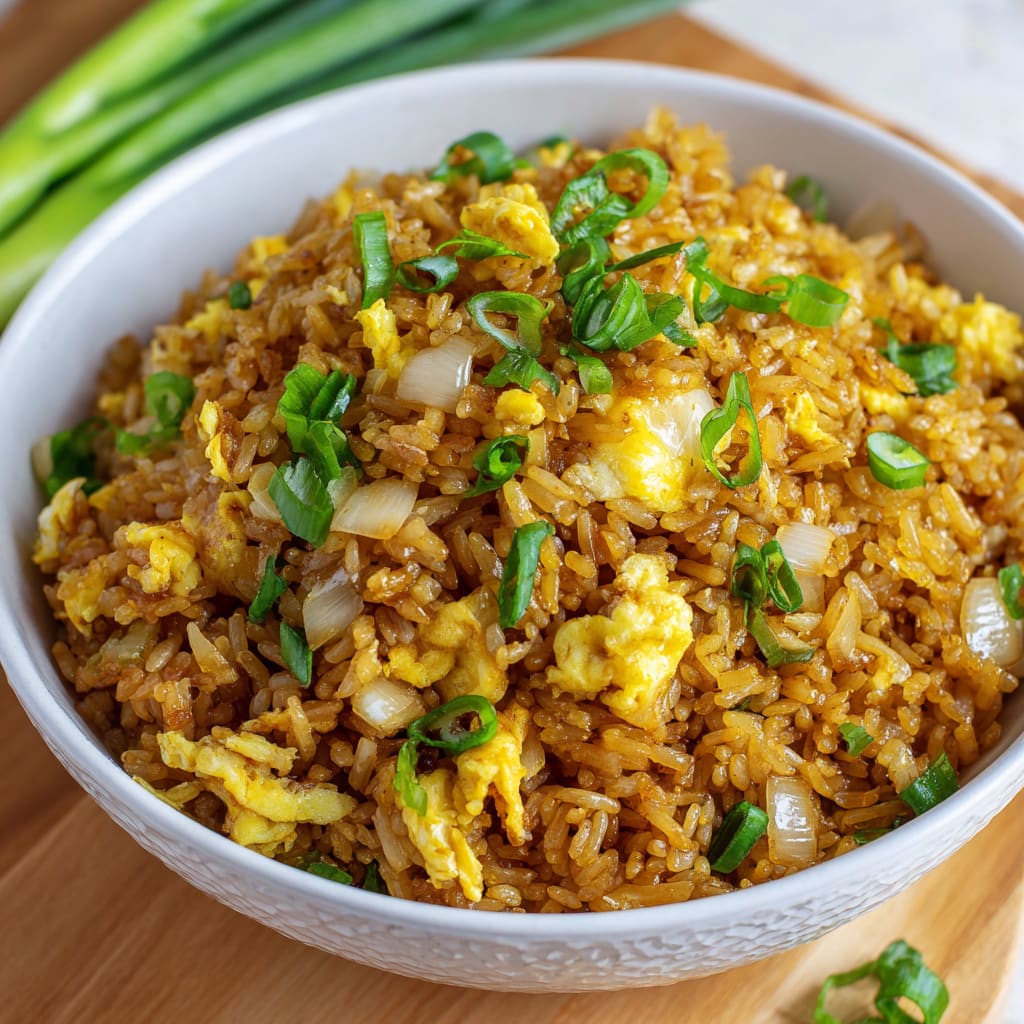
Hibachi fried rice elevates ordinary rice to extraordinary heights with its distinctive combination of flavors and textures. The magic happens when each grain of rice becomes infused with savory umami from soy sauce and butter while maintaining its individual integrity—never mushy, always perfectly separated. The slight char from high-heat cooking creates delightful crispy bits throughout, contrasting beautifully with the tender vegetables and succulent protein.
What makes this recipe special is its versatility—it works beautifully as a main dish or as a side to complement other hibachi favorites. Unlike takeout versions, homemade hibachi rice allows you to control the sodium and oil levels while customizing the ingredients to your preference. Plus, it comes together in just 20 minutes, making it perfect for busy weeknights when you crave something that feels special but doesn’t require hours in the kitchen.
The best part? You’ll achieve restaurant-quality results without specialized equipment—just a good pan and the techniques I’ll share with you. This dish transforms leftover rice into something so delicious, you’ll find yourself deliberately making extra rice just to have this meal the next day.
Ingredients
For perfect hibachi fried rice, you’ll need:
• 4 cups cooked short-grain rice (preferably day-old, cold from refrigerator)
• 2 tablespoons vegetable oil, divided
• 2 tablespoons unsalted butter
• 2 eggs, lightly beaten
• 1 small onion (1 cup), finely diced
• 2-3 cloves garlic, minced
• ½ cup frozen peas and carrots
• 3-4 tablespoons soy sauce (regular or low sodium)
• 1 tablespoon sesame oil
• 2 green onions, thinly sliced
• ¼ teaspoon white pepper
• Salt to taste
Short-grain rice creates that authentic Japanese steakhouse texture—it’s stickier than long-grain varieties, allowing it to hold together while still maintaining distinct grains. The combination of butter and oil is non-negotiable for achieving that signature hibachi flavor, while white pepper provides a subtle heat that black pepper can’t replicate. For protein add-ins, consider 1 cup of diced chicken, steak, or shrimp, which should be cooked separately before adding to your Japanese fried rice.
Pro Tips
The secret to restaurant-quality hibachi fried rice lies in three critical techniques that professional chefs use:
First, always start with cold, day-old rice. Fresh rice contains too much moisture and will turn mushy when stir-fried. Cooking rice the day before and refrigerating it allows the grains to dry out slightly and firm up, creating that perfect individual grain texture when fried. If you’re in a pinch, spread freshly cooked rice on a baking sheet and refrigerate uncovered for 30 minutes to accelerate the drying process.
Second, embrace high heat cooking. Authentic hibachi is cooked on blazing hot grills reaching 400-500°F. To replicate this at home, preheat your pan until it’s smoking slightly before adding oil. This creates that coveted “wok hei” or breath of the wok—the slightly charred flavor that defines great fried rice. But be careful not to overcrowd the pan; cook in batches if necessary to maintain high heat.
Finally, master the timing of ingredients. Cook eggs first and set aside before adding other ingredients. This prevents them from becoming rubbery. Add soy sauce around the perimeter of the pan rather than directly on the rice—this allows it to caramelize slightly before being incorporated, developing deeper flavor in your hibachi style fried rice.

Instructions
Step 1: Prepare Your Workspace
Before heating anything, organize your ingredients in small bowls around your cooking area. This mise en place is essential because hibachi fried rice cooks quickly, leaving no time to measure or chop once you’ve started. Break up any clumps in your cold rice using your fingers to ensure even cooking.
Step 2: Cook the Eggs
Heat 1 tablespoon of oil in a large skillet or wok over medium-high heat until shimmering. Pour in the beaten eggs and swirl to create a thin layer. Let cook for 30 seconds until just set, then break into pieces with your spatula. Transfer to a plate and set aside.
Step 3: Sauté the Aromatics
Return the pan to high heat and add the remaining tablespoon of oil. Once hot, add diced onions and cook for 2-3 minutes until translucent but not browned. Toss in minced garlic and stir continuously for 30 seconds until fragrant—watch carefully as garlic burns quickly!
Step 4: Add Vegetables and Protein
Add frozen peas and carrots to the pan, stirring for 1-2 minutes until bright and warmed through. If using protein, add your pre-cooked chicken, beef, or shrimp now, mixing to combine with the vegetables.
Step 5: Fry the Rice
Push everything to one side of the pan and add butter to the empty space. Once melted, add the cold rice directly into the butter, pressing it down against the hot surface. Let it sit undisturbed for 30 seconds to develop a slight crust before stirring. Fold everything together, ensuring the rice gets coated in butter.
Step 6: Season and Finish
Drizzle soy sauce around the perimeter of the pan, allowing it to sizzle before mixing it through the rice. Add white pepper and sesame oil, then fold in the cooked egg pieces. Continue cooking for 2-3 minutes, tossing occasionally until the rice is heated through and slightly crisp in spots. Taste and adjust seasoning if needed.
Step 7: Garnish and Serve
Remove from heat and sprinkle with sliced green onions. Serve your hibachi fried rice immediately in warm bowls for the best experience, perhaps with additional condiments like sriracha or yum yum sauce on the side.
Variations
Hibachi fried rice is wonderfully adaptable to different dietary needs and flavor preferences. For a vegetarian version, skip the animal protein and add extra vegetables like mushrooms, which provide meaty texture and umami flavor. Diced bell peppers, zucchini, and bean sprouts also make excellent additions. For even more substance, incorporate cubed firm tofu that’s been pressed and pre-fried until crispy.
For a low-carb adaptation, substitute cauliflower rice for traditional rice. Pulse raw cauliflower in a food processor until it resembles rice grains, then thoroughly pat dry with paper towels before stir-frying. The cooking time will be significantly shorter—about 5-7 minutes total—and you’ll want to use slightly less soy sauce as cauliflower absorbs flavors more readily than rice.
Spice lovers can transform this into a “Spicy Hibachi Rice” by adding 1-2 teaspoons of sriracha or sambal oelek to the cooking process, or incorporate minced jalapeño with the garlic for a fresh heat that permeates the entire dish.
Storage and Serving
Hibachi fried rice actually improves after sitting for a few hours as the flavors meld together, making it perfect for meal prep. Store leftovers in airtight containers in the refrigerator for up to 3 days. When reheating, sprinkle a few drops of water over the rice before microwaving covered to reintroduce moisture, or better yet, quickly stir-fry in a hot pan to revive the crispy texture.
For a complete hibachi experience, serve your hibachi style fried rice alongside yum yum sauce (that addictive pink mayo-based condiment from Japanese steakhouses) and a protein like hibachi steak or shrimp. For an impressive dinner presentation, arrange the rice on a large platter with grilled vegetables on one side and protein on the other, garnished with additional green onions and sesame seeds.
For a build-your-own meal that’s sure to please everyone, set up a hibachi rice bowl bar with the base rice and various toppings like sliced avocado, pickled vegetables, fried eggs, nori strips, and different proteins, allowing each person to customize their perfect bowl.
FAQs
What type of rice works best for hibachi fried rice?
Short-grain or medium-grain rice is traditional for authentic hibachi fried rice. Japanese varieties like koshihikari work perfectly, but any short-grain rice will produce good results. Long-grain rice like basmati or jasmine can be used in a pinch but will create a different texture—still delicious, just less traditional.
Why does my rice stick together when I try to make fried rice?
This usually happens when using freshly cooked rice that’s still warm and moist. Always use day-old rice that’s been refrigerated to reduce moisture content. If you must use fresh rice, spread it on a baking sheet and refrigerate uncovered for at least 30 minutes before cooking your hibachi fried rice.
What’s the difference between hibachi and regular fried rice?
Hibachi fried rice is distinguished by its cooking method (high heat), the use of butter alongside oil, and simpler vegetable mix (typically just onions, peas, and carrots). Traditional Chinese fried rice often includes more varied vegetables and seasonings like oyster sauce or five-spice powder.
Can I make hibachi fried rice without a flat top grill?
Absolutely! A heavy cast iron skillet or carbon steel wok works excellently for home preparation. The key is getting the pan extremely hot before adding ingredients to replicate the high-heat cooking method of a hibachi grill.
Is hibachi fried rice gluten-free?
Standard hibachi rice contains soy sauce, which typically contains wheat. For a gluten-free version, simply substitute tamari or certified gluten-free soy sauce in equal amounts.

Hibachi Fried Rice
- Prep Time: 10 minutes
- Cook Time: 10 minutes
- Total Time: 20 minutes
- Yield: 4 servings 1x
- Category: Dinner
- Method: Stir-frying
- Cuisine: Americaine
Description
Hibachi Fried Rice: Flavorful stir-fried rice with tender chicken, veggies, and savory soy sauce. Quick, comforting, and sure to please any crowd.
Ingredients
- 4 cups cooked short-grain rice (preferably day-old, cold from refrigerator)
- 2 tablespoons vegetable oil, divided
- 2 tablespoons unsalted butter
- 2 eggs, lightly beaten
- 1 small onion (1 cup), finely diced
- 2–3 cloves garlic, minced
- ½ cup frozen peas and carrots
- 3–4 tablespoons soy sauce (regular or low sodium)
- 1 tablespoon sesame oil
- 2 green onions, thinly sliced
- ¼ teaspoon white pepper
- Salt to taste
Instructions
- Step 1: Prepare Your Workspace Before heating anything, organize your ingredients in small bowls around your cooking area. This mise en place is essential because Hibachi fried rice cooks quickly, leaving no time to measure or chop once you’ve started. Break up any clumps in your cold rice using your fingers to ensure even cooking.
- Step 2: Cook the Eggs Heat 1 tablespoon of oil in a large skillet or wok over medium-high heat until shimmering. Pour in the beaten eggs and swirl to create a thin layer. Let cook for 30 seconds until just set, then break into pieces with your spatula. Transfer to a plate and set aside.
- Step 3: Sauté the Aromatics Return the pan to high heat and add the remaining tablespoon of oil. Once hot, add diced onions and cook for 2-3 minutes until translucent but not browned. Toss in minced garlic and stir continuously for 30 seconds until fragrant—watch carefully as garlic burns quickly!
- Step 4: Add Vegetables and Protein Add frozen peas and carrots to the pan, stirring for 1-2 minutes until bright and warmed through. If using protein, add your pre-cooked chicken, beef, or shrimp now, mixing to combine with the vegetables.
- Step 5: Fry the Rice Push everything to one side of the pan and add butter to the empty space. Once melted, add the cold rice directly into the butter, pressing it down against the hot surface. Let it sit undisturbed for 30 seconds to develop a slight crust before stirring. Fold everything together, ensuring the rice gets coated in butter.
- Step 6: Season and Finish Drizzle soy sauce around the perimeter of the pan, allowing it to sizzle before mixing it through the rice. Add white pepper and sesame oil, then fold in the cooked egg pieces. Continue cooking for 2-3 minutes, tossing occasionally until the rice is heated through and slightly crisp in spots. Taste and adjust seasoning if needed.
- Step 7: Garnish and Serve Remove from heat and sprinkle with sliced green onions. Serve your Hibachi fried rice immediately in warm bowls for the best experience, perhaps with additional condiments like sriracha or yum yum sauce on the side.
Notes
Fresh ingredients will always yield the best flavor results.
Nutrition
- Serving Size: 1.5 cups
- Calories: 380 calories per serving
- Sugar: 4 grams
- Sodium: 900 mg
- Fat: 16 grams
- Saturated Fat: 5 grams
- Unsaturated Fat: 10 grams
- Trans Fat: 0 grams
- Carbohydrates: 50 grams
- Fiber: 3 grams
- Protein: 8 grams
- Cholesterol: 100 mg


