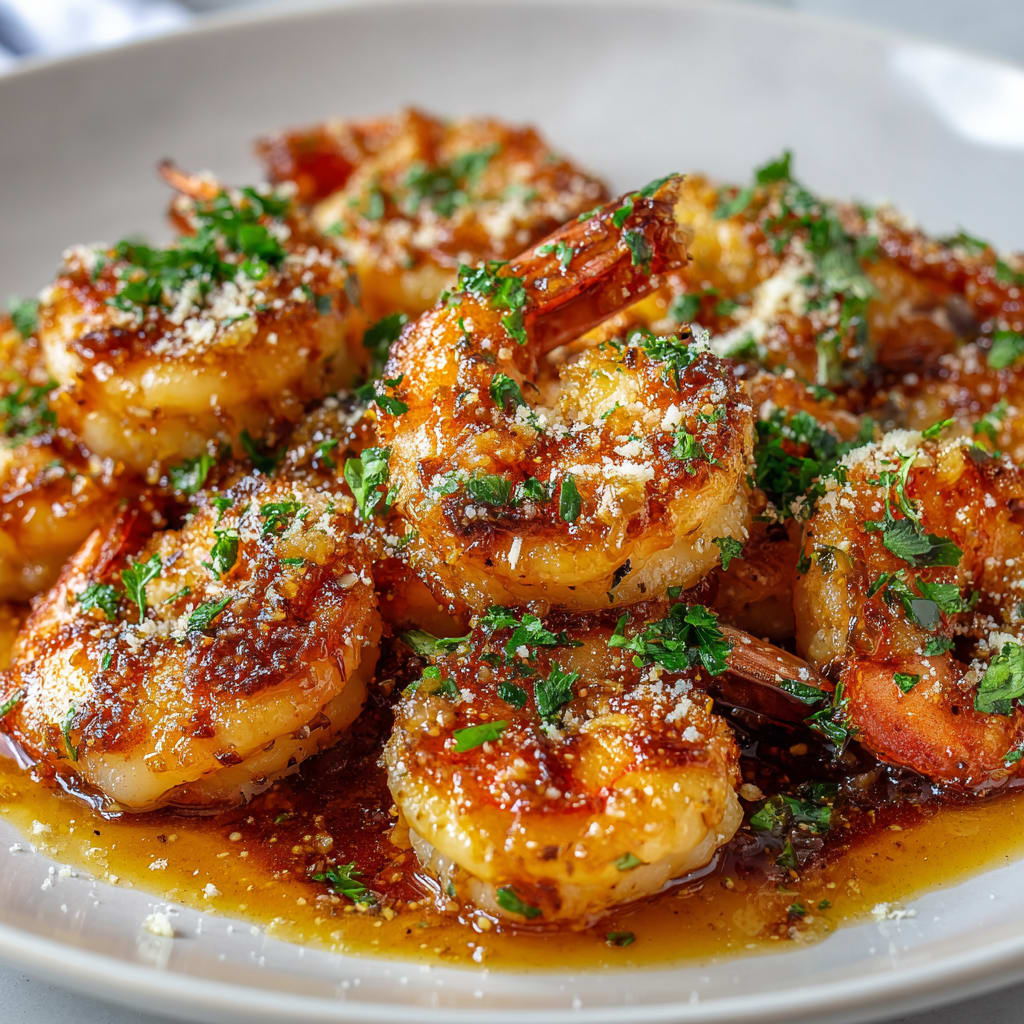
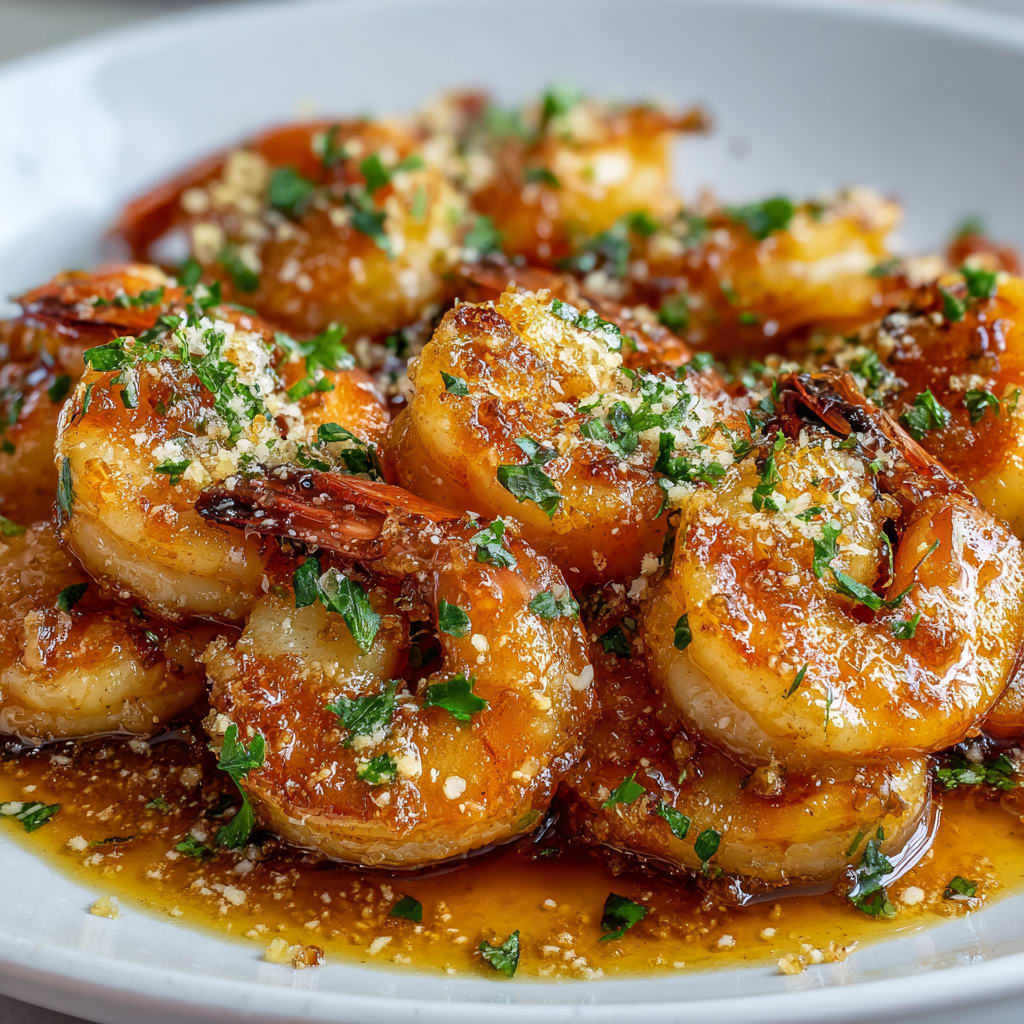
Picture this: succulent shrimp bathed in a golden garlic butter sauce, with just the right hint of Hawaiian-inspired flavors that transport you straight to a North Shore food truck. Hawaiian Garlic Shrimp is the perfect balance of bold garlic, sweet shrimp, and a touch of island magic that makes this dish irresistible. This iconic Hawaiian specialty has become a beloved recipe for seafood lovers everywhere, combining simple ingredients with big, bold flavors. You’ll learn how to recreate this food truck favorite in your own kitchen, with all the authentic techniques that make this dish so special.
Why You’ll Love This Recipe
This Hawaiian Garlic Shrimp recipe will quickly become your go-to seafood dish for several compelling reasons. First, it delivers restaurant-quality results with minimal ingredients and effort – the entire dish comes together in about 15 minutes, making it perfect for busy weeknights or impressive enough for weekend entertaining.
The textural contrasts are what make this dish truly special – the plump, tender shrimp with their subtle sweetness against the crispy, golden exterior created during the quick sauté. The garlic butter sauce provides a rich, aromatic base that’s simultaneously bold yet doesn’t overpower the natural flavors of the shrimp.
Unlike many seafood dishes that require complicated techniques or hard-to-find ingredients, this Hawaiian shrimp recipe uses pantry staples and a straightforward cooking method that even novice cooks can master. The result is a dish that’s transportive – one bite and you’ll feel the warm Hawaiian breeze, hear the ocean waves, and taste the authentic island flavors that make this garlic shrimp recipe so beloved.
Ingredients
For the Hawaiian Garlic Shrimp, you’ll need:
- 2 pounds (900g) large shrimp, shell-on (16-20 count per pound)
- 16 cloves garlic (about 1½ heads), finely minced
- 2 tablespoons all-purpose flour
- 2 teaspoons paprika
- 1 teaspoon cayenne pepper (adjust to taste)
- 1 teaspoon sea salt
- ½ teaspoon black pepper
- ¼ cup (60ml) clarified butter or ghee
- ¼ cup (60ml) neutral oil (like canola or grapeseed)
- 2 tablespoons unsalted butter
- 1 lemon, cut into wedges
- 2 tablespoons fresh parsley, chopped
- Cooked white rice, for serving
The shell-on shrimp are traditional and help protect the delicate flesh during cooking, while also adding flavor. Fresh garlic is non-negotiable here – pre-minced won’t deliver the same aromatic punch that defines authentic Hawaiian garlic prawns.
Pro Tips
Achieving perfect Hawaiian Garlic Shrimp requires attention to a few critical techniques that separate good results from great ones:
First, don’t skip the shell-on shrimp. While it might seem easier to use peeled shrimp, the shells create a protective barrier that prevents overcooking while infusing the meat with more flavor. They also help the seasoned flour mixture adhere better, creating that signature crispy exterior. For easiest eating, devein the shrimp but leave the shells intact.
Second, manage your heat carefully. The garlic should turn golden but never brown or burn, as this creates bitterness. Use medium-high heat and watch vigilantly – properly cooked garlic provides the aromatic foundation of this dish. If your garlic starts browning too quickly, immediately lower the heat or briefly remove the pan from the burner.
Finally, don’t overcrowd your pan when cooking the shrimp. Work in batches if necessary – overcrowding causes the shrimp to steam rather than sauté, preventing that beautiful caramelization that’s essential to authentic Hawaiian garlic shrimp. A single layer with some space between each piece ensures the perfect texture and even cooking.
Instructions
Step 1: Prepare the Shrimp
Start with fresh shrimp, preferably shell-on for the most authentic Hawaiian Garlic Shrimp experience. Using scissors or a sharp knife, cut along the back of each shrimp to devein it, but leave the shells intact. Pat the shrimp completely dry with paper towels – this is crucial for proper browning and to prevent splattering when they hit the hot pan.
Step 2: Create the Seasoning Mixture
In a medium bowl, combine the flour, paprika, cayenne pepper, salt, and black pepper, whisking to integrate all spices evenly. Add your prepared shrimp to the bowl and toss gently until each piece is lightly dusted with the seasoned flour mixture. The coating should be very light – you’re not creating a batter here, just a thin layer to help develop flavor and texture.
Step 3: Prepare the Garlic
Finely mince all your garlic cloves – this might seem like a lot of garlic, but it’s the star ingredient in this dish! For the most authentic flavor, take your time with this step and mince by hand rather than using a garlic press, which can make the garlic taste bitter. The garlic pieces should be uniform in size to ensure even cooking.
Step 4: Cook the Shrimp
Heat a large skillet over medium-high heat, then add the clarified butter and oil. Once the fat is shimmering but not smoking, add the minced garlic and cook for just 30 seconds until fragrant. Quickly add the seasoned shrimp in a single layer and cook for 2-3 minutes per side until they turn pink and slightly crispy. Work in batches if needed – overcrowding is the enemy of perfectly cooked garlic shrimp!
Step 5: Finish the Dish
Just before removing from the heat, add the unsalted butter and allow it to melt into the sauce, creating a richer flavor. Squeeze half the lemon over the shrimp, then toss to coat everything in the garlic butter sauce. Transfer to a serving platter, sprinkle with fresh parsley, and serve immediately with the remaining lemon wedges and plenty of white rice to soak up all that delicious sauce. Your homemade Hawaiian Garlic Shrimp is ready to transport you straight to Oahu’s North Shore!
Variations
The classic Hawaiian Garlic Shrimp is perfect as is, but these variations offer delicious alternatives to suit different dietary needs or taste preferences:
Spicy Hawaiian Shrimp: For heat lovers, double the cayenne pepper and add 1-2 finely diced Thai bird chilies to the garlic during cooking. Finish with a drizzle of chili oil for an extra kick that complements the garlic perfectly. This variation mimics the spicier versions often found at certain North Shore shrimp trucks.
Coconut Garlic Shrimp: Replace half the cooking oil with coconut oil and add 2 tablespoons of coconut milk at the end when you add the butter. This creates a tropical twist that enhances the Hawaiian theme while adding subtle sweetness that pairs beautifully with the garlic.
Lighter Shell-Off Version: For a more convenient eating experience, use completely peeled and deveined shrimp. Reduce the cooking time by about 1 minute per side and be extra vigilant to prevent overcooking. While purists might argue against this variation, it makes the dish more accessible for everyday meals while still capturing the essential garlic-forward flavor profile.
Storage and Serving
Hawaiian Garlic Shrimp is best enjoyed immediately after cooking when the shrimp are perfectly tender and the garlic is fragrant. However, leftovers can be stored in an airtight container in the refrigerator for up to 2 days. Reheat gently in a skillet over low heat just until warmed through to avoid overcooking the shrimp.
For the most authentic serving experience, pile the garlic shrimp over a bed of steamed white rice, which soaks up the flavorful sauce beautifully. On the side, include a scoop of Hawaiian mac salad for the complete plate lunch experience that you’d get at a genuine North Shore shrimp truck.
For a more elaborate meal, serve your garlic shrimp as part of a Hawaiian-inspired feast with sides like grilled pineapple, a fresh green salad with papaya, or sliced avocado with a squeeze of lime and sea salt. A cold Hawaiian beer or a tropical mocktail makes the perfect beverage pairing to complete your island culinary journey.
FAQs
Can I make Hawaiian Garlic Shrimp with peeled shrimp instead of shell-on?
Yes, you can use peeled shrimp, but the traditional recipe calls for shell-on shrimp which helps protect the meat from overcooking and adds flavor. If using peeled shrimp, reduce cooking time by about 1 minute per side and watch carefully to prevent overcooking.
Why is my garlic turning brown or burning?
This likely means your heat is too high. Garlic can burn quickly, turning bitter. For perfect Hawaiian Garlic Shrimp, maintain a medium-high heat and if the garlic is coloring too quickly, lower the heat immediately or temporarily remove the pan from the heat.
What’s the best shrimp size for this recipe?
Large shrimp (16-20 count per pound) work best for authentic Hawaiian Garlic Shrimp. They’re substantial enough to stand up to the bold flavors while cooking quickly and evenly.
Can I make this dish ahead of time for a party?
This dish is best served immediately after cooking. If you need to prepare in advance, you can clean and devein the shrimp and prepare the seasoned flour mixture, but cook just before serving for the best texture and flavor.
Is clarified butter necessary or can I use regular butter?
Clarified butter (or ghee) is preferred because it has a higher smoke point and won’t burn when cooking at medium-high heat. Regular butter contains milk solids that can burn and become bitter. If you must use regular butter, combine it with oil and watch the heat carefully.

Hawaiian Garlic Shrimp
- Prep Time: 15 mins
- Cook Time: 30 mins
- Total Time: 45 mins
- Yield: 4 servings 1x
- Category: Dinner
- Method: Cooking
- Cuisine: Americaine
Description
Delicious Hawaiian Garlic Shrimp recipe! Discover the secret to this mouthwatering dish. Try it today!
Ingredients
- 2 pounds (900g) large shrimp, shell-on (16–20 count per pound)
- 16 cloves garlic (about 1½ heads), finely minced
- 2 tablespoons all-purpose flour
- 2 teaspoons paprika
- 1 teaspoon cayenne pepper (adjust to taste)
- 1 teaspoon sea salt
- ½ teaspoon black pepper
- ¼ cup (60ml) clarified butter or ghee
- ¼ cup (60ml) neutral oil (like canola or grapeseed)
- 2 tablespoons unsalted butter
- 1 lemon, cut into wedges
- 2 tablespoons fresh parsley, chopped
- Cooked white rice, for serving
Instructions
- Step 1: Prepare the Shrimp Start with fresh shrimp, preferably shell-on for the most authentic Hawaiian Garlic Shrimp experience. Using scissors or a sharp knife, cut along the back of each shrimp to devein it, but leave the shells intact. Pat the shrimp completely dry with paper towels – this is crucial for proper browning and to prevent splattering when they hit the hot pan.
- Step 2: Create the Seasoning MixtureIn a medium bowl, combine the flour, paprika, cayenne pepper, salt, and black pepper, whisking to integrate all spices evenly. Add your prepared shrimp to the bowl and toss gently until each piece is lightly dusted with the seasoned flour mixture. The coating should be very light – you’re not creating a batter here, just a thin layer to help develop flavor and texture.
- Step 3: Prepare the GarlicFinely mince all your garlic cloves – this might seem like a lot of garlic, but it’s the star ingredient in this dish! For the most authentic flavor, take your time with this step and mince by hand rather than using a garlic press, which can make the garlic taste bitter. The garlic pieces should be uniform in size to ensure even cooking.
- Step 4: Cook the ShrimpHeat a large skillet over medium-high heat, then add the clarified butter and oil. Once the fat is shimmering but not smoking, add the minced garlic and cook for just 30 seconds until fragrant. Quickly add the seasoned shrimp in a single layer and cook for 2-3 minutes per side until they turn pink and slightly crispy. Work in batches if needed – overcrowding is the enemy of perfectly cooked garlic shrimp!
- Step 5: Finish the DishJust before removing from the heat, add the unsalted butter and allow it to melt into the sauce, creating a richer flavor. Squeeze half the lemon over the shrimp, then toss to coat everything in the garlic butter sauce. Transfer to a serving platter, sprinkle with fresh parsley, and serve immediately with the remaining lemon wedges and plenty of white rice to soak up all that delicious sauce. Your homemade Hawaiian Garlic Shrimp is ready to transport you straight to Oahu’s North Shore!
Notes
Fresh ingredients will always yield the best flavor results.
Nutrition
- Serving Size: 1 serving
- Calories: 300
- Sugar: 5g
- Sodium: 400mg
- Fat: 10g
- Saturated Fat: 3g
- Unsaturated Fat: 7g
- Trans Fat: 0g
- Carbohydrates: 40g
- Fiber: 5g
- Protein: 15g
- Cholesterol: 50mg


