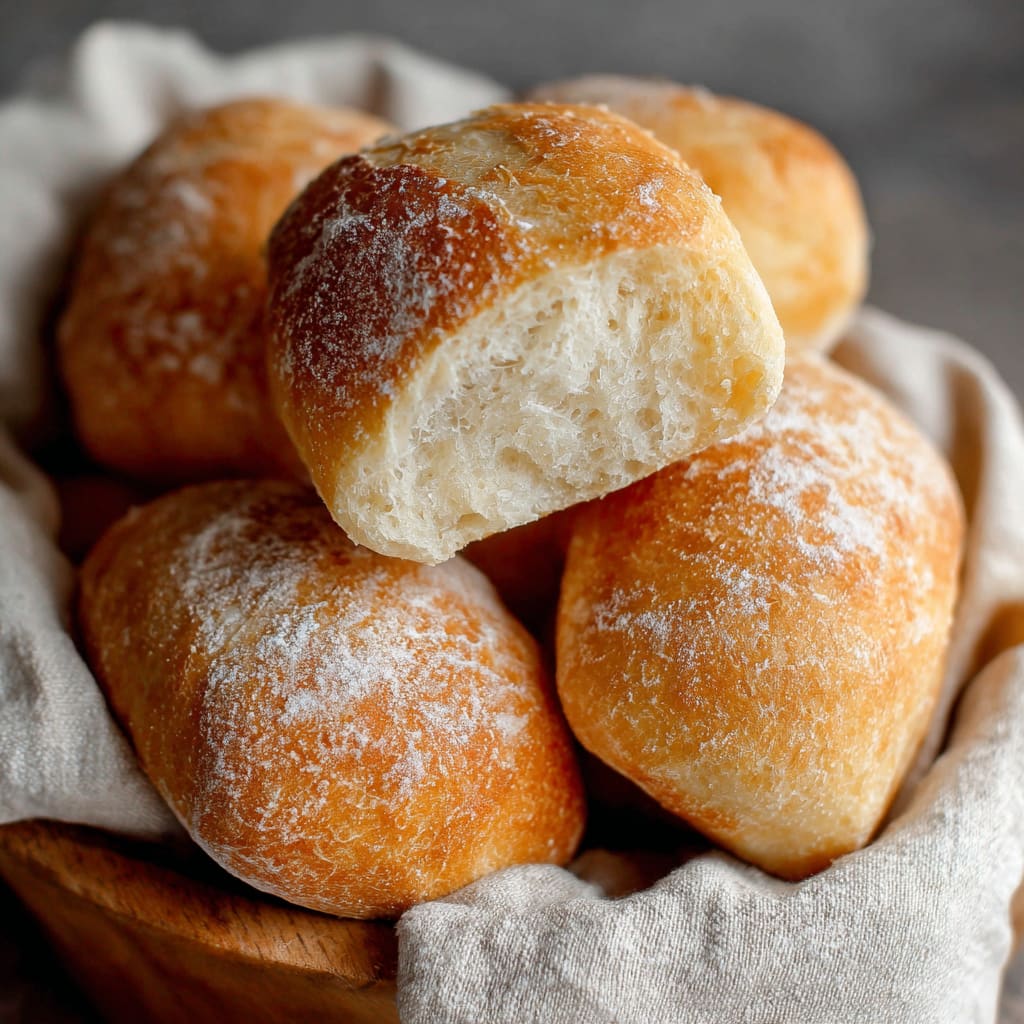
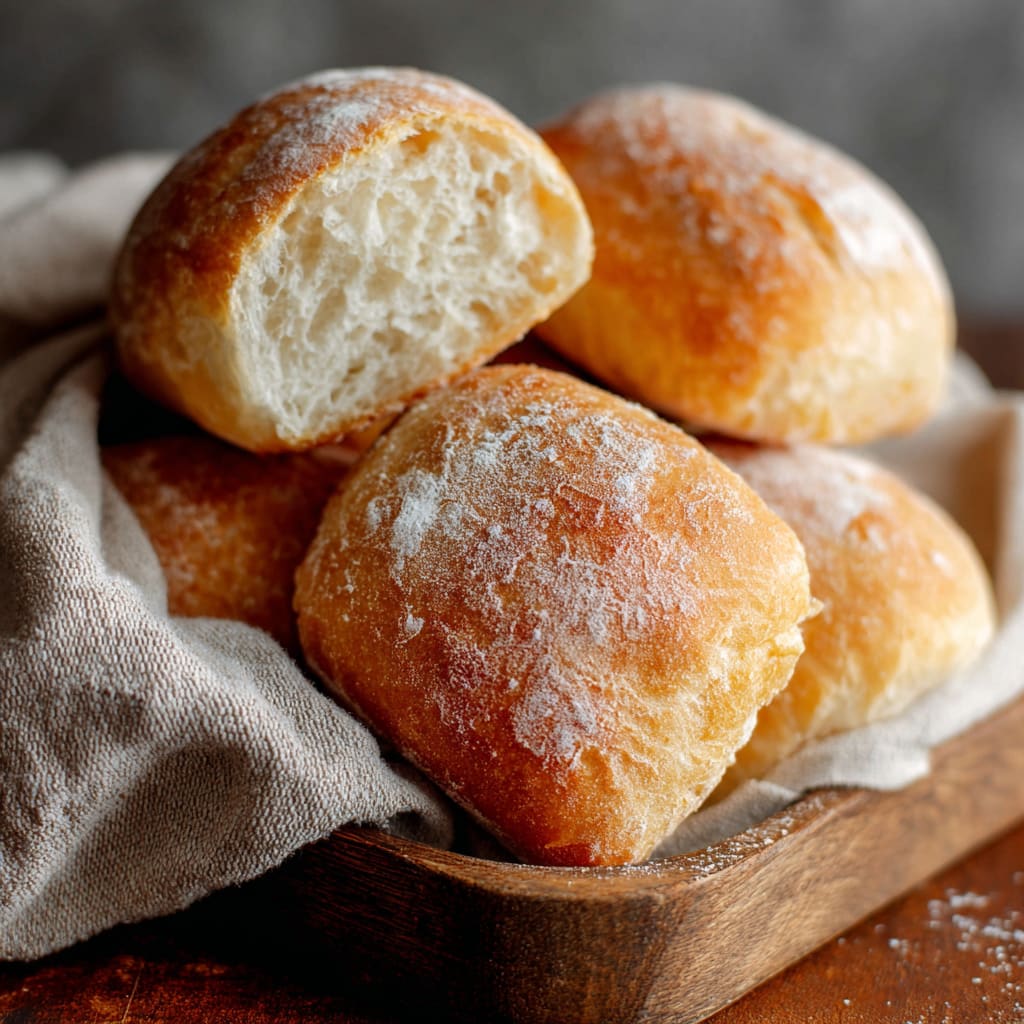
Imagine biting into a Easy Small Batch Ciabatta Roll with its crispy, golden crust giving way to a tender, airy interior filled with beautiful irregular holes. These artisanal-quality rolls deliver the authentic texture and flavor of traditional Italian bread but scaled down to make just enough for a small family meal. Perfect for sandwich lovers and bread enthusiasts alike, these Easy Small Batch Ciabatta Rolls require no special equipment or advanced baking skills. You’ll learn how to create bakery-worthy rolls with a rustic appearance and that distinctive chewy texture that makes ciabatta so beloved worldwide.
Why You’ll Love This Recipe
These Easy Small Batch Ciabatta Rolls are a game-changer for home bakers for several compelling reasons. First, unlike traditional ciabatta that often makes large quantities, this small-batch version yields just 4-5 perfect rolls—ideal for households that don’t need a dozen rolls at once. The contrast between the crackly crust and the open, airy crumb structure creates a sensory delight with each bite.
The high hydration dough creates those signature irregular holes that capture sauces and fillings beautifully. Despite appearing complex, these rolls are surprisingly approachable for bakers of all skill levels. There’s something deeply satisfying about pulling these golden-brown treasures from your oven, knowing you’ve mastered a bakery classic at home.
What’s more, these ciabatta bread rolls are incredibly versatile, serving as the perfect companion to soups, the foundation for outstanding sandwiches, or simply enjoyed with a swipe of good butter and a sprinkle of sea salt.
Ingredients List for the Easy Small Batch Ciabatta Rolls
These simple ingredients transform into extraordinary bread through the magic of proper technique. The high water-to-flour ratio creates the signature open crumb structure that defines authentic ciabatta.
- 1 teaspoon instant yeast
- 240 grams water, at room temperature (approximately 1 cup)
- 300 grams all-purpose flour (approximately 2.5 cups)
- 1 teaspoon salt
Pro Tips
For truly exceptional homemade ciabatta rolls, these three techniques make all the difference:
First, resist the urge to add more flour when handling the dough. The sticky, high-hydration consistency is crucial for developing those beautiful air pockets. Instead of adding flour, wet your hands with cool water when handling the dough to prevent sticking.
Second, the stretch-and-fold technique is non-negotiable. This gentle method develops gluten without knocking out air bubbles. Be patient with each folding session, as this builds the structure that allows your rolls to rise properly.
Finally, creating steam in your oven is essential for achieving that crackling crust. The water pan method works well, but for even better results, spritz the oven walls with water from a spray bottle when you first put the rolls in. This initial burst of steam helps the crust develop its characteristic texture and prevents it from hardening too quickly before the rolls can fully rise.
Instructions
Step 1: Prepare the Dough (1 hour rise time)
In small cup, dissolve instant yeast in lukewarm water and stir to mix together (the mixture should start to bubble and develop a yeasty aroma). Let it sit for 2 minutes.
In a large bowl, add flour and salt. Pour in yeast mixture and whisk until fully combined, scraping down the sides of the bowl (there should be no dry flour particles visible). The mixture is very sticky and wet, with an 80% hydration (flour to water ratio).
Cover the bowl with plastic wrap and let it sit at room temperature for 1 hour (Note that a higher room temperature will speed up the fermentation process and will cause the dough to rise faster).
Step 2: Stretch and Fold the Dough (1.5 hour rise time)
Apply some water onto your hands and stretch and fold the dough in the bowl by folding the edges into the centre, one edge at a time. Wet hands make it easier to work with the dough and it should take you less than a minute to fold all 4 sides. Cover with plastic wrap and let the dough rest for 30 minutes.
Repeat this stretch and fold step, then cover with plastic wrap and let the dough rest for another 30 minutes. Then, repeat the stretch and fold step a final time and let it rest for another 30 minutes. After 3 rounds of stretch and folds with 30 minute resting periods, the dough will rise and approximately double in size.
Step 3: Shape the Dough (40 minutes rise time)
Transfer dough to a floured surface. Note that the dough will still be very sticky and that is okay. Sprinkle dough with a little flour and shape it into a rectangle by gently pulling the dough from underneath. Be careful not to press the dough because the air holes trapped inside might get squeezed out.
Roll the dough into a log and press the edge to seal. Divide the rolled dough into 4-5 equal parts, and place each piece at least two inches apart, onto a well-floured work surface. Let the dough rest for about 40 minutes. This is called the final proofing.
Step 4: Bake the Ciabatta Rolls
Carefully transfer each dough onto a parchment-lined 8×12-inch baking tray. Because the dough is still quite sticky, dust with flour to help with handling it. Set aside.
Fill a baking pan with water and place it in the bottom of your oven. Preheat the oven to 420 F, and allow it to fill with steam from the water. When the oven is ready, slide the baking tray in and spray some water over the dough immediately. Bake for 20 minutes.
Let the bread cool for 20 minutes. To check if the bread is done, you can tap the bottom of the bread with your finger. The bread will sound hollow when they are done.
Variations
The versatility of these Easy Small Batch Ciabatta Rolls allows for delicious customizations. For herb-infused rolls, add 2 tablespoons of chopped fresh rosemary or thyme to the dough during the initial mixing. The aromatic herbs will perfume the bread beautifully.
For a whole wheat variation, substitute up to 100 grams of all-purpose flour with whole wheat flour. This creates a slightly denser roll with a nutty flavor profile, though you may need to increase the water by about 10-15 grams to maintain proper hydration.
Olive lovers can fold in 1/3 cup of chopped kalamata or green olives during the second stretch-and-fold session. This Mediterranean-inspired variation pairs perfectly with tomato-based soups or as the base for an antipasto sandwich.
Storage and Serving
These Easy Small Batch Ciabatta Rolls are best enjoyed on the day they’re baked when the contrast between crisp exterior and tender interior is at its peak. To store leftovers, wrap them in a clean kitchen towel and keep at room temperature for up to 2 days. For longer storage, freeze the completely cooled rolls in airtight bags for up to 3 months. Refresh frozen or day-old rolls by spritzing with water and heating in a 350°F oven for 5-7 minutes.
For serving, these versatile small batch ciabatta rolls shine when split and lightly toasted for sandwiches—particularly with Italian deli meats, provolone, and arugula. They make exceptional garlic bread when split, buttered, and toasted with minced garlic and parsley. For a simple yet elegant appetizer, serve warm rolls alongside good olive oil spiked with balsamic vinegar and a sprinkle of flaky sea salt.
FAQs
Can I use active dry yeast instead of instant yeast?
Yes, you can substitute active dry yeast, but you’ll need to proof it first. Dissolve the yeast in the water with a pinch of sugar and let it sit for 10 minutes until foamy before proceeding with the recipe.
Why is my dough so sticky? Did I do something wrong?
Not at all! The extremely sticky, wet consistency is intentional and crucial for authentic ciabatta. Resist adding extra flour—instead, use wet hands to handle the dough during stretching and folding.
Can I make the dough ahead of time?
Yes! After the first rise, you can refrigerate the dough for up to 24 hours. This slow fermentation actually enhances flavor. Allow the cold dough to sit at room temperature for 30 minutes before proceeding with the shaping step.
My rolls didn’t get those big air pockets. What happened?
The key to those signature holes is gentle handling. Avoid pressing down on the dough during shaping, and ensure you complete all three stretch-and-fold sessions to develop proper structure.
Can I double this recipe?
Absolutely. The Easy Small Batch Ciabatta Rolls recipe doubles beautifully without any adjustments to techniques or timing. Just make sure you have adequate baking trays to space out the rolls properly.

Easy Small Batch Ciabatta Rolls
- Prep Time: 15 mins
- Cook Time: 30 mins
- Total Time: 45 mins
- Yield: 4 people 1x
- Category: Appetizer
- Method: Cooking
- Cuisine: American
Description
Discover how to make Easy Small Batch Ciabatta Rolls with this simple recipe. Perfect for a quick, homemade bread fix!
Ingredients
- 1 teaspoon instant yeast
- 240 grams water, at room temperature (approximately 1 cup)
- 300 grams all-purpose flour (approximately 2.5 cups)
- 1 teaspoon salt
Instructions
- Step 1– Prepare the Dough (1 hour rise time):
In small cup, dissolve instant yeast in lukewarm water and stir to mix together (the mixture should start to bubble and develop a yeasty aroma). Let it sit for 2 minutes.
In a large bowl, add flour and salt. Pour in yeast mixture and whisk until fully combined, scraping down the sides of the bowl (there should be no dry flour particles visible). The mixture is very sticky and wet, with an 80% hydration (flour to water ratio).
Cover the bowl with plastic wrap and let it sit at room temperature for 1 hour (Note that a higher room temperature will speed up the fermentation process and will cause the dough to rise faster). - Step 2- Stretch and Fold the Dough (1: 5 hour rise time):
Apply some water onto your hands and stretch and fold the dough in the bowl by folding the edges into the centre, one edge at a time. Wet hands make it easier to work with the dough and it should take you less than a minute to fold all 4 sides. Cover with plastic wrap and let the dough rest for 30 minutes.
Repeat this stretch and fold step, then cover with plastic wrap and let the dough rest for another 30 minutes. Then, repeat the stretch and fold step a final time and let it rest for another 30 minutes. After 3 rounds of stretch and folds with 30 minute resting periods, the dough will rise and approximately double in size. - Step 3– Shape the Dough (40 minutes rise time):
Transfer dough to a floured surface. Note that the dough will still be very sticky and that is okay. Sprinkle dough with a little flour and shape it into a rectangle by gently pulling the dough from underneath. Be careful not to press the dough because the air holes trapped inside might get squeezed out.
Roll the dough into a log and press the edge to seal. Divide the rolled dough into 4-5 equal parts, and place each piece at least two inches apart, onto a well-floured work surface. Let the dough rest for about 40 minutes. This is called the final proofing. - Step 4– Bake the Ciabatta Rolls:
Carefully transfer each dough onto a parchment-lined 8×12-inch baking tray. Because the dough is still quite sticky, dust with flour to help with handling it. Set aside.
Fill a baking pan with water and place it in the bottom of your oven. Preheat the oven to 420 F, and allow it to fill with steam from the water. When the oven is ready, slide the baking tray in and spray some water over the dough immediately. Bake for 20 minutes.
Let the bread cool for 20 minutes. To check if the bread is done, you can tap the bottom of the bread with your finger. The bread will sound hollow when they are done.
Notes
Try This Recipe and Leave a comment Below, your opinion matters to me!
Nutrition
- Serving Size: 4 serving
- Calories: 400
- Sugar: 5g
- Sodium: 400mg
- Fat: 10g
- Saturated Fat: 3g
- Unsaturated Fat: 7g
- Trans Fat: 0g
- Carbohydrates: 40g
- Fiber: 5g
- Protein: 15g
- Cholesterol: 50mg