
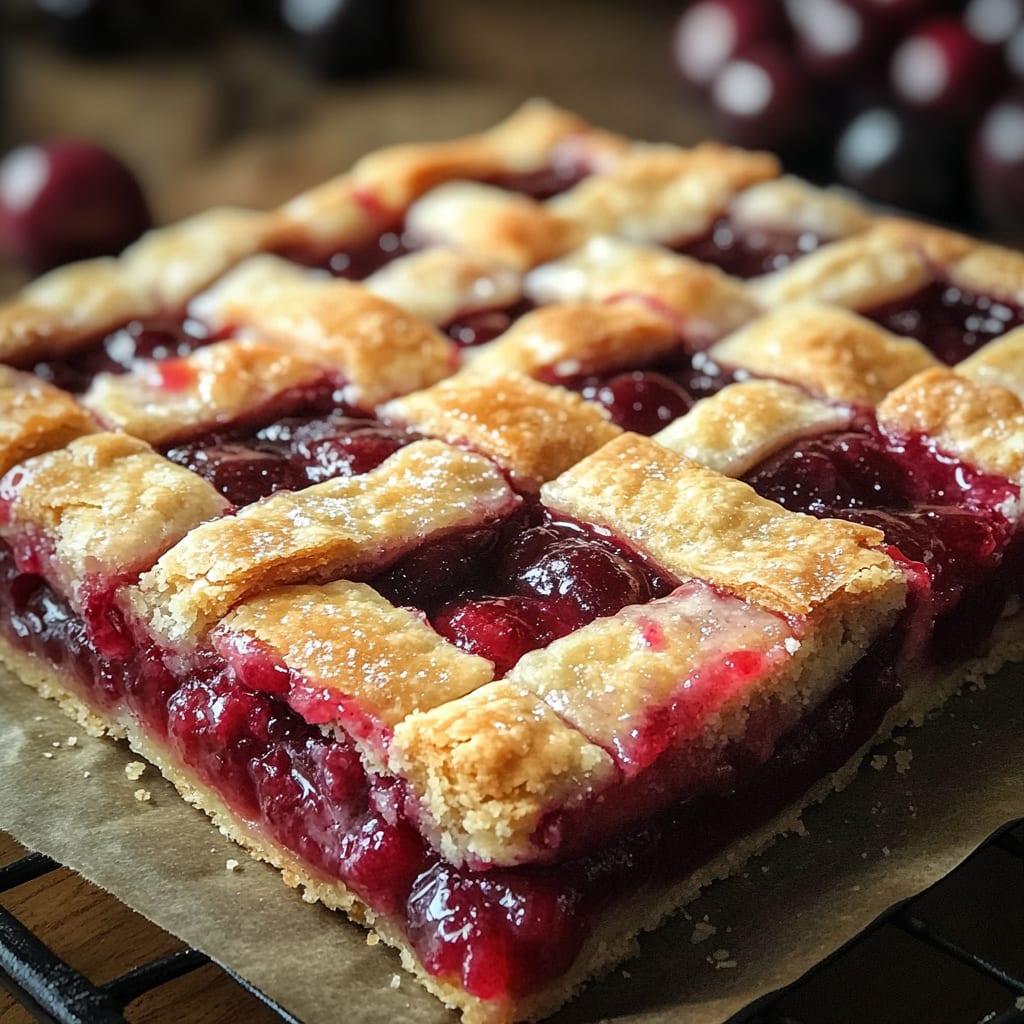
Imagine sinking your teeth into buttery, crumbly shortbread topped with sweet-tart cherry filling that’s perfectly jammy with just the right amount of ooze. These Easy Cherry Pie Bars deliver all the delicious flavor of traditional cherry pie but in convenient, handheld bar form! The contrast between the tender crust, juicy fruit layer, and golden crumble topping creates an irresistible treat that’s perfect for potlucks, family gatherings, or satisfying your sweet tooth any day of the week. You’ll learn how to create these simple yet impressive cherry pie bars with minimal effort and maximum flavor impact.
Why You’ll Love This Recipe
These Easy Cherry Pie Bars will quickly become a staple in your dessert rotation for so many reasons. First, they offer the perfect balance of textures—a sturdy shortbread base that provides the ideal foundation, a luscious cherry filling that’s bursting with bright, fruity flavor, and a buttery crumble topping that adds a delightful crunch. Unlike traditional pie, these bars require no fussy pie crust skills or crimping techniques.
The convenience factor is unmatched—they’re portable, pre-portioned, and perfect for feeding a crowd. You can enjoy them warm with a scoop of vanilla ice cream melting over the top or at room temperature when you need a sweet treat on the go. The vibrant red filling peeking through the golden crumble creates a dessert that’s as beautiful as it is delicious.
Best of all, these cherry pie bars come together in a fraction of the time it takes to make a traditional pie, making them ideal for both planned occasions and last-minute dessert emergencies when you need something impressive without hours of work.
Ingredients
For the Crust and Topping:
- 3 cups (375g) all-purpose flour
- 1 cup (200g) granulated sugar
- 1 teaspoon baking powder
- 1/4 teaspoon salt
- 1 cup (226g) cold unsalted butter, cubed
- 1 large egg, beaten
- 1/2 teaspoon almond extract (optional)
For the Cherry Filling:
- 4 cups (600g) pitted cherries (fresh or frozen)
- 2/3 cup (133g) granulated sugar
- 3 tablespoons cornstarch
- 2 tablespoons lemon juice
- 1 teaspoon vanilla extract
- 1/4 teaspoon almond extract (optional)
The cherries are the star of these Easy Cherry Pie Bars, so use the best quality you can find. Sweet cherries like Bing work beautifully, but tart cherries provide a wonderful contrast to the sweet crust. If using frozen cherries, there’s no need to thaw them first—simply measure and use them directly from the freezer. In a pinch, you can substitute two 21-ounce cans of cherry pie filling, though the homemade filling delivers superior flavor.
Pro Tips
Perfect Your Crust Texture
For the ideal shortbread base, avoid overworking the dough. Use cold butter and pulse it with the dry ingredients in a food processor until the mixture resembles coarse crumbs. This creates those lovely pockets of butter that will make your crust tender and flaky. If making by hand, use a pastry cutter or two forks to cut the butter into the flour mixture. The mixture should look like pebbles with some larger pieces of butter still visible.
Master the Cherry Filling Consistency
The secret to perfect cherry pie bars is getting the filling consistency just right. Cook the filling until it thickens enough to coat the back of a spoon but still maintains some flow. If your filling seems too runny, add an additional teaspoon of cornstarch mixed with a tablespoon of cold water. If it’s too thick, a splash of cherry juice or water will thin it nicely. Remember that the filling will continue to thicken as it cools.
Achieve the Perfect Crumble Topping
Reserve about 1 cup of your crust mixture for the topping, then enhance it by adding 1/4 cup of rolled oats and 2 tablespoons of sliced almonds for extra texture and flavor. For the best crumble appearance, gently squeeze portions of the topping in your hand to create varying sizes of crumbles before sprinkling over the cherry layer. This creates beautiful texture and ensures perfect bites with both crumble and cherries.
Instructions
Step 1: Prepare Your Pan
Preheat your oven to 350°F (175°C). Line a 9×13 inch baking pan with parchment paper, leaving some overhang on the sides to make bar removal easier. The parchment paper is crucial for these Easy Cherry Pie Bars as it prevents sticking and makes cleanup a breeze. Lightly grease any exposed parts of the pan with butter or cooking spray.
Step 2: Make the Crust Mixture
In a large bowl, whisk together the flour, sugar, baking powder, and salt until well combined. Add the cold cubed butter and use a pastry cutter or your fingertips to work it into the dry ingredients until the mixture resembles coarse crumbs. Mix in the beaten egg and almond extract (if using) until the dough starts to come together. It should be crumbly but hold together when pressed. Reserve 1 cup of this mixture for the topping and refrigerate it while preparing the filling.
Step 3: Press and Pre-Bake the Crust
Press the remaining crust mixture firmly and evenly into the bottom of your prepared pan. Use the bottom of a measuring cup to create a smooth, even surface. Bake for 15 minutes until the edges just begin to turn golden. This pre-baking step ensures your base will be sturdy enough to hold the juicy cherry filling without becoming soggy.
Step 4: Prepare the Cherry Filling
While the crust bakes, combine the cherries, sugar, cornstarch, and lemon juice in a medium saucepan over medium heat. Cook, stirring frequently, until the mixture begins to bubble and thicken, about 5-7 minutes. Remove from heat and stir in the vanilla and almond extracts. The filling should coat the back of a spoon but still be pourable. Let it cool slightly before using.
Step 5: Assemble and Bake
Pour the warm cherry filling over the par-baked crust, spreading it evenly with a spatula. Take the reserved crumble mixture from the refrigerator and sprinkle it evenly over the cherry layer. Return the pan to the oven and bake for an additional 25-30 minutes, until the topping is golden brown and the filling is bubbly around the edges.
Step 6: Cool and Slice
Allow the cherry pie bars to cool completely in the pan on a wire rack before lifting out using the parchment paper overhang. For clean cuts, refrigerate for at least 2 hours before slicing into bars. This cooling time allows the filling to set properly, ensuring neat, picture-perfect squares.
Variations
Mixed Berry Cherry Bars
Create a delightful twist on these Easy Cherry Pie Bars by replacing half the cherries with a mix of blueberries, raspberries, and blackberries. This variation offers beautiful color contrast and complex flavor layers while maintaining the classic bar structure. Adjust the sugar slightly depending on the sweetness of your berries. The mixed berry version pairs exceptionally well with a lemon glaze drizzled over the top after cooling.
Chocolate Cherry Delight
For chocolate lovers, add 1/2 cup mini chocolate chips to the cherry filling just before pouring it over the crust. Alternatively, add 3 tablespoons of unsweetened cocoa powder to the crust mixture for a chocolate shortbread base that beautifully complements the cherry filling. For an extra indulgent touch, drizzle the cooled bars with melted white or dark chocolate before serving. These chocolate-cherry bars make a sophisticated dessert option for dinner parties or special occasions.
Gluten-Free Cherry Pie Bars
Easily adapt this recipe for gluten-free diets by substituting the all-purpose flour with a 1:1 gluten-free baking blend. Add 1/4 teaspoon of xanthan gum if your blend doesn’t already include it to ensure the proper texture. The cherry filling is naturally gluten-free, making this an easy adaptation that doesn’t sacrifice flavor or texture. These gluten-free cherry pie bars will be appreciated by everyone at the table, regardless of dietary restrictions.
Storage and Serving
These Easy Cherry Pie Bars keep beautifully at room temperature in an airtight container for up to 2 days. For longer storage, refrigerate them for up to a week, though the crust may soften slightly over time. They also freeze exceptionally well—layer them between sheets of parchment paper in a freezer-safe container and freeze for up to 3 months. Thaw overnight in the refrigerator before serving.
For an elevated dessert experience, warm individual bars slightly in the microwave for 15-20 seconds and top with a scoop of vanilla ice cream or fresh whipped cream. The contrast between the warm bar and cold topping is absolutely divine. For brunch or coffee gatherings, dust the bars lightly with powdered sugar just before serving for an elegant presentation.
Create a stunning dessert platter by cutting the bars into smaller bite-sized squares and arranging them alongside fresh cherries, chocolate-dipped strawberries, and small brownie bites for a varied dessert table that will impress your guests.
FAQs
Can I use canned cherry pie filling instead of making my own?
Yes, you can substitute two 21-ounce cans of cherry pie filling for the homemade version. If using canned filling, consider adding 1/2 teaspoon of almond extract and 1 tablespoon of lemon juice to brighten the flavors and cut through some of the sweetness.
Why did my cherry filling turn out runny?
If your filling is runny, it likely wasn’t cooked long enough or needed more cornstarch. The filling should be visibly thickened before pouring over the crust. Remember that it will continue to set as it cools, but should already have body when hot.
Can I make these bars ahead of time for an event?
Absolutely! These Easy Cherry Pie Bars are perfect for make-ahead occasions. Prepare them up to 2 days in advance and store at room temperature, or freeze for longer storage. They actually slice more cleanly after being completely chilled.
What’s the best way to cut clean squares?
For picture-perfect bars, chill them completely (at least 2 hours) in the refrigerator before cutting. Use a sharp knife dipped in hot water and wiped clean between cuts. The parchment paper overhang also helps lift the entire dessert out for easier cutting on a board.
Can I use other fruits instead of cherries?
Yes! This versatile recipe works wonderfully with other fruits. Try blueberries, peaches, strawberries, or a combination. Adjust the sugar based on the sweetness of your fruit, and you may need to adjust the cornstarch slightly depending on how juicy your substitution is.
Conclusion
These Easy Cherry Pie Bars are comfort food at its finest — portable pockets of cherry pie goodness that combine nostalgic flavors with modern convenience. The contrast between the buttery shortbread base, vibrant cherry filling, and crumbly topping creates a dessert that satisfies on every level without the fuss of traditional pie. It’s the kind of dish that brings people together, whether at summer picnics, holiday gatherings, or simple family dinners when you need a reliable sweet ending. With these bars in your recipe collection, you’ll always have a crowd-pleasing dessert at your fingertips.
Print
Easy Cherry Pie Bars
- Prep Time: 20 minutes
- Cook Time: 45 minutes
- Total Time: 1 hour 5 minutes
- Yield: 12 bars 1x
- Category: Dessert
- Method: Baking
- Cuisine: Americaine
Description
Easy Cherry Pie Bars packed with juicy cherries and a buttery crust. Quick, comforting, and perfect for a crowd!
Ingredients
- 3 cups (375g) all-purpose flour
- 1 cup (200g) granulated sugar
- 1 teaspoon baking powder
- 1/4 teaspoon salt
- 1 cup (226g) cold unsalted butter, cubed
- 1 large egg, beaten
- 1/2 teaspoon almond extract (optional)
- 4 cups (600g) pitted cherries (fresh or frozen)
- 2/3 cup (133g) granulated sugar
- 3 tablespoons cornstarch
- 2 tablespoons lemon juice
- 1 teaspoon vanilla extract
- 1/4 teaspoon almond extract (optional)
Instructions
- Step 1: Prepare Your Pan Preheat your oven to 350°F (175°C). Line a 9×13 inch baking pan with parchment paper, leaving some overhang on the sides to make bar removal easier. The parchment paper is crucial for these Easy Cherry Pie Bars as it prevents sticking and makes cleanup a breeze. Lightly grease any exposed parts of the pan with butter or cooking spray.
- Step 2: Make the Crust Mixture In a large bowl, whisk together the flour, sugar, baking powder, and salt until well combined. Add the cold cubed butter and use a pastry cutter or your fingertips to work it into the dry ingredients until the mixture resembles coarse crumbs. Mix in the beaten egg and almond extract (if using) until the dough starts to come together. It should be crumbly but hold together when pressed. Reserve 1 cup of this mixture for the topping and refrigerate it while preparing the filling.
- Step 3: Press and Pre-Bake the Crust Press the remaining crust mixture firmly and evenly into the bottom of your prepared pan. Use the bottom of a measuring cup to create a smooth, even surface. Bake for 15 minutes until the edges just begin to turn golden. This pre-baking step ensures your base will be sturdy enough to hold the juicy cherry filling without becoming soggy.
- Step 4: Prepare the Cherry Filling While the crust bakes, combine the cherries, sugar, cornstarch, and lemon juice in a medium saucepan over medium heat. Cook, stirring frequently, until the mixture begins to bubble and thicken, about 5-7 minutes. Remove from heat and stir in the vanilla and almond extracts. The filling should coat the back of a spoon but still be pourable. Let it cool slightly before using.
- Step 5: Assemble and Bake Pour the warm cherry filling over the par-baked crust, spreading it evenly with a spatula. Take the reserved crumble mixture from the refrigerator and sprinkle it evenly over the cherry layer. Return the pan to the oven and bake for an additional 25-30 minutes, until the topping is golden brown and the filling is bubbly around the edges.
- Step 6: Cool and Slice Allow the cherry pie bars to cool completely in the pan on a wire rack before lifting out using the parchment paper overhang. For clean cuts, refrigerate for at least 2 hours before slicing into bars. This cooling time allows the filling to set properly, ensuring neat, picture-perfect squares.
Notes
Fresh ingredients will always yield the best flavor results.
Nutrition
- Serving Size: 1 bar
- Calories: 320
- Sugar: 20g
- Sodium: 150mg
- Fat: 15g
- Saturated Fat: 9g
- Unsaturated Fat: 5g
- Trans Fat: 0g
- Carbohydrates: 40g
- Fiber: 1g
- Protein: 3g
- Cholesterol: 50mg


