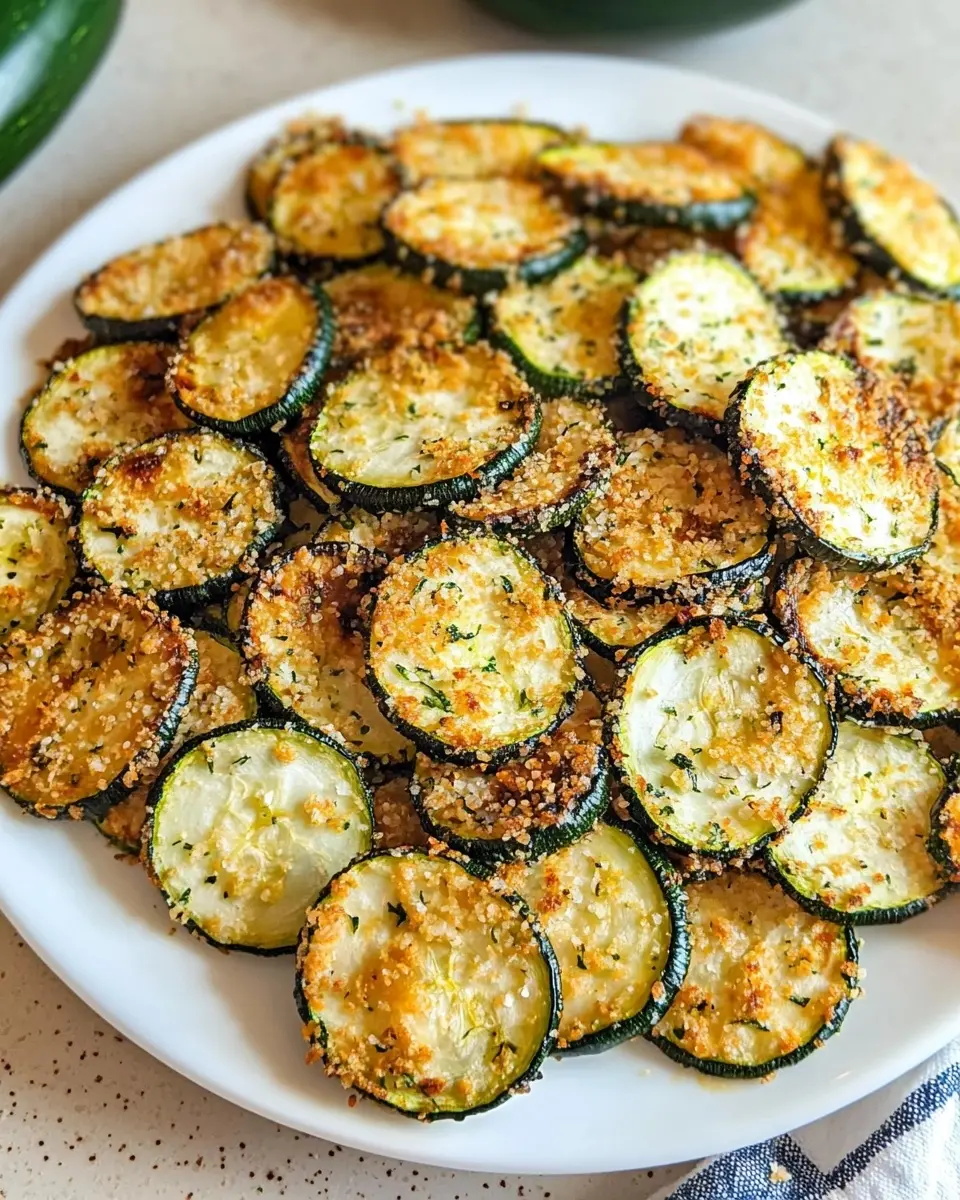
Imagine biting into a perfectly Crispy Baked Zucchini Chip – that satisfying crunch giving way to the subtle, garden-fresh flavor of zucchini enhanced with just the right seasoning. These irresistible chips transform ordinary zucchini into a guilt-free snack that rivals any store-bought potato chip. Crispy Baked Zucchini Chips are the perfect solution for gardeners with an abundance of summer squash or anyone seeking a healthier alternative to traditional fried snacks. You’ll learn how to achieve that perfect crispness without frying, ensuring these nutritious treats disappear from your serving plate faster than you can make them!
Why You’ll Love This Recipe
These Crispy Baked Zucchini Chips will quickly become your go-to snack for several compelling reasons. First, they deliver that satisfying crunch you crave from a chip but with a fraction of the calories and fat of store-bought varieties. The beautiful contrast between the crispy exterior and the tender zucchini center creates an addictive texture experience that keeps you reaching for more.
What truly sets these oven-baked zucchini chips apart is their versatility – they work equally well as an afternoon snack, a cocktail party appetizer, or a side dish to complement your main course. The natural sweetness of the zucchini concentrates during baking, creating a surprisingly complex flavor profile that both adults and children love.
Perhaps best of all, this recipe transforms an abundant garden vegetable that might otherwise go to waste into something truly special. With just a handful of pantry ingredients and minimal hands-on time, you’ll create a healthy, crave-worthy snack that will have everyone asking for your zucchini chip secret.
Ingredients
For perfect Crispy Baked Zucchini Chips, you’ll need:
- 2 medium zucchini (approximately 1 pound or 450g)
- 1 tablespoon olive oil
- 1/2 teaspoon kosher salt
- 1/4 teaspoon freshly ground black pepper
- 1/2 teaspoon garlic powder
- 1/4 teaspoon paprika (sweet or smoked)
- 2 tablespoons freshly grated Parmesan cheese (optional)
The zucchini should be fresh and firm – avoid specimens that feel soft or have wrinkled skin. For the crispiest results, choose medium-sized zucchini rather than large ones, as they contain less water and seeds. The olive oil helps conduct heat evenly while supporting that essential crispiness, but a light spritz of cooking spray can substitute for those watching their fat intake. The Parmesan adds a savory umami dimension but can be omitted for dairy-free baked zucchini rounds.
Pro Tips
Uniform Thickness is Critical: The single most important factor for perfectly Crispy Baked Zucchini Chips is slicing the zucchini to a consistent thickness. Aim for 1/8-inch (3mm) slices – any thicker and they’ll remain soft in the middle; any thinner and they’ll burn before crisping. A mandoline slicer is ideal for this job, but a steady hand and sharp knife can work well too. Take your time with this step, as it will directly impact your results.
Remove Excess Moisture: Zucchini naturally contains high water content, which is the enemy of crispiness. After slicing, place your zucchini rounds on paper towels and sprinkle lightly with salt. Let them sit for 15-30 minutes, then pat thoroughly dry before seasoning and baking. This simple step draws out moisture and concentrates flavor, resulting in much crispier chips.
Perfect Your Baking Method: For optimal crispness, use a low oven temperature (225°F/107°C) and patience. Arrange the zucchini chips in a single layer without overlapping on a baking sheet lined with parchment paper or a silicone mat. Halfway through baking, rotate the pan and flip the chips for even browning. The extended low-temperature baking essentially dehydrates the zucchini while preserving its flavor, resulting in that coveted crunch.
Instructions
Step 1: Prepare the Zucchini
Begin by washing your zucchini thoroughly and drying them with a clean kitchen towel. Trim off both ends, then use a mandoline slicer set to 1/8-inch thickness to create uniform rounds. If you don’t have a mandoline, use a sharp knife and steady hand to slice as evenly as possible. Place the slices in a single layer on paper towels and sprinkle lightly with a pinch of salt to draw out moisture. Let them sit for 15-30 minutes.
Step 2: Remove Excess Moisture
After the salting period, you’ll notice moisture beading on the zucchini surface. Pat each slice thoroughly dry with paper towels, pressing gently to remove as much water as possible. This crucial step ensures your Crispy Baked Zucchini Chips will crisp properly rather than steam in the oven.
Step 3: Season the Chips
Preheat your oven to 225°F (107°C) and line two large baking sheets with parchment paper or silicone mats. In a large bowl, combine the olive oil, garlic powder, paprika, black pepper, and half the salt. Add the dried zucchini slices and gently toss until evenly coated. If using Parmesan, sprinkle it over the slices now, pressing lightly to adhere.
Step 4: Arrange and Bake
Arrange the seasoned zucchini slices in a single layer on the prepared baking sheets, ensuring they don’t overlap. This allows air to circulate around each chip, promoting even crisping. Place in the oven and bake for 1 hour and 30 minutes to 2 hours, depending on your oven and the moisture content of your zucchini.
Step 5: Check and Flip
After the first 45 minutes, rotate the baking sheets and flip each zucchini slice. Some pieces may be browning faster than others – remove any that are already crisp and golden. Continue baking the remaining chips, checking every 15 minutes until they reach your desired level of crispness. They should feel dry to the touch and have a golden brown color.
Step 6: Cool and Enjoy
Remove the finished Crispy Baked Zucchini Chips from the oven and let them cool completely on the baking sheets. They’ll continue to crisp as they cool. Once at room temperature, taste and adjust seasoning if needed, adding a final light sprinkle of salt if desired. Serve immediately or store properly for later enjoyment.
Variations
Spicy Italian Zucchini Chips: Transform your Crispy Baked Zucchini Chips with an Italian twist by adding 1/2 teaspoon of dried Italian seasoning, a pinch of red pepper flakes, and doubling the Parmesan cheese. The herbs and spicy kick complement the mild zucchini perfectly, creating a sophisticated snack that pairs wonderfully with a glass of wine or as a side for pasta dishes.
Ranch-Style Zucchini Crisps: For a crowd-pleasing variation, prepare a ranch-inspired seasoning by combining 1 teaspoon dried dill, 1/2 teaspoon garlic powder, 1/2 teaspoon onion powder, and 1/4 teaspoon dried parsley with your salt and pepper. This flavor profile makes these healthy zucchini chips particularly appealing to children and creates a perfect accompaniment for veggie platters or lunchboxes.
Vegan Cheesy Zucchini Chips: Create dairy-free baked zucchini rounds with a cheesy flavor by sprinkling 2 tablespoons of nutritional yeast over your oiled zucchini slices before baking. Add a pinch of turmeric for color and a subtle earthy flavor. This variation maintains the satisfying umami quality that cheese typically provides while keeping the recipe completely plant-based and suitable for vegan diets.
Storage and Serving
Crispy Baked Zucchini Chips are best enjoyed immediately after cooling, when they’re at their crunchiest peak. However, if you have leftovers, store them in an airtight container with a paper towel at the bottom to absorb any residual moisture. Keep at room temperature for up to 2 days. Avoid refrigeration, as this introduces moisture and will make your chips soggy. If they lose some crispness, you can refresh them with a quick 5-minute bake in a 350°F (175°C) oven.
For serving, these versatile chips shine in multiple settings. Create an elevated snack board by pairing them with hummus, tzatziki, or a roasted red pepper dip for dipping. They make a sophisticated garnish when perched atop creamy soups, adding textural contrast and visual appeal. For a nutritious lunchbox addition, package a small portion alongside a sandwich as a healthier alternative to potato chips, providing the same satisfying crunch with significantly more nutrients and fewer calories.
FAQs
Why aren’t my zucchini chips getting crispy?
The most common reason is excess moisture. Make sure you’re salting and thoroughly drying the zucchini before baking. Also, verify your oven temperature with an oven thermometer, as ovens can run cooler than their setting indicates. Finally, ensure you’re slicing the zucchini thinly and evenly (1/8-inch thick) for optimal crispness.
Can I make these in an air fryer?
Yes! Air fryer baked zucchini rounds cook much faster. Preheat your air fryer to 200°F (93°C), arrange seasoned zucchini in a single layer (working in batches if needed), and cook for 15-20 minutes until crisp, shaking the basket halfway through.
How can I tell when the chips are done?
Properly finished Crispy Baked Zucchini Chips should be golden brown, slightly shrunken in size, and feel dry to the touch. They’ll continue to crisp as they cool, so it’s okay if they still have just a slight give when hot.
Can I make these ahead for a party?
Yes, but prepare them no more than 24 hours in advance and store in a single layer if possible. If they soften, refresh in a 350°F (175°C) oven for 3-5 minutes before serving.
Are these suitable for keto or low-carb diets?
Absolutely! Zucchini is naturally low in carbohydrates, making these Crispy Baked Zucchini Chips perfect for keto, low-carb, and paleo dietary plans. Just omit the Parmesan for strict paleo compliance.
Conclusion
These Crispy Baked Zucchini Chips are snacking perfection — simultaneously light and satisfying, with a garden-fresh flavor and addictive crunch that makes healthy eating genuinely enjoyable. They’re the kind of dish that transforms abundant summer produce into a crave-worthy treat that disappears within minutes of serving. Whether you’re looking to use up garden zucchini, seeking healthier alternatives to store-bought chips, or simply want to expand your repertoire of nutritious snacks, this recipe delivers on all fronts with minimal effort and maximum flavor.
Print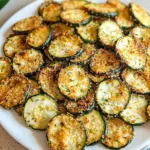
Crispy Baked Zucchini Chips
Description
Ditch the potato chips! These crispy zucchini chips are oven-baked to perfection with just the right amount of seasoning for your next guilt-free snacking session.
Ingredients
- 2 medium zucchini (approximately 1 pound or 450g)
- 1 tablespoon olive oil
- 1/2 teaspoon kosher salt
- 1/4 teaspoon freshly ground black pepper
- 1/2 teaspoon garlic powder
- 1/4 teaspoon paprika (sweet or smoked)
- 2 tablespoons freshly grated Parmesan cheese (optional)
Instructions
- Wash and dry zucchini, then slice into uniform 1/8-inch (3mm) rounds using a mandoline or sharp knife.
- Place zucchini slices on paper towels, sprinkle lightly with salt, and let sit for 15-30 minutes to draw out moisture.
- Thoroughly pat zucchini dry with paper towels, pressing gently to remove as much water as possible.
- Preheat oven to 225°F (107°C) and line two baking sheets with parchment paper or silicone mats.
- In a large bowl, combine olive oil, garlic powder, paprika, black pepper, and half the salt. Add dried zucchini slices and toss until evenly coated.
- If using Parmesan, sprinkle over the seasoned slices, pressing lightly to adhere.
- Arrange zucchini in a single layer on prepared baking sheets, ensuring they don’t overlap.
- Bake for 1 hour and 30 minutes to 2 hours total, rotating pans and flipping slices after the first 45 minutes.
- Check chips every 15 minutes after flipping, removing any that are already golden and crisp.
- Allow chips to cool completely on baking sheets (they’ll continue to crisp as they cool).
- Taste and adjust seasoning if needed before serving or storing in an airtight container.


