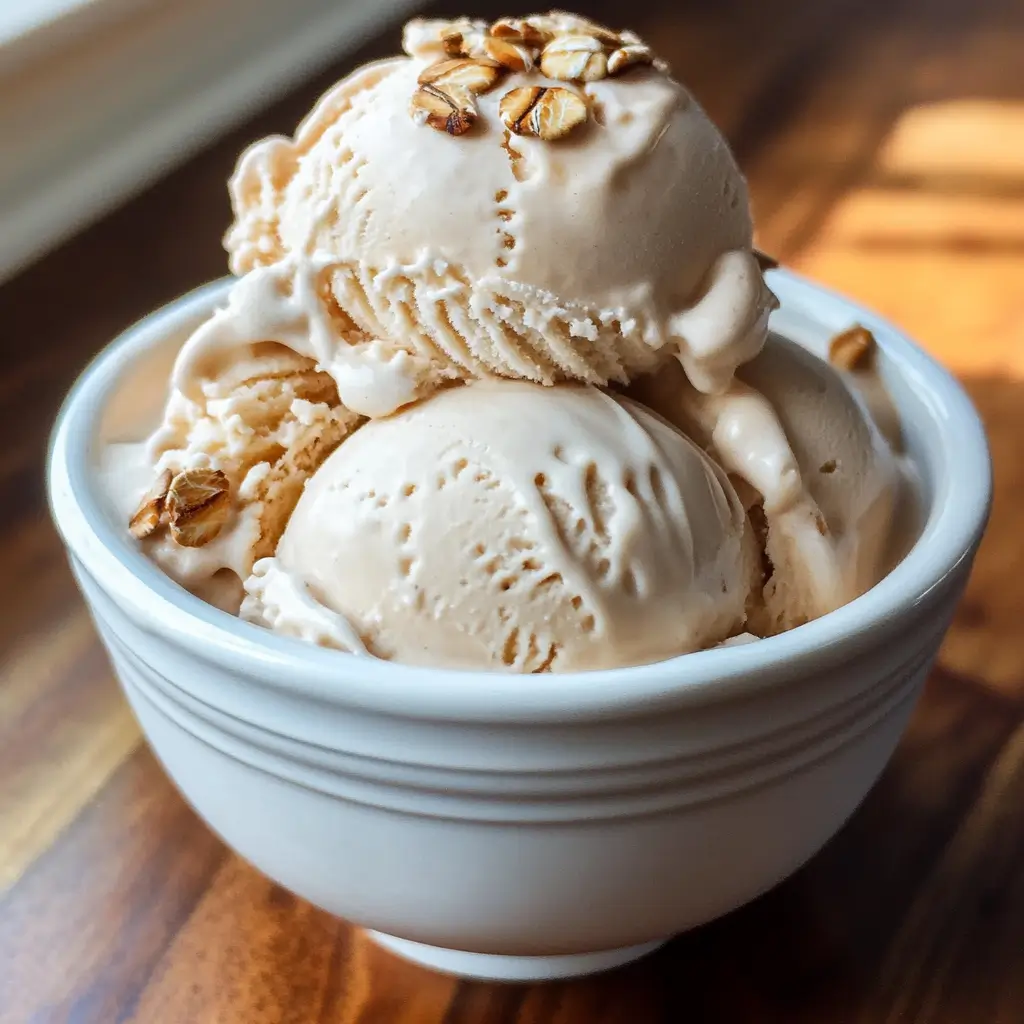
Silky, luscious, and irresistibly smooth—Creamy Oat Milk Ice Cream transforms plant-based desserts into a dairy-free dream. This velvety frozen treat delivers all the rich indulgence of traditional ice cream without a drop of dairy, making it perfect for everyone from vegans to the lactose-intolerant. The natural sweetness of oat milk creates a perfectly balanced canvas for flavors to shine through. You’ll learn how to create a professional-quality Creamy Oat Milk Ice Cream with the perfect scoopable texture that will have everyone coming back for seconds.
Why You’ll Love This Recipe
This Creamy Oat Milk Ice Cream stands out among dairy-free frozen desserts for so many delicious reasons. First, the texture is extraordinary—silky smooth with none of the iciness or chalkiness that plagues many vegan ice creams. The oat milk provides a naturally creamy base with subtle notes of toasted grain that complement whatever flavors you add.
Unlike coconut-based alternatives, this oat milk version doesn’t overpower your chosen flavorings with tropical notes. It’s also more environmentally friendly than almond milk options and gentler on the stomach than soy-based varieties. The recipe requires minimal ingredients yet delivers maximum satisfaction with each spoonful.
What truly sets this Creamy Oat Milk Ice Cream apart is its remarkable scoopability—it maintains that perfect consistency that allows it to yield beautifully to an ice cream scoop without being too hard or too soft. Whether you’re serving it in cones, bowls, or alongside warm desserts, this oat milk frozen treat will impress even the most dedicated dairy ice cream enthusiasts.
Ingredients
For the perfect Creamy Oat Milk Ice Cream, you’ll need:
- 3 cups (710ml) barista-quality oat milk (the extra fat content makes for creamier results)
- 1 cup (200g) granulated sugar
- ¼ cup (60ml) neutral oil like grapeseed or refined coconut oil
- 2 tablespoons (30ml) pure vanilla extract
- ¼ teaspoon fine sea salt
- 2 tablespoons (16g) cornstarch or arrowroot powder
- ¼ cup (60ml) light corn syrup or glucose syrup (helps prevent crystallization)
- 2 tablespoons (30ml) vodka (optional, prevents hard freezing)
The key to exceptional oat-based ice cream lies in using barista-grade oat milk, which contains more fat than regular versions. This additional fat content mimics the richness of cream, resulting in that luxurious mouthfeel we all crave in premium ice cream. The cornstarch acts as an emulsifier, binding everything together for that perfect scoop-friendly texture.
Pro Tips
Select The Right Oat Milk: For truly exceptional Creamy Oat Milk Ice Cream, always choose barista-quality oat milk. These varieties contain added oils that significantly improve the final texture. If you can only find regular oat milk, add an additional 2 tablespoons of oil to compensate. Avoid oat milks with added flavors or sweeteners that might compete with your intended flavor profile.
Perfect Your Base Mixture: The key to silky-smooth texture lies in proper thickening. Whisk your cornstarch with a small amount of cold oat milk first to create a slurry, then add to your heating mixture. This prevents lumps from forming. Cook until the mixture coats the back of a spoon and leaves a clear line when you run your finger through it—this “nappe” stage ensures proper thickening.
Chill and Churn Strategically: After cooking your base, chill it thoroughly—overnight is ideal. A properly chilled base freezes more efficiently during churning, creating smaller ice crystals for smoother texture. When churning, stop when the mixture resembles soft-serve (about 25 minutes in most machines). Over-churning incorporates too much air, resulting in a less creamy final product. For optimal scoopability, freeze your churned Creamy Oat Milk Ice Cream for at least 4 hours before serving.
Instructions
Step 1: Create Your Base
In a medium saucepan, combine 2½ cups of the oat milk with the sugar, salt, and corn syrup. Place over medium heat and stir occasionally until the sugar completely dissolves. Meanwhile, in a small bowl, whisk together the remaining ½ cup oat milk with the cornstarch until smooth, creating a slurry with no lumps. Keep this mixture close by.
Step 2: Thicken The Mixture
When the oat milk mixture begins to simmer gently around the edges (small bubbles forming, but not a rolling boil), slowly whisk in the cornstarch slurry. Continue cooking, stirring constantly, for about 2-3 minutes until the mixture thickens noticeably and coats the back of a spoon. Remove from heat immediately once thickened to avoid overheating.
Step 3: Finish The Base
Add the oil and vanilla extract to the hot mixture, whisking vigorously to incorporate completely. The oil helps create the rich mouthfeel that makes your Creamy Oat Milk Ice Cream so satisfying. If using, add the vodka now (it helps prevent the ice cream from freezing too hard). Pour the mixture into a heat-safe container, place a piece of plastic wrap directly on the surface to prevent a skin from forming, and refrigerate until completely cold, at least 4 hours or preferably overnight.
Step 4: Churn Your Ice Cream
Once thoroughly chilled, pour the mixture into your ice cream maker and churn according to the manufacturer’s instructions, usually 20-25 minutes. The ice cream is ready when it resembles soft-serve consistency—thick enough to hold its shape but still slightly soft. Avoid over-churning, which can incorporate too much air and create a less creamy texture.
Step 5: Freeze For Perfect Scoopability
Transfer your freshly churned Creamy Oat Milk Ice Cream to a freezer-safe container. For optimal texture, use a shallow container rather than a deep one. Press a piece of parchment paper or plastic wrap directly onto the surface of the ice cream to prevent ice crystals from forming. Seal tightly and freeze for at least 4 hours or until firm enough to scoop perfectly. Allow to sit at room temperature for 5-10 minutes before serving for the ideal scooping texture.
Variations
Chocolate Oat Milk Ice Cream: Transform your Creamy Oat Milk Ice Cream into a chocolate lover’s dream by adding ½ cup of unsweetened cocoa powder to the base mixture when combining with sugar. Whisk thoroughly to remove any lumps, then proceed with the recipe as written. For an even more intense chocolate experience, fold in ½ cup of dairy-free chocolate chips or chopped dark chocolate during the last 2 minutes of churning.
Cookie Butter Swirl: For a spiced twist on your oat milk ice cream, prepare the base as directed, then reduce the vanilla to 1 tablespoon and add 1 teaspoon of ground cinnamon. After churning to soft-serve consistency, layer the ice cream in your storage container with generous dollops of cookie butter (speculoos spread), creating beautiful swirls throughout. The caramelized spice notes complement the oat milk’s natural flavor profile perfectly.
Fruit-Forward Adaptations: Create a fruit-infused version by preparing a quick compote from 2 cups of berries or stone fruits with 3 tablespoons of sugar. Cook until thick, chill completely, then swirl into your churned Creamy Oat Milk Ice Cream just before transferring to the freezer. The natural pectin in the fruit creates a jammy texture that contrasts beautifully with the creamy base.
Storage and Serving
Your Creamy Oat Milk Ice Cream will maintain its optimal texture and flavor for up to two weeks when stored properly. Keep it in an airtight container with parchment paper or plastic wrap pressed directly against the surface to prevent ice crystals from forming. Store at the back of your freezer where temperatures remain most constant.
For the perfect scoop, let the ice cream sit at room temperature for 5-10 minutes before serving. This brief tempering allows the fats to soften slightly, revealing the full complexity of flavors and that signature creamy texture.
Serve this dairy-free delight in pre-chilled bowls to prevent premature melting. For an elevated dessert experience, pair your Creamy Oat Milk Ice Cream with warm fruit crisps or cobblers for a beautiful temperature contrast. It also makes an exceptional affogato—simply pour a shot of hot espresso over a scoop for a sophisticated coffee dessert. For a nostalgic treat, sandwich scoops between your favorite cookies for the ultimate plant-based ice cream sandwich.
FAQs
Why is my oat milk ice cream icy rather than creamy?
Iciness typically occurs when there isn’t enough fat in your mixture. Make sure you’re using barista-quality oat milk and don’t reduce the oil called for in the recipe. The cornstarch and corn syrup also play crucial roles in preventing ice crystal formation.
Can I make this without an ice cream maker?
Yes, though the texture won’t be quite as smooth. Pour your chilled base into a shallow container and freeze. Every 30 minutes for 2-3 hours, vigorously stir or whisk the mixture to break up ice crystals. An immersion blender works well for this too.
Is this recipe allergy-friendly?
The Creamy Oat Milk Ice Cream is dairy-free, egg-free, and nut-free. However, if you have celiac disease, ensure your oat milk is certified gluten-free as some oats may be processed in facilities with wheat.
Can I substitute the sugar with a natural sweetener?
Liquid sweeteners like maple syrup or honey will alter the freezing point and texture. If using alternatives, stick with granulated options like coconut sugar or monkfruit sweetener in equal amounts.
How can I make this recipe keto-friendly?
Replace the sugar with a granulated erythritol-based sweetener and omit the corn syrup. Add 1 teaspoon of xanthan gum to improve texture and use an unsweetened oat milk alternative or a blend of coconut cream and almond milk.
Conclusion
This Creamy Oat Milk Ice Cream is plant-based indulgence at its finest — velvety, rich, and impossibly smooth without a drop of dairy. It’s the kind of dessert that bridges dietary divides, bringing everyone to the table for one more scoop. Whether you’re serving it at a summer gathering or enjoying a quiet moment of sweet satisfaction, this recipe proves that dairy-free ice cream can be extraordinary rather than merely acceptable. Master this versatile base, and you’ll have endless possibilities for frozen treats that everyone can enjoy regardless of dietary preferences.
Print
Creamy Oat Milk Ice Cream
Description
Creamy, dairy-free decadence in every spoonful. This oat milk ice cream will make you forget all about the traditional stuff.
Ingredients
- 3 cups (710ml) barista-quality oat milk
- 1 cup (200g) granulated sugar
- ¼ cup (60ml) neutral oil like grapeseed or refined coconut oil
- 2 tablespoons (30ml) pure vanilla extract
- ¼ teaspoon fine sea salt
- 2 tablespoons (16g) cornstarch or arrowroot powder
- ¼ cup (60ml) light corn syrup or glucose syrup
- 2 tablespoons (30ml) vodka (optional)
Instructions
- Combine 2½ cups oat milk, sugar, salt, and corn syrup in a medium saucepan over medium heat. Stir until sugar dissolves.
- In a small bowl, whisk remaining ½ cup oat milk with cornstarch until smooth to create a slurry.
- When oat milk mixture begins to simmer, slowly whisk in the cornstarch slurry. Cook for 2-3 minutes, stirring constantly, until mixture thickens and coats the back of a spoon.
- Remove from heat and whisk in oil, vanilla extract, and vodka (if using).
- Transfer to a heat-safe container, cover with plastic wrap directly on the surface, and refrigerate until completely cold (at least 4 hours or overnight).
- Pour chilled mixture into ice cream maker and churn according to manufacturer’s instructions until it reaches soft-serve consistency (usually 20-25 minutes).
- Transfer to a freezer-safe container, press parchment paper on surface, and freeze for at least 4 hours until firm.
- Let sit at room temperature for 5-10 minutes before scooping and serving.


