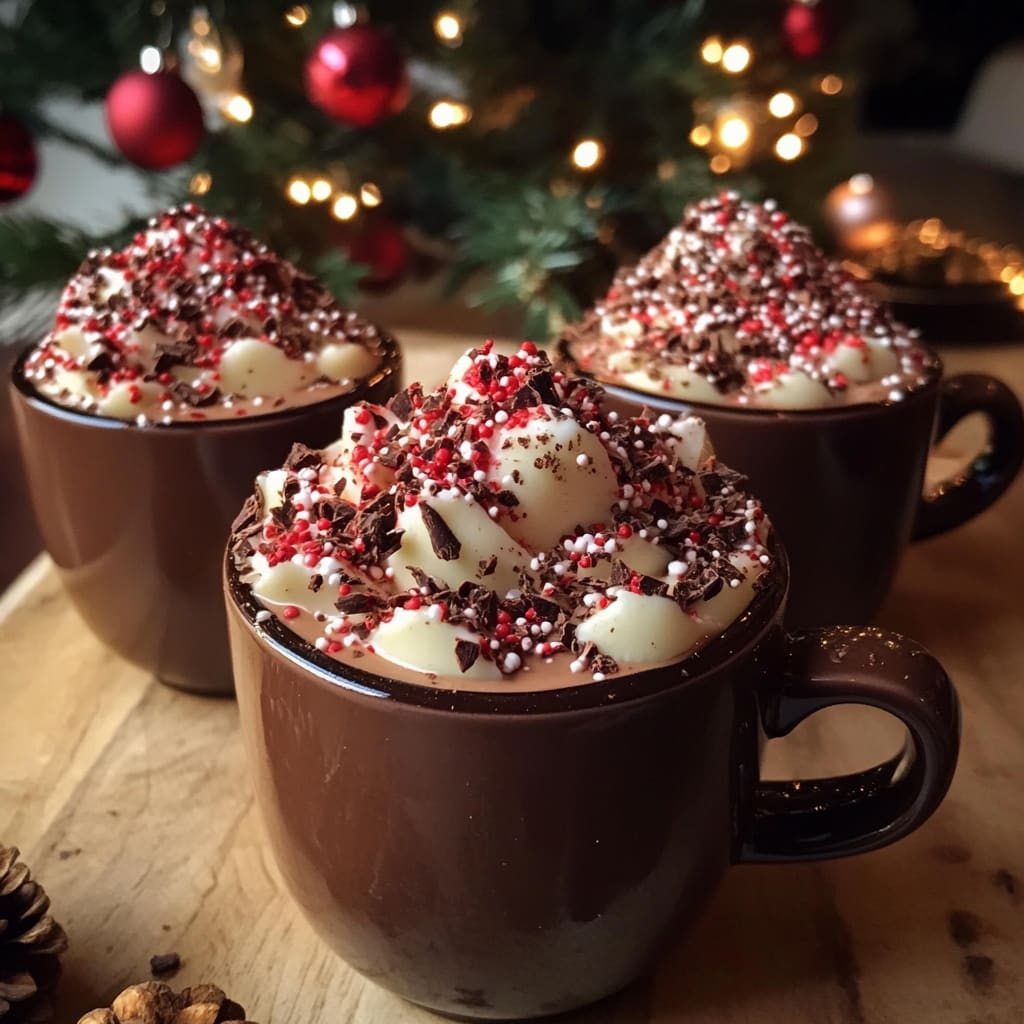
Imagine biting into a rich, decadent chocolate shell filled with velvety hot chocolate that melts in your mouth with every sip. These Christmas Chocolate Hot Cups are the perfect festive treat that combines the joy of drinking hot chocolate with the pleasure of eating it too! The contrast between the crisp chocolate cup and warm, creamy filling creates a magical sensory experience that captures the essence of Christmas indulgence. Whether you’re hosting a holiday party or looking for a special treat on Christmas Eve, these edible chocolate vessels will delight guests of all ages. You’ll learn how to create these impressive chocolate mugs that are not only delicious but also serve as delightful edible decorations for your holiday table.
Why You’ll Love This Recipe
These Christmas Chocolate Hot Cups are guaranteed to become a new holiday tradition in your home for several compelling reasons:
First, they create an unforgettable wow-factor when served. Imagine your guests’ faces lighting up when presented with a drinking chocolate experience unlike any other—where both the container and contents are completely edible!
The textural contrast is sublime—the satisfying snap of the chocolate cup against the silky, warm chocolate filling delivers pure holiday bliss. The cups themselves have a glossy, professional appearance that belies how simple they actually are to make.
These festive cups are incredibly versatile and can be customized with various toppings and decorations to match your holiday theme. They’re also make-ahead friendly, allowing you to prepare them in advance and simply fill with hot chocolate when ready to serve.
Perhaps most importantly, they transform an ordinary hot chocolate moment into an extraordinary memory—perfect for Christmas morning surprises, holiday movie nights, or as the grand finale to your Christmas dinner.
Ingredients
For the Chocolate Cups:
- 16 oz (450g) high-quality semi-sweet chocolate, finely chopped (60-70% cocoa solids work best)
- 2 tbsp (30g) coconut oil or cocoa butter
- 1/4 tsp peppermint extract (optional)
- 8-10 medium-sized balloons, washed and dried
For the Hot Chocolate Filling:
- 2 cups (480ml) whole milk
- 1 cup (240ml) heavy cream
- 8 oz (225g) high-quality chocolate (milk or dark, according to preference)
- 3 tbsp (37g) granulated sugar
- 1 tsp pure vanilla extract
- 1/4 tsp ground cinnamon
- Pinch of salt
For Decorating:
- White chocolate, for drizzling
- Crushed candy canes
- Edible gold or silver dust
- Mini marshmallows
- Whipped cream
The quality of chocolate is crucial—use premium brands with high cocoa content for the best flavor and structural integrity. The addition of coconut oil creates a smoother consistency that’s perfect for molding and gives the cups a beautiful shine.
Pro Tips
Master the Tempering Process
The secret to creating sturdy, glossy Christmas Chocolate Hot Cups lies in proper tempering. Heat your chocolate slowly using a double-boiler method, bringing it to exactly 115°F (46°C) for dark chocolate or 110°F (43°C) for milk chocolate. Then cool it to 84°F (29°C) before reheating slightly to 88-90°F (31-32°C). This precise temperature control creates a stable crystal structure that results in cups with a professional sheen that won’t melt in your hands.
Perfect Balloon Technique
When dipping balloons, ensure they’re completely clean, dry, and inflated to a consistent medium size—not too large or the cups will be unstable. Dip each balloon at a slight angle rather than straight down, which creates a more natural cup shape with an angled rim. Allow excess chocolate to drip off completely before placing on parchment paper, and always have a pin ready to slowly deflate balloons to prevent chocolate shards from flying everywhere.
Strategic Reinforcement
For extra-sturdy cups that can truly hold hot liquid, apply a second coating of chocolate after the first layer has set but isn’t completely hardened (about 10-15 minutes). This double-layering technique strengthens weak points and creates cups that can handle warm (not boiling) liquid for several minutes without leaking—crucial for serving the perfect Christmas chocolate hot cups experience.
Instructions
Step 1: Prepare Your Workspace
Begin by clearing ample counter space and lining two baking sheets with parchment paper. Inflate 8-10 balloons to a consistent size (approximately the size of a small apple) and tie them off. Wash balloons with soap and water, then dry completely—any moisture will cause the chocolate to seize.
Step 2: Temper the Chocolate
Place two-thirds of your chopped chocolate in a heatproof bowl over a pot of barely simmering water (ensure the bowl doesn’t touch the water). Stir gently until chocolate reaches 115°F (46°C). Remove from heat and add remaining chocolate, stirring until completely melted and cooled to 84°F (29°C). Briefly return to heat to bring temperature to 88-90°F (31-32°C). Stir in coconut oil and peppermint extract if using.
Step 3: Create Chocolate Cups
Hold a balloon by the knot and dip it into the tempered chocolate at a slight angle, rotating to coat the bottom half evenly. Allow excess chocolate to drip off, then place on prepared baking sheet. Repeat with remaining balloons, working quickly to maintain chocolate temperature. If chocolate begins to thicken, gently rewarm.
Step 4: Apply Decorative Elements
While the chocolate is still tacky (but not completely set), sprinkle chosen decorations around the rims—crushed candy canes create a festive peppermint rim, while edible gold dust adds elegant sparkle. For a snowy effect, carefully drizzle thin lines of melted white chocolate across the cups.
Step 5: Set and Release
Allow the Christmas Chocolate Hot Cups to completely set at room temperature (about 30 minutes) or in the refrigerator (10-15 minutes). To remove balloons, snip a small hole near the knot with scissors and allow air to release slowly. Gently pull balloon away from chocolate once deflated.
Step 6: Prepare Hot Chocolate Filling
In a medium saucepan, combine milk and cream over medium-low heat. When mixture begins to simmer, remove from heat and add chopped chocolate, sugar, vanilla, cinnamon, and salt. Whisk until completely smooth and velvety. Keep warm until ready to serve.
Step 7: Serve and Enjoy
Just before serving, carefully pour warm (not hot) chocolate into each cup, filling to about 3/4 full. Top with whipped cream, mini marshmallows, or additional festive garnishes. Serve immediately with a spoon for the perfect combination of drinking and eating your Christmas Chocolate Hot Cups!
Variations
White Chocolate Wonderland Cups
For a stunning snow-themed variation, substitute white chocolate for the dark chocolate cups. Add a touch of almond extract instead of peppermint for a nutty flavor profile. Fill with a raspberry-infused hot chocolate for a striking color contrast and delicious flavor combination. Decorate with silver dragees and white shimmer dust for an elegant winter wonderland appearance that’s perfect for upscale Christmas gatherings.
Gingerbread Spiced Cups
Transform your Christmas Chocolate Hot Cups with the cozy flavors of gingerbread by incorporating 1 teaspoon of gingerbread spice mix (cinnamon, ginger, nutmeg, and cloves) into the chocolate before dipping the balloons. For the filling, create a gingerbread hot chocolate by adding molasses, additional spices, and a splash of rum extract. Garnish with tiny gingerbread man cookies perched on the rim for an adorable presentation that children and adults will adore.
Vegan Holiday Cups
Create plant-based chocolate hot cups using high-quality vegan dark chocolate and coconut oil for the shells. For the filling, substitute full-fat coconut milk and almond milk for the dairy components, and use vegan chocolate chips. Top with coconut whipped cream and crushed freeze-dried raspberries for a festive red and white color scheme that accommodates guests with dietary restrictions without sacrificing the festive experience.
Storage and Serving
The empty chocolate cups can be made up to 3 days in advance and stored in a cool, dry place away from direct sunlight. Place them in a single layer in an airtight container with parchment paper between layers if stacking is necessary. Avoid refrigeration as condensation during warming may cause the cups to soften.
For the most impressive presentation, serve your Christmas Chocolate Hot Cups on a large platter dusted with powdered sugar to resemble snow, surrounded by fresh evergreen sprigs and cinnamon sticks. Include both spoons and napkins, as these treats are deliciously messy!
These delightful edible vessels pair wonderfully with Christmas cookies, particularly shortbread or gingerbread, which can be used for dipping into the hot chocolate. For an adult version, consider adding a small shot of Baileys, Kahlúa, or peppermint schnapps on the side that guests can add to their cups for an extra festive touch.
For children’s parties, set up a chocolate hot cups decoration station where kids can add their own sprinkles, marshmallows, and candy cane stirrers to personalize their special holiday treat.
FAQs
Can I use any type of balloon for the chocolate cups?
Use only high-quality, food-safe balloons without powder coating. Water balloons often work better than regular party balloons as they create smaller, more manageable cups. Always wash and thoroughly dry balloons before dipping them in chocolate.
Why did my chocolate cups crack when removing the balloons?
Cracking typically occurs when chocolate hasn’t been properly tempered or when balloons are deflated too quickly. Ensure chocolate is correctly tempered and release balloon air gradually by snipping a small hole rather than popping it.
How long can the chocolate cups hold hot chocolate before melting?
The cups can hold warm (not boiling) liquid for approximately 10-15 minutes. For longer-lasting cups, make them with a double layer of chocolate and ensure the hot chocolate has cooled slightly before pouring.
Can I make these cups without tempering the chocolate?
While tempering provides the best results, you can use the shortcut of melting chocolate with coconut oil (1 tablespoon per cup of chocolate) which helps stabilize it. These cups won’t have the same snap but will work for a more casual presentation.
My chocolate seized and became grainy—what happened?
Chocolate seizes when it comes into contact with even tiny amounts of water or if it’s overheated. Ensure all utensils are completely dry and heat chocolate gently, never exceeding 115°F for dark chocolate.
Conclusion
These Christmas Chocolate Hot Cups are comfort food at its finest — a magical marriage of drinkable and edible chocolate that creates an unforgettable sensory experience. They’re the perfect combination of playful presentation and serious indulgence that captures the wonder and delight of the holiday season. It’s the kind of treat that transforms an ordinary moment into a Christmas memory, whether shared with wide-eyed children on Christmas morning or savored with loved ones after a festive meal. By mastering this impressive yet accessible technique, you’ve added a signature holiday dessert to your repertoire that will have family and friends talking long after the season ends.
Print
Christmas Chocolate Hot Cups
- Prep Time: 30 minutes
- Cook Time: 15 minutes
- Total Time: 45 minutes
- Yield: 8–10 cups 1x
- Category: Dessert
- Method: Tempering, Melting, Whisking, Filling, Decorating
- Cuisine: Americaine
Description
Christmas Chocolate Hot Cups are rich, creamy, and indulgent treats perfect for the holidays. Made with luscious chocolate and warm spices, they are a crowd-pleasing dessert that will surely delight your guests.
Ingredients
- 16 oz (450g) high-quality semi-sweet chocolate, finely chopped (60-70% cocoa solids work best)
- 2 tbsp (30g) coconut oil or cocoa butter
- 1/4 tsp peppermint extract (optional)
- 8–10 medium-sized balloons, washed and dried
- 2 cups (480ml) whole milk
- 1 cup (240ml) heavy cream
- 8 oz (225g) high-quality chocolate (milk or dark, according to preference)
- 3 tbsp (37g) granulated sugar
- 1 tsp pure vanilla extract
- 1/4 tsp ground cinnamon
- Pinch of salt
- White chocolate, for drizzling
- Crushed candy canes
- Edible gold or silver dust
- Mini marshmallows
- Whipped cream
Instructions
- Step 1: Prepare Your Workspace Begin by clearing ample counter space and lining two baking sheets with parchment paper. Inflate 8-10 balloons to a consistent size (approximately the size of a small apple) and tie them off. Wash balloons with soap and water, then dry completely—any moisture will cause the chocolate to seize.
- Step 2: Temper the Chocolate Place two-thirds of your chopped chocolate in a heatproof bowl over a pot of barely simmering water (ensure the bowl doesn’t touch the water). Stir gently until chocolate reaches 115°F (46°C). Remove from heat and add remaining chocolate, stirring until completely melted and cooled to 84°F (29°C). Briefly return to heat to bring temperature to 88-90°F (31-32°C). Stir in coconut oil and peppermint extract if using.
- Step 3: Create Chocolate Cups Hold a balloon by the knot and dip it into the tempered chocolate at a slight angle, rotating to coat the bottom half evenly. Allow excess chocolate to drip off, then place on prepared baking sheet. Repeat with remaining balloons, working quickly to maintain chocolate temperature. If chocolate begins to thicken, gently rewarm.
- Step 4: Apply Decorative Elements While the chocolate is still tacky (but not completely set), sprinkle chosen decorations around the rims—crushed candy canes create a festive peppermint rim, while edible gold dust adds elegant sparkle. For a snowy effect, carefully drizzle thin lines of melted white chocolate across the cups.
- Step 5: Set and Release Allow the Christmas Chocolate Hot Cups to completely set at room temperature (about 30 minutes) or in the refrigerator (10-15 minutes). To remove balloons, snip a small hole near the knot with scissors and allow air to release slowly. Gently pull balloon away from chocolate once deflated.
- Step 6: Prepare Hot Chocolate Filling In a medium saucepan, combine milk and cream over medium-low heat. When mixture begins to simmer, remove from heat and add chopped chocolate, sugar, vanilla, cinnamon, and salt. Whisk until completely smooth and velvety. Keep warm until ready to serve.
- Step 7: Serve and Enjoy Just before serving, carefully pour warm (not hot) chocolate into each cup, filling to about 3/4 full. Top with whipped cream, mini marshmallows, or additional festive garnishes. Serve immediately with a spoon for the perfect combination of drinking and eating your Christmas Chocolate Hot Cups!
Notes
Fresh ingredients will always yield the best flavor results.
Nutrition
- Serving Size: 1 cup
- Calories: 350 per serving
- Sugar: 25 grams
- Sodium: 100 mg
- Fat: 22 grams
- Saturated Fat: 14 grams
- Unsaturated Fat: 8 grams
- Trans Fat: 0 grams
- Carbohydrates: 34 grams
- Fiber: 3 grams
- Protein: 5 grams
- Cholesterol: 25 mg


