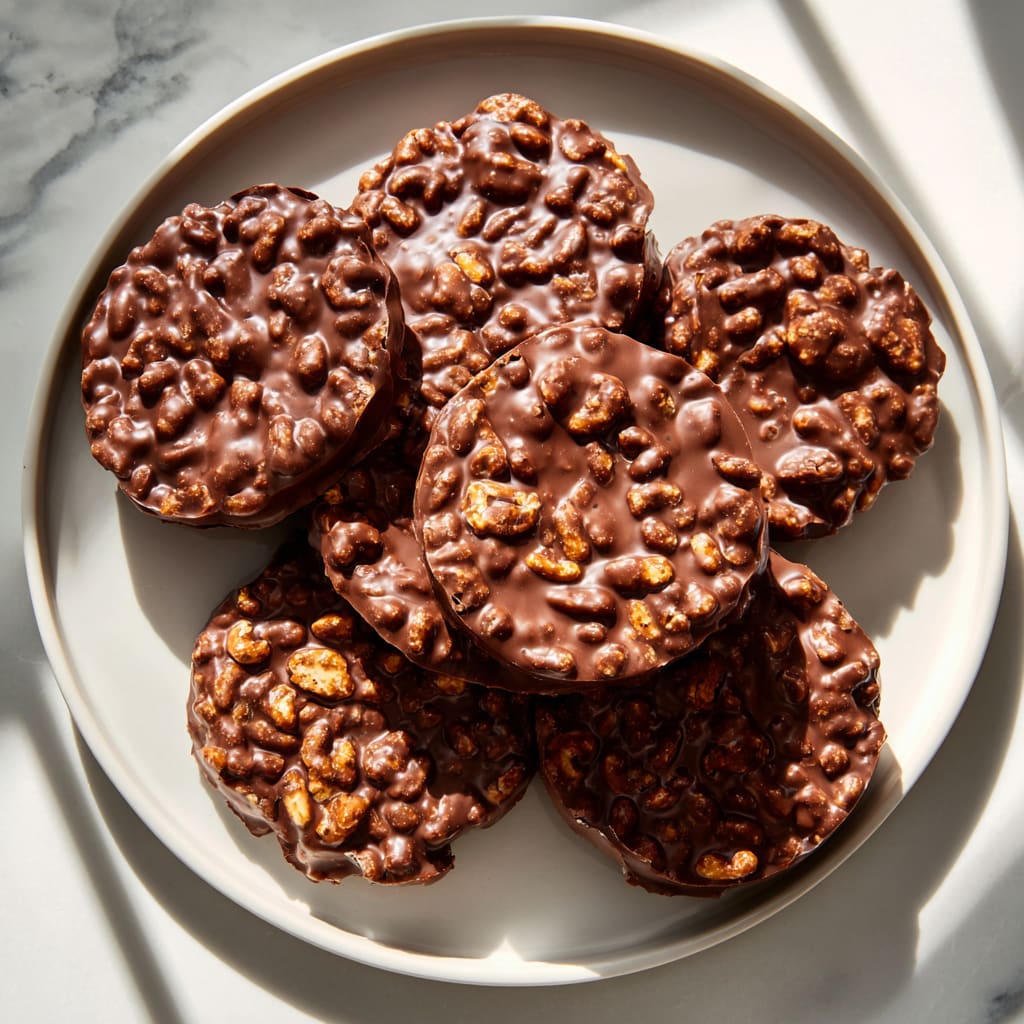
The satisfying snap followed by the creamy, nutty interior makes these Chocolate Peanut Butter Crunch Cups an irresistible treat for any occasion. These homemade cups elevate the classic chocolate-peanut butter combination with a delightful textural surprise—a crispy, crunchy layer that transforms an already beloved flavor pairing into something extraordinary. The rich chocolate shell encases a velvety peanut butter filling studded with crunchy elements that will have everyone reaching for seconds. You’ll learn how to create these indulgent Chocolate Peanut Butter Crunch Cups at home with simple ingredients and easy techniques that yield professional-looking results.
Why You’ll Love This Recipe
These Chocolate Peanut Butter Crunch Cups are guaranteed to become your new favorite homemade treat for several compelling reasons. First, they perfectly balance sweet chocolate with salty, nutty peanut butter—a combination that’s scientifically proven to trigger pleasure responses in our brains. The textural contrast between the snappy chocolate exterior, the silky-smooth peanut butter middle, and the surprising crunch elements creates a multi-sensory experience in each bite.
Unlike store-bought versions, these homemade cups allow you to control the quality of ingredients and adjust sweetness to your preference. They’re also surprisingly easy to make with no baking required—just some simple melting and assembling steps anyone can master. The recipe is incredibly versatile, working equally well for casual snacking, dinner party desserts, or as thoughtful homemade gifts.
Best of all, these peanut butter chocolate cups with crunch can be made ahead of time and stored in the refrigerator or freezer, making them perfect for meal prep or last-minute sweet cravings.
Ingredients
For the Chocolate Peanut Butter Crunch Cups, you’ll need:
For the chocolate shell:
- 2 cups (350g) high-quality semi-sweet chocolate chips or chopped chocolate
- 1 tablespoon (15ml) coconut oil or vegetable shortening
For the peanut butter filling:
- 1 cup (250g) smooth peanut butter (natural or regular)
- 1/3 cup (40g) powdered sugar
- 2 tablespoons (30g) unsalted butter, softened
- 1/2 teaspoon vanilla extract
- 1/4 teaspoon salt (omit if using salted peanut butter)
For the crunch element:
- 1/2 cup (40g) crispy rice cereal
- 1/4 cup (30g) chopped peanuts or other nuts
- Optional: 2 tablespoons (30g) toffee bits or crushed pretzels
The quality of chocolate significantly impacts the final flavor—opt for chocolate with 55-70% cocoa content for the perfect balance of sweetness and depth. Natural peanut butter provides a more robust, authentic flavor, but conventional varieties work well too.
Pro Tips
Master the Chocolate Tempering: For Chocolate Peanut Butter Crunch Cups with a professional shine and satisfying snap, properly tempering your chocolate is essential. The easiest method for home cooks is the “seeding” technique: Melt two-thirds of your chocolate over a double boiler until it reaches 115°F (46°C), then remove from heat and add the remaining chocolate to cool it down to about 84°F (29°C). This creates a stable crystal structure for perfectly glossy cups that won’t bloom or melt at room temperature.
Create the Perfect Texture Contrast: For maximum crunch that stands up to the creamy peanut butter, toast your nuts and cereals before incorporating them. Spread rice cereal and chopped nuts on a baking sheet and toast at 325°F (165°C) for 5-7 minutes until fragrant. Allow them to cool completely before mixing into your peanut butter filling. This simple step dramatically enhances both flavor and texture.
Master the Layering Technique: For clean, even cups, work in thin layers rather than trying to create the entire shell at once. After painting the first chocolate layer in your molds, refrigerate for 5 minutes until just set before adding filling. Leave space at the top and chill again before sealing with the final chocolate layer. This prevents the peanut butter from bleeding into the chocolate and ensures distinct, beautiful layers.
Instructions
Step 1: Prepare Your Molds
Line a standard 12-cup muffin tin with paper liners or use silicone molds for easier removal. If you prefer smaller treats, mini muffin tins work wonderfully too—just adjust the ingredient quantities accordingly. Make sure your molds are clean and completely dry before beginning.
Step 2: Prepare the Chocolate Shell
Place two-thirds of your chocolate chips and all of the coconut oil in a microwave-safe bowl. Microwave in 30-second intervals, stirring between each, until mostly melted. Remove and continue stirring until completely smooth. The residual heat will melt any remaining pieces. If using the tempering method, follow the pro tip instructions for proper temperature control.
Step 3: Create the Base Layer
Spoon about 1-2 teaspoons of melted chocolate into each muffin liner. Using a small spoon or a pastry brush, push the chocolate up the sides of the liners, creating a chocolate cup. Make sure there are no thin spots or holes. Place the tray in the refrigerator for 10 minutes to set this first layer.
Step 4: Prepare the Peanut Butter Filling
While the chocolate bases are chilling, combine the peanut butter, powdered sugar, softened butter, vanilla extract, and salt (if using) in a medium bowl. Mix until completely smooth and well incorporated. Fold in the crispy rice cereal, chopped nuts, and any optional crunch elements. The mixture should be thick but still spreadable.
Step 5: Fill the Cups
Remove the chocolate cups from the refrigerator. Spoon about 1-1.5 tablespoons of the peanut butter crunch filling into each chocolate cup, leaving about 1/8 inch space at the top for the final chocolate layer. Gently press the filling to create a flat surface. Return to the refrigerator for 10 minutes to firm up.
Step 6: Seal with Chocolate
Reheat your remaining chocolate if it has begun to solidify. Spoon the melted chocolate over each filled cup, making sure to completely cover the peanut butter layer and seal it against the sides of the first chocolate layer. Gently tap the muffin tin on the counter to remove any air bubbles and create a smooth top.
Step 7: Chill and Serve
Refrigerate your Chocolate Peanut Butter Crunch Cups for at least 1 hour until completely set. Once firm, carefully peel away the paper liners if using. For the cleanest presentation, allow them to stand at room temperature for 5-10 minutes before serving to take the chill off and enhance the flavors.
Variations
Dark Chocolate Sea Salt Version: For a sophisticated twist on the classic Chocolate Peanut Butter Crunch Cups, substitute dark chocolate (70-85% cacao) for the semi-sweet chocolate. Add a pinch of flaky sea salt to the peanut butter filling and also sprinkle some on top of the cups before the final chocolate layer hardens. This creates a complex sweet-salty flavor profile that’s particularly appealing to adult palates.
White Chocolate Strawberry Crunch Cups: Replace half the peanut butter with strawberry jam and use white chocolate for the outer shell. Mix freeze-dried strawberries into the filling instead of nuts for a fruity crunch. This variation creates beautiful pink-speckled cups that are perfect for Valentine’s Day or spring gatherings.
Vegan Almond Butter Cups: Make these completely plant-based by using dairy-free chocolate, replacing butter with coconut oil, and substituting almond butter for peanut butter. Use maple syrup instead of powdered sugar and add chopped almonds and puffed quinoa for the crunch element. These adjustments maintain the delicious texture contrast while accommodating dietary restrictions.
Storage and Serving
Chocolate Peanut Butter Crunch Cups maintain their quality impressively well in proper storage conditions. Refrigerate them in an airtight container with parchment paper between layers for up to two weeks. The cups can also be frozen for up to three months—simply place them in a freezer-safe container and thaw in the refrigerator for a few hours before serving.
For the best flavor experience, allow refrigerated cups to sit at room temperature for 5-10 minutes before eating. This slight warming softens the chocolate just enough to enhance its flavor complexity while maintaining that satisfying snap.
Serve these cups as an impressive dessert by placing each on a small square of parchment paper and arranging on a decorative platter. For an elevated presentation, drizzle with additional melted chocolate or sprinkle with crushed nuts just before serving. They pair wonderfully with a glass of cold milk, coffee, or even a dessert wine for special occasions.
FAQs
Can I use natural peanut butter for these Chocolate Peanut Butter Crunch Cups?
Yes! Natural peanut butter works beautifully in this recipe. Just make sure it’s well-stirred before measuring. Natural varieties may produce a slightly softer filling, so you might need to add an extra tablespoon of powdered sugar to achieve the right consistency.
Why did my chocolate bloom or develop white streaks?
Chocolate bloom occurs when chocolate isn’t properly tempered or experiences temperature fluctuations. To prevent this, either properly temper your chocolate using the method in the Pro Tips section or store your finished cups at a consistent temperature. The bloom is harmless and doesn’t affect taste.
Can I make these without any special equipment?
Absolutely! While silicone molds make removal easier, regular paper muffin liners work perfectly. If you don’t have a double boiler for melting chocolate, a heatproof bowl set over a pot of simmering water (not touching the water) works just as well.
How do I prevent the peanut butter from showing through the chocolate?
Make sure your initial chocolate layer is thick enough and completely set before adding the filling. Also, leave adequate space at the top and chill the filled cups before adding the final chocolate layer to prevent mixing.
Are these Chocolate Peanut Butter Crunch Cups gluten-free?
They can be! Just verify your crispy rice cereal is gluten-free and avoid pretzel pieces in the crunch element. All other ingredients are naturally gluten-free, making this an easy adaptation for those with gluten sensitivities.

Chocolate Peanut Butter Crunch Cups
- Prep Time: 20 minutes
- Cook Time: 10 minutes
- Total Time: 1 hour 30 minutes
- Yield: 12 cups 1x
- Category: Dessert
- Method: No-bake
- Cuisine: Americaine
Description
Chocolate Peanut Butter Crunch Cups – Indulgent chocolate & peanut butter combo in one irresistible treat! Easy to make, perfect for satisfying sweet cravings.
Ingredients
- 2 cups high-quality semi-sweet chocolate chips or chopped chocolate
- 1 tablespoon coconut oil or vegetable shortening
- 1 cup smooth peanut butter (natural or regular)
- 1/3 cup powdered sugar
- 2 tablespoons unsalted butter, softened
- 1/2 teaspoon vanilla extract
- 1/4 teaspoon salt (omit if using salted peanut butter)
- 1/2 cup crispy rice cereal
- 1/4 cup chopped peanuts or other nuts
- Optional: 2 tablespoons toffee bits or crushed pretzels
Instructions
- Step 1: Prepare Your Molds Line a standard 12-cup muffin tin with paper liners or use silicone molds for easier removal. If you prefer smaller treats, mini muffin tins work wonderfully too—just adjust the ingredient quantities accordingly. Make sure your molds are clean and completely dry before beginning.
- Step 2: Prepare the Chocolate Shell Place two-thirds of your chocolate chips and all of the coconut oil in a microwave-safe bowl. Microwave in 30-second intervals, stirring between each, until mostly melted. Remove and continue stirring until completely smooth. The residual heat will melt any remaining pieces. If using the tempering method, follow the pro tip instructions for proper temperature control.
- Step 3: Create the Base Layer Spoon about 1-2 teaspoons of melted chocolate into each muffin liner. Using a small spoon or a pastry brush, push the chocolate up the sides of the liners, creating a chocolate cup. Make sure there are no thin spots or holes. Place the tray in the refrigerator for 10 minutes to set this first layer.
- Step 4: Prepare the Peanut Butter Filling While the chocolate bases are chilling, combine the peanut butter, powdered sugar, softened butter, vanilla extract, and salt (if using) in a medium bowl. Mix until completely smooth and well incorporated. Fold in the crispy rice cereal, chopped nuts, and any optional crunch elements. The mixture should be thick but still spreadable.
- Step 5: Fill the Cups Remove the chocolate cups from the refrigerator. Spoon about 1-1.5 tablespoons of the peanut butter crunch filling into each chocolate cup, leaving about 1/8 inch space at the top for the final chocolate layer. Gently press the filling to create a flat surface. Return to the refrigerator for 10 minutes to firm up.
- Step 6: Seal with Chocolate Reheat your remaining chocolate if it has begun to solidify. Spoon the melted chocolate over each filled cup, making sure to completely cover the peanut butter layer and seal it against the sides of the first chocolate layer. Gently tap the muffin tin on the counter to remove any air bubbles and create a smooth top.
- Step 7: Chill and Serve Refrigerate your Chocolate Peanut Butter Crunch Cups for at least 1 hour until completely set. Once firm, carefully peel away the paper liners if using. For the cleanest presentation, allow them to stand at room temperature for 5-10 minutes before serving to take the chill off and enhance the flavors.
Notes
Fresh ingredients will always yield the best flavor results.
Nutrition
- Serving Size: 1 cup
- Calories: 280
- Sugar: 12g
- Sodium: 160mg
- Fat: 20g
- Saturated Fat: 8g
- Unsaturated Fat: 12g
- Trans Fat: 0g
- Carbohydrates: 22g
- Fiber: 2g
- Protein: 6g
- Cholesterol: 5mg


