
Sink your spoon into a warm, decadent Chocolate Lava Cake and watch as the molten chocolate center flows like dark velvet onto your plate. These irresistible individual desserts strike the perfect balance between cake-like exterior and silky, flowing interior that chocolate lovers dream about. Chocolate Lava Cakes have become a restaurant favorite, but they’re surprisingly simple to make at home with just a handful of ingredients and proper timing. You’ll learn how to create these impressive desserts that look like they required hours of preparation but can actually be ready in under 30 minutes.
Why You’ll Love This Recipe
These Chocolate Lava Cakes are guaranteed to become your go-to dessert for both special occasions and indulgent weeknight treats. Unlike many restaurant versions that rely on frozen ganache inserts, this recipe creates that magical molten center naturally through precise baking time, ensuring an authentic chocolate experience.
The contrast between the cakey exterior with a slight crust and the warm, flowing center creates an exciting textural journey with each bite. The rich chocolate flavor is intense yet balanced, with deep notes that satisfy even the most dedicated chocolate connoisseur.
Best of all, these Chocolate Lava Cakes require minimal effort for maximum impact. With just six ingredients you likely already have in your pantry, you can create a restaurant-quality dessert that never fails to impress guests. The entire process takes less than 30 minutes from start to finish, making these molten chocolate desserts perfect for last-minute entertaining or satisfying sudden chocolate cravings.
Ingredients
For 4 individual Chocolate Lava Cakes, you’ll need:
- 6 ounces (170g) high-quality semi-sweet chocolate, chopped
- ½ cup (113g) unsalted butter, cut into pieces
- ¼ cup (50g) granulated sugar
- 2 large whole eggs plus 2 egg yolks, at room temperature
- 2 tablespoons (16g) all-purpose flour
- ¼ teaspoon salt
- 1 teaspoon pure vanilla extract
- 1 tablespoon (8g) unsweetened cocoa powder for dusting ramekins
- Optional for serving: vanilla ice cream, fresh berries, or lightly whipped cream
The quality of chocolate makes a significant difference in these molten chocolate desserts. Choose a premium bar with 60-70% cocoa content rather than chocolate chips, which contain stabilizers that affect melting. Room temperature eggs are crucial for achieving the proper texture, as cold eggs can cause the chocolate mixture to seize and compromise the flowing center.
Pro Tips
Choose the right ramekins: For perfect Chocolate Lava Cakes, use 4-ounce (118ml) ramekins or oven-safe custard cups. Their size ensures the ideal ratio of cooked exterior to molten interior. Thoroughly butter and dust each ramekin with cocoa powder to prevent sticking and allow for clean removal.
Master the folding technique: When incorporating the flour, fold gently rather than stirring vigorously. Overmixing develops gluten, resulting in a tougher cake exterior instead of the tender crumb that perfectly complements the molten center of your individual chocolate lava cakes. Use a rubber spatula and make broad, sweeping motions that scrape the bottom and fold over the top.
Timing is everything: The difference between perfect molten centers and completely cooked cakes is literally minutes. Bake until the edges are firm but the center still jiggles slightly when gently shaken – typically 12-14 minutes depending on your oven. Remember that the cakes will continue cooking slightly from residual heat after removal from the oven, so it’s better to err on the side of underbaking if you’re unsure.
Instructions
Step 1: Prepare Your Workspace
Preheat your oven to 425°F (220°C). Generously butter four 4-ounce (118ml) ramekins, then dust the insides thoroughly with cocoa powder, tapping out the excess. Place the prepared ramekins on a baking sheet for easier handling. Having everything ready before melting the chocolate ensures smooth execution of this quick-moving recipe.
Step 2: Melt Chocolate and Butter
Place the chopped chocolate and butter in a medium microwave-safe bowl. Microwave in 30-second intervals, stirring thoroughly between each, until completely melted and smooth. This typically takes 1-2 minutes total. Alternatively, use a double boiler, placing the bowl over a pot of simmering (not boiling) water, ensuring no water touches the bowl. The mixture should be glossy and completely smooth without any chocolate pieces remaining.
Step 3: Complete the Batter
Add sugar to the chocolate-butter mixture and whisk until well incorporated. The mixture should cool slightly during this process. Add the eggs and egg yolks one at a time, whisking well after each addition until fully incorporated. The batter will become noticeably lighter and slightly thicker. Add vanilla extract and salt, then sift the flour directly over the mixture. Gently fold the flour into the batter using a rubber spatula until just combined and no dry streaks remain.
Step 4: Fill and Bake
Divide the batter evenly among the prepared ramekins, filling each about ¾ full. Tap each ramekin gently on the counter to level the batter and remove any large air bubbles. Place the baking sheet with filled ramekins in the preheated oven and bake for 12-14 minutes, until the edges are firm but the centers still jiggle slightly when the ramekins are gently shaken. The tops should no longer look wet or shiny.
Step 5: Serve Immediately
Remove the cakes from the oven and allow them to rest for exactly 1 minute – this helps the cakes set just enough for unmolding while preserving the liquid center. Run a small knife around the edge of each cake to loosen it from the ramekin. Place a dessert plate upside down on top of each ramekin, then carefully invert in one quick motion. Wait about 10 seconds before slowly lifting the ramekin. Your Chocolate Lava Cake should release easily, ready to serve with your chosen accompaniments. For the most impressive molten effect, serve within 2 minutes of unmolding.
Variations
Spiced Chocolate Lava Cakes: Transform these Chocolate Lava Cakes by adding ¼ teaspoon of cinnamon, a pinch of cayenne pepper, and a pinch of ground cardamom to the batter. These warming spices create a Mexican-chocolate inspired dessert with complex flavor notes that beautifully complement the rich chocolate. Serve with cinnamon-dusted whipped cream for the perfect finishing touch.
Peanut Butter Surprise: For peanut butter cup enthusiasts, create a peanut butter center by freezing teaspoon-sized portions of creamy peanut butter on a parchment-lined plate for at least an hour. Fill your ramekins halfway with batter, place a frozen peanut butter portion in the center, then cover with remaining batter before baking. The peanut butter creates a second molten layer that perfectly complements the flowing chocolate center.
Gluten-Free Version: Easily adapt this molten lava cake recipe for gluten-free diets by substituting the all-purpose flour with an equal amount of almond flour or a high-quality gluten-free flour blend. The minimal flour content in these cakes makes them particularly adaptable to gluten-free modifications without sacrificing texture or taste.
Storage and Serving
While Chocolate Lava Cakes are best enjoyed immediately after baking to experience the perfect molten center, you can prepare the batter up to 24 hours in advance. Simply cover the filled, unbaked ramekins tightly with plastic wrap and refrigerate. When ready to serve, remove from the refrigerator 30 minutes before baking to return to room temperature, then bake as directed, adding 1-2 extra minutes to the baking time.
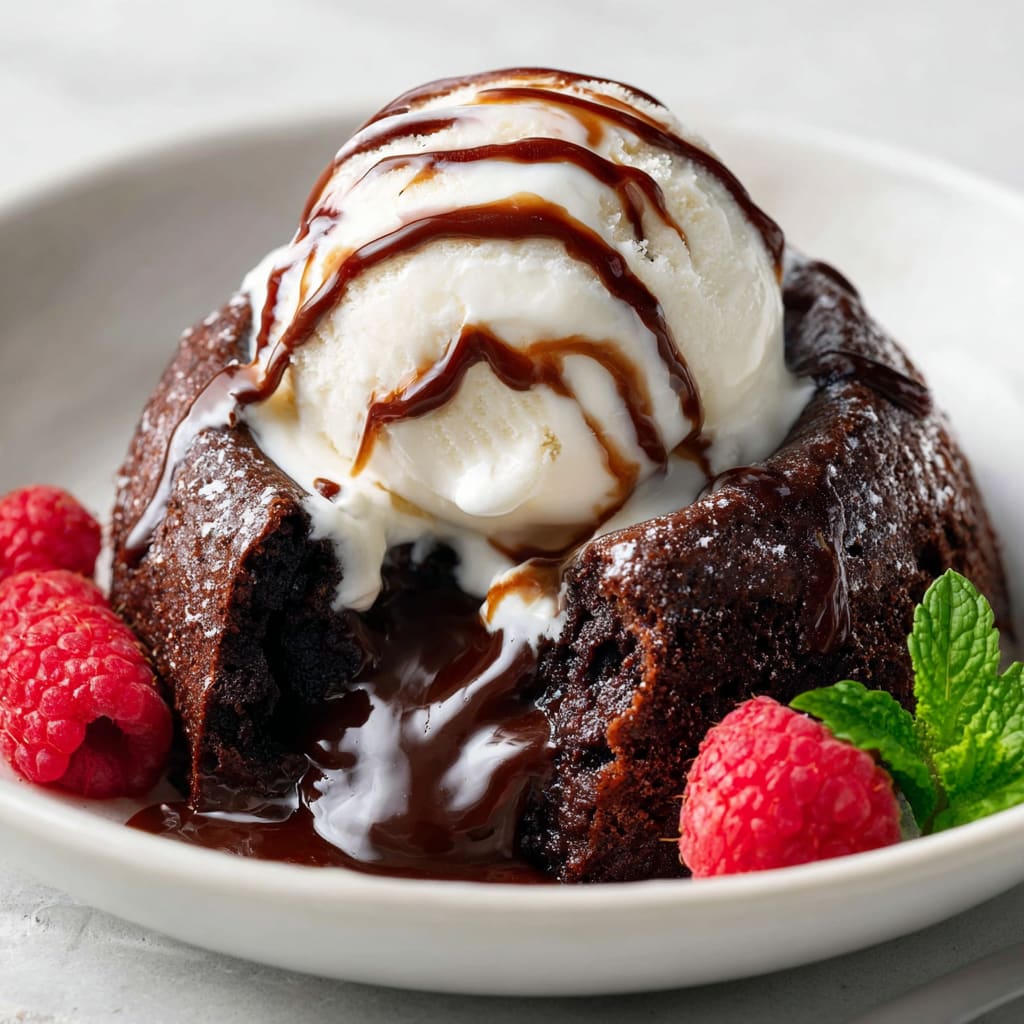
For an elegant presentation, dust the plated cakes with powdered sugar just before serving, and place a small scoop of vanilla bean ice cream alongside. The temperature contrast between the warm cake and cold ice cream creates a sensational dining experience. For a fruity complement, serve with fresh raspberries or sliced strawberries, which provide a refreshing tartness that balances the rich chocolate.
For a decadent finishing touch, drizzle warm salted caramel sauce over the unmolded cakes, allowing it to pool around the base and mingle with the flowing chocolate center when cut open.
FAQs
Why did my Chocolate Lava Cakes not have a molten center?
The most common reason is overbaking. Even 1-2 minutes too long can cause the center to set completely. Ensure your oven is properly calibrated and check the cakes at the minimum baking time. They should still have a slight jiggle in the center when removed from the oven.
Can I make these in muffin tins instead of ramekins?
Yes! A standard muffin tin works well as a substitute. Thoroughly grease and dust the cups with cocoa powder, and reduce the baking time by about 2 minutes, as the metal conducts heat more efficiently than ceramic ramekins.
Why did my cakes collapse when unmolding?
This typically happens when the cakes are underbaked. The exterior needs to set enough to hold its structure. Allow them to rest for the full minute after removing from the oven before attempting to unmold.
Can I freeze unbaked Chocolate Lava Cake batter?
Absolutely! Fill your prepared ramekins, cover tightly with plastic wrap, and freeze for up to one month. When ready to bake, place the frozen ramekins directly in the preheated oven and add 3-5 minutes to the baking time.
What’s the best chocolate to use for Chocolate Lava Cakes?
Use high-quality baking chocolate with 60-70% cocoa content. Brands like Ghirardelli, Valrhona, or Lindt produce excellent results. Avoid chocolate chips, as they contain stabilizers that affect the melting quality and flowing center.

Chocolate Lava Cakes
- Prep Time: 15 minutes
- Cook Time: 13 minutes
- Total Time: 28 minutes
- Yield: 4 individual Chocolate Lava Cakes 1x
- Category: Dessert
- Method: Baking
- Cuisine: Americaine
Description
Indulge in decadent Chocolate Lava Cakes with a gooey molten center! Quick, easy, and sure to please with rich chocolate and simple ingredients.
Ingredients
- 6 ounces (170g) high-quality semi-sweet chocolate, chopped
- ½ cup (113g) unsalted butter, cut into pieces
- ¼ cup (50g) granulated sugar
- 2 large whole eggs plus 2 egg yolks, at room temperature
- 2 tablespoons (16g) all-purpose flour
- ¼ teaspoon salt
- 1 teaspoon pure vanilla extract
- 1 tablespoon (8g) unsweetened cocoa powder for dusting ramekins
Instructions
- Step 1: Prepare Your Workspace Preheat your oven to 425°F (220°C). Generously butter four 4-ounce (118ml) ramekins, then dust the insides thoroughly with cocoa powder, tapping out the excess. Place the prepared ramekins on a baking sheet for easier handling. Having everything ready before melting the chocolate ensures smooth execution of this quick-moving recipe.
- Step 2: Melt Chocolate and Butter Place the chopped chocolate and butter in a medium microwave-safe bowl. Microwave in 30-second intervals, stirring thoroughly between each, until completely melted and smooth. This typically takes 1-2 minutes total. Alternatively, use a double boiler, placing the bowl over a pot of simmering (not boiling) water, ensuring no water touches the bowl. The mixture should be glossy and completely smooth without any chocolate pieces remaining.
- Step 3: Complete the Batter Add sugar to the chocolate-butter mixture and whisk until well incorporated. The mixture should cool slightly during this process. Add the eggs and egg yolks one at a time, whisking well after each addition until fully incorporated. The batter will become noticeably lighter and slightly thicker. Add vanilla extract and salt, then sift the flour directly over the mixture. Gently fold the flour into the batter using a rubber spatula until just combined and no dry streaks remain.
- Step 4: Fill and Bake Divide the batter evenly among the prepared ramekins, filling each about ¾ full. Tap each ramekin gently on the counter to level the batter and remove any large air bubbles. Place the baking sheet with filled ramekins in the preheated oven and bake for 12-14 minutes, until the edges are firm but the centers still jiggle slightly when the ramekins are gently shaken. The tops should no longer look wet or shiny.
- Step 5: Serve Immediately Remove the cakes from the oven and allow them to rest for exactly 1 minute – this helps the cakes set just enough for unmolding while preserving the liquid center. Run a small knife around the edge of each cake to loosen it from the ramekin. Place a dessert plate upside down on top of each ramekin, then carefully invert in one quick motion. Wait about 10 seconds before slowly lifting the ramekin. Your Chocolate Lava Cake should release easily, ready to serve with your chosen accompaniments. For the most impressive molten effect, serve within 2 minutes of unmolding.
Notes
Fresh ingredients will always yield the best flavor results.
Nutrition
- Serving Size: 1 cake
- Calories: 390
- Sugar: 22g
- Sodium: 180mg
- Fat: 28g
- Saturated Fat: 16g
- Unsaturated Fat: 9g
- Trans Fat: 0g
- Carbohydrates: 32g
- Fiber: 2g
- Protein: 5g
- Cholesterol: 215mg


