Imagine tender, juicy chicken simmering in a rich, velvety gravy that clings perfectly to each bite. That’s the magic of Chicken and Gravy Stovetop – a classic comfort dish that transforms simple ingredients into a meal that feels like a warm hug. The golden-brown chicken swimming in savory gravy creates an irresistible aroma that fills your kitchen and beckons everyone to the table. You’ll learn how to create this one-pan wonder with perfectly seasoned chicken and a scratch-made gravy that’s miles better than anything from a packet.
Why You’ll Love This Recipe
This Chicken and Gravy Stovetop recipe will quickly become a family favorite for several compelling reasons. First, it’s incredibly versatile – perfect for busy weeknights yet impressive enough for Sunday dinner. The contrast between the crispy-skinned chicken and the silky, flavor-packed gravy creates a textural symphony that’s utterly satisfying.
What truly sets this dish apart is how the chicken infuses the gravy with its natural juices while cooking, creating layers of flavor that simply can’t be replicated with shortcuts. Even better, this one-pan wonder minimizes cleanup while maximizing taste. The recipe uses pantry staples you likely already have on hand, making it both economical and convenient.
For those intimidated by making gravy from scratch, this foolproof method produces perfect results every time – no lumps, just smooth, rich gravy that’s destined to be sopped up with bread or drizzled over mashed potatoes. The entire dish comes together in under an hour, giving you restaurant-quality results without the fuss.
Ingredients
For the perfect Chicken and Gravy Stovetop, gather these simple yet essential ingredients:
• 4-6 chicken thighs (about 2 lbs/900g), bone-in and skin-on
• 2 tbsp (30ml) vegetable oil
• 1 medium onion (about 1 cup/150g), finely diced
• 2 cloves garlic (about 2 tsp/10g), minced
• 3 tbsp (45g) all-purpose flour
• 2 cups (480ml) chicken broth, low sodium preferred
• 1/2 cup (120ml) whole milk or half-and-half
• 1 tsp (5g) dried thyme or 1 tbsp fresh
• 1 bay leaf
• Salt and freshly ground black pepper to taste
The skin-on chicken thighs are crucial for developing deep flavor in the gravy, as they render fat that becomes the foundation of your sauce. Low-sodium broth allows you to control the saltiness, while the addition of milk creates that signature creamy texture without heaviness.
Pro Tips
Perfect Searing Technique: The key to extraordinary Chicken and Gravy Stovetop starts with properly searing the chicken. Pat the thighs completely dry with paper towels before seasoning – moisture is the enemy of a good sear. Once in the pan, resist the urge to move the chicken prematurely. It will naturally release from the pan when properly seared, usually after 5-7 minutes. This patience creates the foundation for both flavor and texture.
Flour Incorporation Magic: When making the gravy, cook the flour in the chicken fat for a full 2 minutes before adding any liquid. This eliminates raw flour taste and creates a proper roux. Add your liquid gradually while whisking continuously to ensure a lump-free gravy. If you see any lumps forming, switch to a silicone whisk and beat vigorously before adding more liquid.
Seasoning Strategy: Season in layers throughout the cooking process rather than just at the beginning or end. Season the chicken before searing, adjust when making the gravy, and taste again just before serving. Remember that gravy reduces as it simmers, concentrating flavors, so slightly under-season early on and perfect it at the finish line. This creates depth that elevates your Chicken and Gravy Stovetop from good to memorable.
Instructions
Step 1: Prepare the Chicken
Season chicken thighs generously with salt and pepper on both sides. Heat vegetable oil in a large, heavy-bottomed skillet over medium-high heat until shimmering. Carefully place chicken thighs skin-side down in the hot pan, ensuring they don’t touch. Let them cook undisturbed for 5-7 minutes until the skin turns golden brown and crispy. Flip and cook for another 5 minutes. Transfer chicken to a plate and set aside. Don’t wash the pan – those browned bits are flavor gold for your Chicken and Gravy Stovetop.
Step 2: Create the Flavor Base
Reduce heat to medium and add diced onions to the same pan with the rendered chicken fat. Cook for 3-4 minutes until softened and translucent, scraping up any browned bits from the bottom of the pan. Add minced garlic and cook for another 30 seconds until fragrant, being careful not to burn it. This aromatic foundation will infuse your entire dish with savory depth.
Step 3: Make the Gravy
Sprinkle flour over the onion-garlic mixture, stirring constantly to create a paste. Cook this roux for 2 minutes, stirring continuously to prevent burning while cooking out the raw flour taste. Gradually pour in chicken broth while whisking vigorously to prevent lumps from forming. Add milk, dried thyme, and bay leaf, continuing to whisk until completely smooth. Let the mixture come to a gentle simmer and begin to thicken, about 3-4 minutes.
Step 4: Finish Cooking the Chicken
Return the chicken thighs to the pan, nestling them into the gravy skin-side up. Reduce heat to low, cover the pan, and simmer for 20-25 minutes until chicken is completely cooked through (internal temperature of 165°F/74°C). For extra-crispy skin, remove the lid during the last 5 minutes of cooking. The chicken will finish cooking while simultaneously flavoring the gravy, creating the perfect Chicken and Gravy Stovetop harmony.
Step 5: Final Touches
Remove bay leaf and taste gravy, adjusting seasoning with salt and pepper as needed. If the gravy is too thick, add a splash of broth; if too thin, let it simmer uncovered for a few more minutes. For an extra-silky finish, stir in a tablespoon of cold butter right before serving. Transfer to a serving dish, sprinkle with fresh herbs if desired, and serve immediately while piping hot.
Variations
Herb-Enhanced Chicken and Gravy: Transform your Chicken and Gravy Stovetop with a custom herb blend. Add 1 tablespoon of fresh rosemary and 1 tablespoon of fresh sage (or 1 teaspoon each dried) when adding the thyme. This creates a more aromatic, garden-fresh profile that’s especially delightful during spring and summer months. The herbs infuse the gravy with complex flavors that complement the chicken beautifully.
Mushroom Lover’s Version: Add 8 ounces of sliced mushrooms (cremini, button, or a wild mushroom blend) after cooking the onions. Sauté until golden brown and their moisture has evaporated before proceeding with the flour. This variation adds earthy depth and meaty texture to the gravy, creating an even more substantial dish. For maximum umami impact, deglaze the pan with 2 tablespoons of dry sherry before adding the broth.
Dairy-Free Alternative: For those avoiding dairy, replace the milk with additional chicken broth and add 1/4 cup of full-fat coconut milk at the end of cooking for creaminess without the dairy. The subtle coconut flavor works surprisingly well with the savory elements of this Chicken and Gravy Stovetop dish, and the healthy fats create a similar mouthfeel to traditional cream-based gravy.
Storage and Serving
Chicken and Gravy Stovetop stores beautifully, often tasting even better the next day as flavors continue to meld. Refrigerate leftovers in an airtight container for up to 3 days. Reheat gently on the stovetop over medium-low heat, adding a splash of chicken broth if the gravy has thickened too much. For longer storage, freeze portions for up to 2 months; thaw overnight in the refrigerator before reheating.
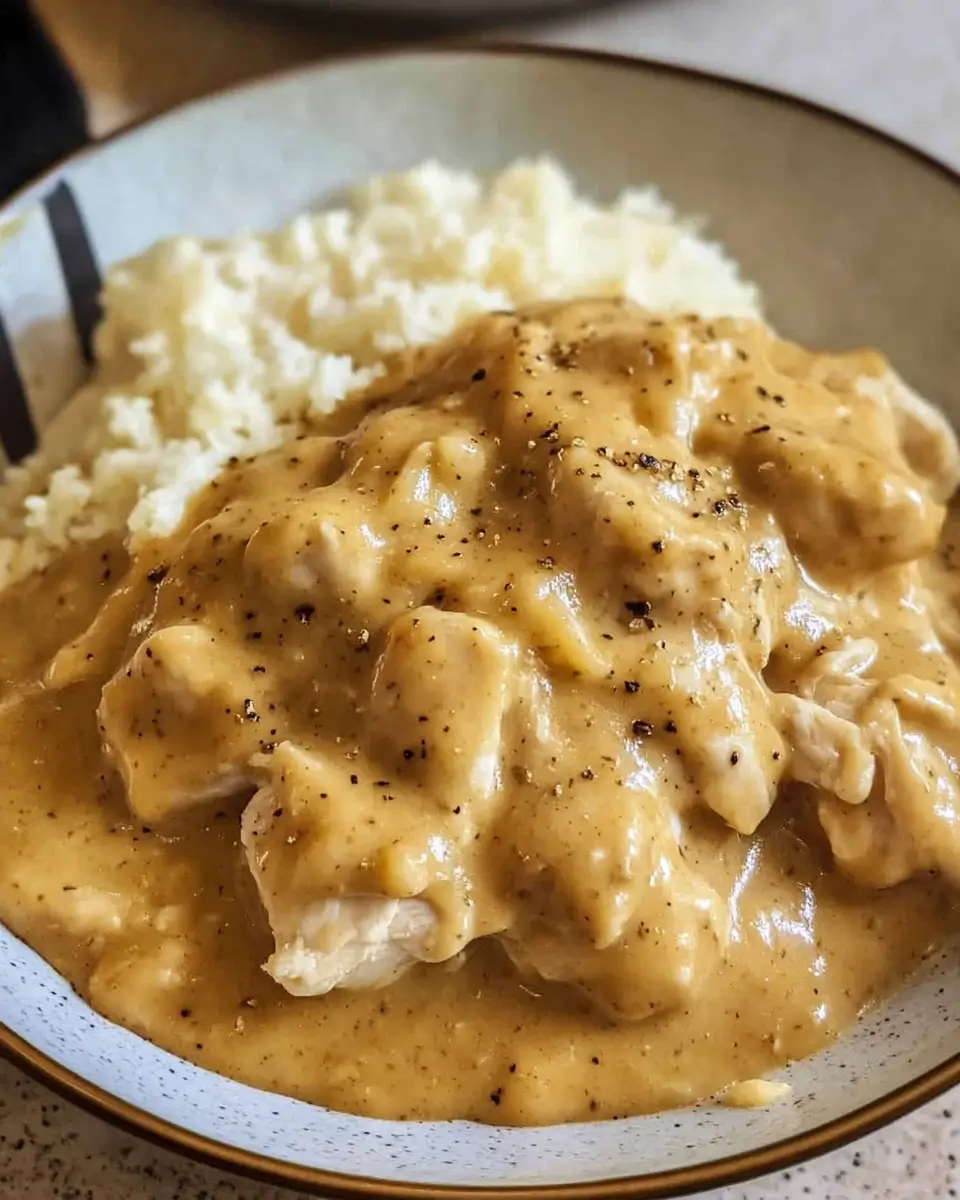
Serve this comforting dish over creamy mashed potatoes, which provide the perfect canvas for the luscious gravy. For a complete meal, pair with steamed green vegetables like broccoli or green beans, which offer fresh contrast to the rich main dish. The gravy also works beautifully with buttered egg noodles or rice, both of which catch every drop of the savory sauce.
For an elevated presentation, serve family-style on a large platter with the chicken nestled in the gravy, garnished with fresh thyme sprigs and a sprinkle of black pepper. Offer warm, crusty bread on the side for sopping up extra gravy – no one should miss a single drop of this flavorful sauce!
FAQs
Can I use boneless, skinless chicken breasts instead of thighs?
Yes, though cooking time will need to be reduced to about 15 minutes to prevent drying out. The gravy won’t be quite as rich without the skin and bones, so consider adding an extra tablespoon of butter to compensate.
Why is my gravy lumpy?
Lumps typically form when flour is added too quickly to hot liquid. To fix lumpy gravy, strain it through a fine-mesh sieve or blend with an immersion blender. Prevent lumps by creating a proper roux and adding liquid gradually while whisking constantly.
Can I make this Chicken and Gravy Stovetop ahead of time?
Absolutely! It actually improves with time as flavors meld. Make it up to 24 hours ahead, refrigerate, and gently reheat on the stovetop.
What’s the best pan to use for this recipe?
A cast-iron skillet or heavy-bottomed stainless steel pan works best. These materials retain heat well and create the best fond (browned bits) for flavorful gravy.
Can I add vegetables to make this a one-pot meal?
Yes! Add diced carrots and celery with the onions, or stir in frozen peas during the last 5 minutes of cooking for a complete one-pot meal.
Conclusion
This Chicken and Gravy Stovetop is comfort food at its finest — tender, juicy chicken bathed in a velvety, savory gravy that warms you from the inside out. It’s the kind of dish that transforms ordinary evenings into special occasions without hours of effort. What makes this recipe truly special is how it balances simplicity with rich, layered flavors, proving that sometimes the most straightforward cooking methods yield the most satisfying results. Whether served over mashed potatoes on a chilly evening or paired with a crisp salad for Sunday dinner, this Chicken and Gravy Stovetop celebrates the beautiful harmony of humble ingredients transformed through thoughtful preparation.
Print
Chicken and Gravy Stovetop
Description
The ultimate one-pan comfort meal! This chicken simmers in its own flavorful gravy until fork-tender and juicy. Skip the packets and make the real deal tonight!
Ingredients
- 4–6 chicken thighs (about 2 lbs/900g), bone-in and skin-on
- 2 tbsp (30ml) vegetable oil
- 1 medium onion (about 1 cup/150g), finely diced
- 2 cloves garlic (about 2 tsp/10g), minced
- 3 tbsp (45g) all-purpose flour
- 2 cups (480ml) chicken broth, low sodium preferred
- 1/2 cup (120ml) whole milk or half-and-half
- 1 tsp (5g) dried thyme or 1 tbsp fresh
- 1 bay leaf
- Salt and freshly ground black pepper to taste
Instructions
- Pat chicken thighs dry with paper towels and season generously with salt and pepper on both sides.
- Heat vegetable oil in a large skillet over medium-high heat until shimmering.
- Place chicken skin-side down in the hot pan and cook undisturbed for 5-7 minutes until skin is golden brown and crispy.
- Flip chicken and cook for another 5 minutes, then transfer to a plate.
- Reduce heat to medium and add diced onions to the pan with the chicken fat, cooking for 3-4 minutes until softened.
- Add minced garlic and cook for 30 seconds until fragrant.
- Sprinkle flour over the onion-garlic mixture, stirring constantly for 2 minutes to cook out the raw flour taste.
- Gradually pour in chicken broth while whisking vigorously to prevent lumps.
- Add milk, dried thyme, and bay leaf, whisking until smooth.
- Bring mixture to a gentle simmer and let it thicken for 3-4 minutes.
- Return chicken to the pan skin-side up, nestling pieces into the gravy.
- Reduce heat to low, cover the pan, and simmer for 20-25 minutes until chicken reaches 165°F/74°C internally.
- Remove lid during the last 5 minutes for crispier skin if desired.
- Remove bay leaf, taste gravy, and adjust seasoning as needed.
- Serve hot over mashed potatoes, rice, or noodles.


