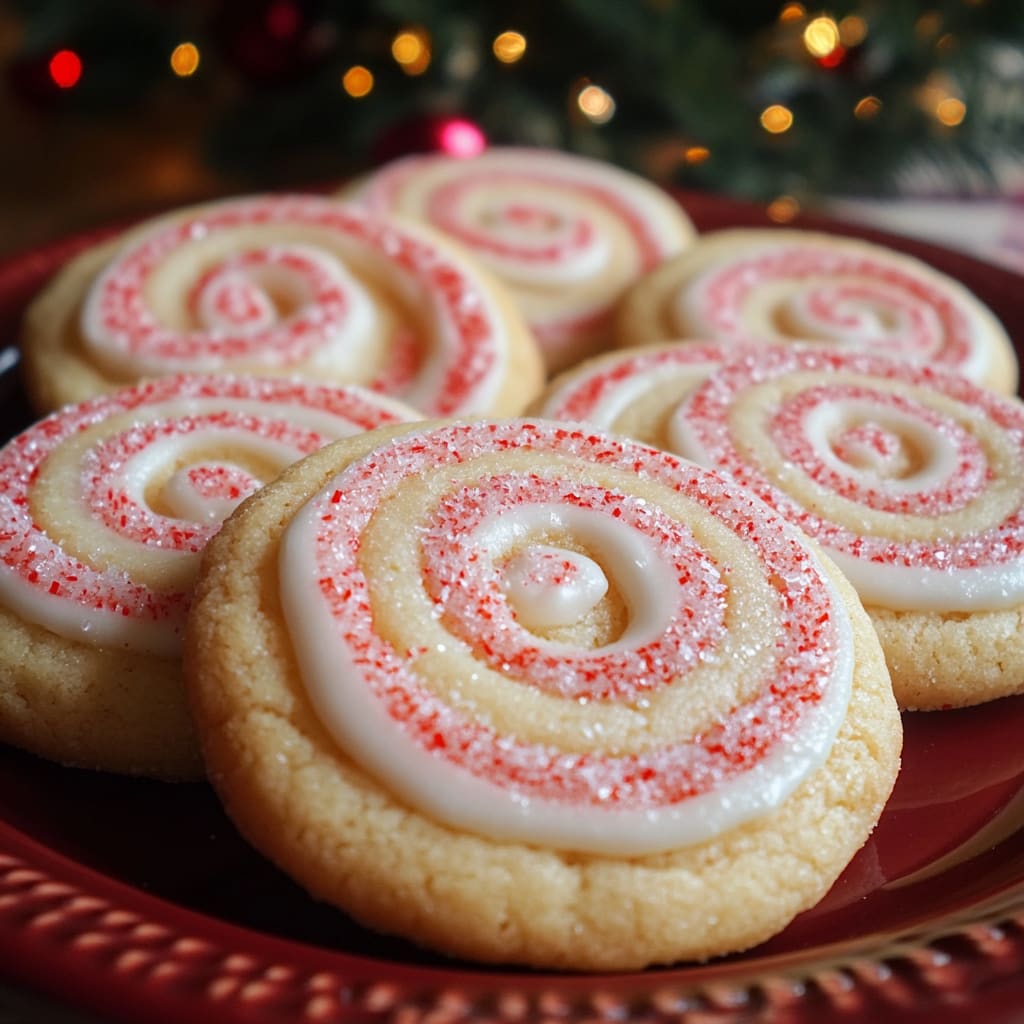
The sweet, minty aroma of Candy Cane Cookies wafting through your kitchen instantly signals that holiday magic has arrived. These festive red and white twisted treats combine the buttery richness of shortbread with refreshing peppermint, creating the perfect Christmas cookie that looks as spectacular as it tastes. Crisp on the edges yet tender in the center, these Candy Cane Cookies capture the essence of the season in every bite. You’ll learn how to achieve that perfect twist pattern, get the ideal peppermint flavor balance, and create a showstopping holiday treat that will become a cherished tradition.
Why You’ll Love This Recipe
These Candy Cane Cookies are about to become your new holiday baking obsession, and for good reason. First, they create that perfect sensory contrast between the buttery, melt-in-your-mouth cookie texture and the bright pop of peppermint flavor. Unlike many holiday cookies that require complicated decorating skills, these achieve their festive appearance through a simple twisting technique that even beginner bakers can master.
The dramatic red and white stripes make these cookies instantly recognizable on any cookie platter, yet they’re surprisingly straightforward to make. Children especially love helping with the rolling and twisting process, making these Christmas candy cane biscuits a perfect family baking activity. The dough can be prepared ahead of time, allowing you to break the baking process into manageable steps during the busy holiday season.
Best of all, these cookies strike that perfect balance—impressive enough for gifting or cookie exchanges but familiar and comforting enough to become part of your family’s treasured holiday traditions.
Ingredients
To make approximately 24 Candy Cane Cookies, you’ll need:
- 1 cup (226g) unsalted butter, softened
- 1 cup (200g) granulated sugar
- 1 large egg
- 1 teaspoon vanilla extract
- 1 teaspoon peppermint extract
- 3 cups (375g) all-purpose flour
- ½ teaspoon salt
- ½ teaspoon baking powder
- Red food coloring (gel preferred)
- 2 tablespoons crushed peppermint candies (optional, for topping)
The quality of your peppermint extract matters significantly in these cookies—always choose pure rather than imitation for the most authentic flavor. The butter should be softened but not melting for the ideal dough consistency. Gel food coloring is recommended over liquid varieties as it provides vibrant color without altering the dough’s texture. If possible, use a high-quality butter with higher fat content for the most tender, flavorful holiday peppermint cookies.
Pro Tips
Get the Perfect Twist: The secret to beautiful Candy Cane Cookies lies in the temperature of your dough. If it becomes too warm while handling, the colors can bleed and the cookies may spread too much during baking. After dividing and coloring your dough, refrigerate both portions for 30 minutes before rolling into ropes. If the dough warms up during shaping, pause and chill it again for 10-15 minutes.
Ideal Color Intensity: For that classic candy cane appearance, don’t be timid with your red coloring. The red will fade slightly during baking, so aim for a vibrant shade that’s slightly darker than your desired final result. Knead the coloring thoroughly into half the dough to ensure consistent color throughout with no streaks.
Peppermint Balance: The key to these cookies is achieving the perfect peppermint flavor that’s festive without overpowering. Start with the recommended amount of extract, but if you’re uncertain, divide a small piece of dough and add extra extract to test the flavor after baking. Remember that peppermint flavor intensifies as the cookies cool and develop over the next day.

Instructions
Step 1: Prepare the Dough
In a large mixing bowl, cream together the softened butter and sugar until light and fluffy, about 3-4 minutes. This extended creaming creates air pockets that help your Candy Cane Cookies achieve that perfect texture. Add the egg and beat until fully incorporated, then mix in both vanilla and peppermint extracts. In a separate bowl, whisk together flour, salt, and baking powder. Gradually add the dry ingredients to the butter mixture, mixing on low speed just until combined. Overmixing at this stage can make your cookies tough.
Step 2: Divide and Color
Divide the dough evenly into two portions. Return one half to the mixing bowl and add red food coloring, starting with a small amount and gradually increasing until you achieve a vibrant red color. Remember that the color will appear less intense after baking. Cover both portions separately with plastic wrap and refrigerate for at least 30 minutes or until firm enough to handle without sticking to your hands.
Step 3: Shape the Cookies
Preheat your oven to 375°F (190°C) and line baking sheets with parchment paper. Take a tablespoon of each dough color and roll each into a 5-inch rope on a lightly floured surface. Place the ropes side by side and gently twist them together. Transfer to the prepared baking sheet and curve the top to form a candy cane shape. Place cookies about 2 inches apart as they will spread slightly. For best results, work with small batches of dough at a time, keeping the remainder refrigerated.
Step 4: Bake to Perfection
Bake the Candy Cane Cookies for 9-11 minutes, until the edges are just set but not browned. If you want a slightly softer cookie, aim for the lower end of the baking time. For crispier cookies, bake a minute or two longer. If using crushed peppermint candy as a topping, sprinkle it over the cookies immediately upon removing them from the oven so it adheres as they cool. Let the cookies cool on the baking sheet for 5 minutes before transferring to a wire rack to cool completely.
Variations
Chocolate Mint Candy Canes: For chocolate peppermint cookie canes, replace ½ cup of the flour with unsweetened cocoa powder in the portion that would typically be colored red. This creates a striking chocolate and white twist with the same minty flavor profile. Drizzle cooled cookies with melted white chocolate for an extra festive touch.
Gluten-Free Holiday Cookies: These festive Candy Cane Cookies can be easily adapted for gluten-free diets by substituting a high-quality cup-for-cup gluten-free flour blend. Add ¼ teaspoon xanthan gum if your blend doesn’t already contain it. The dough may be slightly more fragile, so handle with extra care during the twisting process.
Almond Candy Canes: For a sophisticated twist, replace the peppermint extract with almond extract and add ½ cup finely chopped toasted almonds to the dough. Color one half red or leave it natural for a more subtle cookie. This variation pairs beautifully with coffee or hot chocolate for holiday gatherings.
Storage and Serving
Store your Candy Cane Cookies in an airtight container at room temperature for up to one week. Place parchment paper between layers to prevent the cookies from sticking together or breaking. For longer storage, these cookies freeze exceptionally well for up to three months—perfect for getting ahead on your holiday baking. Thaw at room temperature for about an hour before serving.
Serve these festive treats alongside mugs of hot chocolate topped with whipped cream for the ultimate Christmas cookie experience. They make a beautiful addition to holiday cookie platters or gift boxes. For an elegant dessert presentation, use these cookies as decorative elements on a peppermint ice cream sundae or alongside a chocolate mousse. Their candy cane shape makes them perfect for hanging on the rim of a dessert cup or as an edible garnish for holiday-themed cocktails.
FAQs
Why did my candy cane cookies spread too much?
The most common culprit is butter that’s too warm. Make sure to thoroughly chill your dough before shaping and baking. Also, check that your baking powder is fresh and your oven is correctly calibrated to the proper temperature.
Can I make the dough ahead of time?
Absolutely! The dough for Candy Cane Cookies can be refrigerated for up to 3 days before shaping and baking. You can also freeze the shaped unbaked cookies for up to a month—just add 1-2 minutes to the baking time.
Why did my red color fade during baking?
Gel food coloring typically provides more vibrant, bake-stable colors than liquid varieties. Start with a shade that’s slightly darker than desired as some fading is normal. For intense red, some bakers add the coloring to the dough the day before baking to allow the color to develop.
Can I use different flavor extracts?
While peppermint is traditional for Candy Cane Cookies, you can experiment with wintergreen, spearmint, or even a combination of almond and vanilla for a different festive flavor profile.
How do I prevent the twisted ropes from unraveling?
Gently press the ends of the two ropes together before starting to twist, and again at the end. A light pinch at each end helps secure the twist. If they’re still separating, try wetting your finger with a drop of water and rubbing it along the seam.
Conclusion
These Candy Cane Cookies are comfort food at its most festive — buttery, minty twists of joy that brighten any holiday cookie platter with their cheerful red and white stripes. They’re the kind of treat that brings generations together in the kitchen, creating memories while filling your home with the irresistible scent of peppermint and vanilla. Whether you’re continuing a longtime family tradition or starting a new one, these charming cookies capture the magic of the season in every sweet, colorful bite.
Print
Candy Cane Cookies
- Prep Time: 25 minutes
- Cook Time: 10 minutes
- Total Time: 35 minutes
- Yield: 24 cookies 1x
- Category: Dessert
- Method: Baking
- Cuisine: Americaine
Description
Candy Cane Cookies: Peppermint swirls of joy! Quick, easy, festive delight with butter, sugar, flour, and peppermint extract. A crowd-pleasing treat!
Ingredients
- 1 cup (226g) unsalted butter, softened
- 1 cup (200g) granulated sugar
- 1 large egg
- 1 teaspoon vanilla extract
- 1 teaspoon peppermint extract
- 3 cups (375g) all-purpose flour
- ½ teaspoon salt
- ½ teaspoon baking powder
- Red food coloring (gel preferred)
- 2 tablespoons crushed peppermint candies (optional, for topping)
Instructions
- Step 1: Prepare the Dough In a large mixing bowl, cream together the softened butter and sugar until light and fluffy, about 3-4 minutes. This extended creaming creates air pockets that help your Candy Cane Cookies achieve that perfect texture. Add the egg and beat until fully incorporated, then mix in both vanilla and peppermint extracts. In a separate bowl, whisk together flour, salt, and baking powder. Gradually add the dry ingredients to the butter mixture, mixing on low speed just until combined. Overmixing at this stage can make your cookies tough.
- Step 2: Divide and Color Divide the dough evenly into two portions. Return one half to the mixing bowl and add red food coloring, starting with a small amount and gradually increasing until you achieve a vibrant red color. Remember that the color will appear less intense after baking. Cover both portions separately with plastic wrap and refrigerate for at least 30 minutes or until firm enough to handle without sticking to your hands.
- Step 3: Shape the Cookies Preheat your oven to 375°F (190°C) and line baking sheets with parchment paper. Take a tablespoon of each dough color and roll each into a 5-inch rope on a lightly floured surface. Place the ropes side by side and gently twist them together. Transfer to the prepared baking sheet and curve the top to form a candy cane shape. Place cookies about 2 inches apart as they will spread slightly. For best results, work with small batches of dough at a time, keeping the remainder refrigerated.
- Step 4: Bake to Perfection Bake the Candy Cane Cookies for 9-11 minutes, until the edges are just set but not browned. If you want a slightly softer cookie, aim for the lower end of the baking time. For crispier cookies, bake a minute or two longer. If using crushed peppermint candy as a topping, sprinkle it over the cookies immediately upon removing them from the oven so it adheres as they cool. Let the cookies cool on the baking sheet for 5 minutes before transferring to a wire rack to cool completely.
Notes
Fresh ingredients will always yield the best flavor results.
Nutrition
- Serving Size: 1 cookie
- Calories: 130
- Sugar: 9g
- Sodium: 60mg
- Fat: 6g
- Saturated Fat: 4g
- Unsaturated Fat: 2g
- Trans Fat: 0g
- Carbohydrates: 17g
- Fiber: 0.5g
- Protein: 1g
- Cholesterol: 20mg


