Imagine biting into a chewy, buttery cookie studded with crunchy bits of candy that offer that distinctive peanut-butterscotch flavor you crave. These Butterfinger Cookies transform everyone’s favorite candy bar into an irresistible homemade treat that’s sure to disappear from your cookie jar in record time. The contrast between the soft cookie base and the crispy Butterfinger pieces creates a texture sensation that’s simply unforgettable. You’ll learn how to create these crowd-pleasing cookies that perfectly balance sweetness with that iconic Butterfinger flavor in every bite.
Why You’ll Love This Recipe
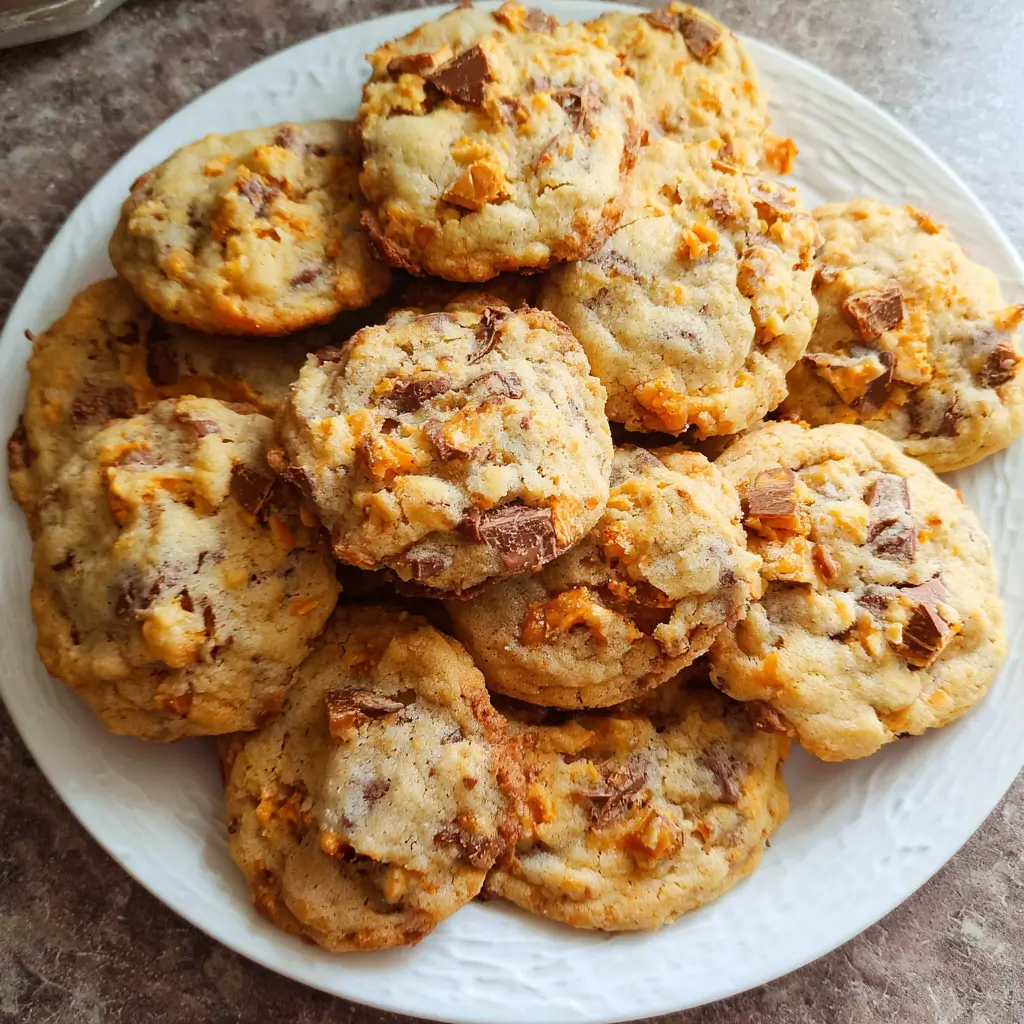
These Butterfinger Cookies are a guaranteed hit for several compelling reasons. First, they blend the comforting familiarity of a classic chocolate chip cookie with the exciting crunch and flavor of Butterfinger candy bars—creating something both nostalgic and new. The cookies feature a beautiful contrast between the tender, slightly chewy cookie base and the distinctive crispy candy pieces that maintain their signature texture even after baking.
What makes these cookies truly special is their versatility—they’re elegant enough for special occasions but simple enough for everyday treats. The recipe uses basic pantry ingredients with the addition of chopped Butterfinger bars, making them accessible even for novice bakers. The dough comes together in minutes, and the heavenly aroma that fills your kitchen as they bake is almost as rewarding as the first bite.
Perhaps most importantly, these Butterfinger Cookies deliver that perfect balance of sweet and salty, with the distinctive peanut-butterscotch flavor that Butterfinger fans adore in a fresh-baked cookie form.
Ingredients
For these delectable Butterfinger Cookies, you’ll need:
• 2½ cups (313g) all-purpose flour
• 1 teaspoon baking soda
• 1 teaspoon salt
• 1 cup (226g) unsalted butter, softened to room temperature
• ¾ cup (150g) granulated sugar
• ¾ cup (165g) packed light brown sugar
• 2 large eggs, at room temperature
• 2 teaspoons vanilla extract
• 3 cups (about 12 oz/340g) chopped Butterfinger candy bars (approximately 12-15 fun-size bars)
The Butterfinger candy bars are the star ingredient here—they add their distinctive crispy, peanut-butterscotch flavor that makes these cookies unique. For the best texture, chop the candy bars into small pieces (about ¼-inch) rather than crushing them completely. The brown sugar contributes to the cookies’ chewy texture, while the vanilla extract enhances the overall flavor profile without overwhelming the Butterfinger pieces.
Pro Tips
Get the Texture Right: For the perfect Butterfinger Cookies, cream the butter and sugars until truly light and fluffy—about 3-4 minutes with an electric mixer. This crucial step incorporates air into the dough, resulting in cookies with the ideal texture: slightly crisp edges and chewy centers. Don’t rush this stage as it forms the foundation of your cookie’s structure.
Butterfinger Handling Matters: Instead of incorporating the Butterfinger pieces directly into the mixer, fold them in by hand using a spatula. This gentle approach prevents the candy from breaking down too much and maintains those delightful crunchy bits throughout the cookies. For visual appeal, reserve a small portion of the chopped Butterfinger to press into the tops of the cookie dough balls just before baking.
Perfect Your Baking Timing: These cookies can quickly go from perfect to overdone. Bake until the edges are just set and lightly golden, but the centers still appear slightly underbaked—they’ll continue cooking on the hot baking sheet after removal from the oven. This technique (about 10-12 minutes at 350°F/175°C) ensures your Butterfinger Cookies maintain that coveted chewy center that perfectly complements the crunchy candy pieces.
Instructions
Step 1: Prepare Your Ingredients and Equipment
Preheat your oven to 350°F (175°C) and line two baking sheets with parchment paper. This prevents sticking and makes cleanup easier, especially important since the Butterfinger pieces can caramelize during baking. While the oven heats, unwrap and chop your Butterfinger bars into approximately ¼-inch pieces—not too fine, as you want identifiable chunks in the finished cookies.
Step 2: Combine Dry Ingredients
In a medium bowl, whisk together the flour, baking soda, and salt until well combined. This even distribution of leavening agents ensures your Butterfinger Cookies rise uniformly. Set this mixture aside while you prepare the wet ingredients.
Step 3: Cream Butter and Sugars
In a large bowl using an electric mixer, beat the softened butter, granulated sugar, and brown sugar together on medium-high speed until light and fluffy, about 3-4 minutes. Don’t rush this step—proper creaming creates air pockets that give your cookies their perfect texture. The mixture should lighten in color and appear almost fluffy.
Step 4: Add Eggs and Vanilla
Add the eggs one at a time, beating well after each addition until completely incorporated. Scrape down the sides of the bowl as needed. Then mix in the vanilla extract until just combined. Your mixture should look smooth and glossy at this point.
Step 5: Combine Wet and Dry Ingredients
Gradually add the dry ingredient mixture to the wet ingredients, mixing on low speed just until combined. Over-mixing develops gluten and can result in tough cookies, so stop as soon as no flour streaks remain. The dough will be thick and somewhat sticky.
Step 6: Fold in Butterfinger Pieces
Using a rubber spatula, gently fold in about 2½ cups of the chopped Butterfinger pieces, reserving the remaining ½ cup for topping. This gentle folding preserves the candy chunks for maximum texture contrast in your Butterfinger Cookies.
Step 7: Form and Bake Cookies
Using a cookie scoop or tablespoon, drop rounded balls of dough (about 2 tablespoons each) onto the prepared baking sheets, spacing them about 2 inches apart. Press a few pieces of the reserved chopped Butterfinger onto the tops of each dough ball for visual appeal. Bake for 10-12 minutes until the edges are set and lightly golden while the centers still look slightly underdone.
Step 8: Cool and Enjoy
Allow the cookies to cool on the baking sheets for 5 minutes before transferring them to wire racks to cool completely. This cooling period allows the cookies to set up properly, resulting in that perfect chewy texture that makes Butterfinger Cookies so irresistible.
Variations
Chocolate-Dipped Butterfinger Cookies: For an extra layer of indulgence, try dipping half of each cooled Butterfinger Cookie into melted semisweet or milk chocolate. After dipping, place the cookies on parchment paper and sprinkle with additional finely chopped Butterfinger pieces before the chocolate sets. This variation adds a beautiful visual element and doubles down on the chocolate-candy bar connection.
Peanut Butter Butterfinger Cookies: Enhance the peanut notes already present in Butterfingers by adding ⅓ cup of creamy peanut butter to your cookie dough. Reduce the butter by 2 tablespoons to maintain the proper dough consistency. This variation amplifies the nutty flavor profile and creates an even chewier texture that perfectly complements the crunchy Butterfinger pieces.
Mini Butterfinger Cookie Cups: For a fun presentation twist, press tablespoon-sized portions of the Butterfinger Cookie dough into mini muffin tins and bake for 8-10 minutes. While still warm, press a miniature peanut butter cup or additional Butterfinger piece into the center of each cookie cup, creating an impressive two-in-one dessert that’s perfect for parties.
Storage and Serving
These Butterfinger Cookies will stay fresh when stored in an airtight container at room temperature for up to 5 days. The flavor actually improves slightly after the first day as the candy pieces soften just a bit and meld with the cookie. For longer storage, you can freeze the baked cookies for up to 3 months—simply thaw at room temperature for about an hour before serving.
For an elevated dessert presentation, sandwich a scoop of vanilla ice cream between two cookies to create the ultimate Butterfinger Cookie ice cream sandwich. The contrast between the cold, creamy ice cream and the chewy cookie with crunchy candy bits is simply divine.
Another serving suggestion is to crumble a warm Butterfinger Cookie over a bowl of chocolate pudding or as a topping for brownies. The textural contrast adds excitement to these classic desserts. For the ultimate indulgence, serve these cookies still slightly warm with a cold glass of milk or a hot cup of coffee to balance the sweetness.
FAQs
Can I use Butterfinger Bites instead of chopping candy bars?
Yes! Butterfinger Bites work perfectly in these Butterfinger Cookies and save you the chopping step. Use about 2 cups of Butterfinger Bites, giving them just a rough chop to create various-sized pieces for texture interest.
Why did my cookies spread too much?
If your Butterfinger Cookies spread too thin during baking, your butter may have been too warm. Try chilling the dough for 30 minutes before baking or add an extra 2-3 tablespoons of flour to the dough.
Can I freeze the cookie dough for later?
Absolutely! Form the dough into balls, place on a baking sheet until frozen solid, then transfer to a freezer bag. Bake from frozen, adding 1-2 minutes to the baking time.
Are there any alternatives to Butterfinger candy bars?
While Butterfingers give these cookies their signature flavor, you could substitute other candy bars with a crispy texture like Crunch bars or Heath bars for a different but equally delicious cookie.
Why do my Butterfinger pieces seem to disappear in the cookies?
If your candy pieces are chopped too finely, they can melt into the cookie during baking. Aim for larger chunks (about ¼-inch pieces) and be sure your oven isn’t too hot, which can cause excessive melting.
Conclusion
These Butterfinger Cookies are comfort food at its finest — combining the homey satisfaction of freshly baked cookies with the nostalgic joy of a beloved candy bar. They’re the kind of treat that bridges generations, delighting both children and adults with their perfect balance of textures and that unmistakable peanut-butterscotch flavor. Whether you’re making them for a special occasion, a bake sale, or simply to fill your cookie jar with something extraordinary, these cookies deliver satisfaction in every bite. The simple joy of sharing these homemade treasures makes any day a little sweeter—and isn’t that what great recipes are all about?
Print
Butterfinger Cookies
Description
These Butterfinger Cookies will make you question every other cookie recipe you’ve ever loved – crispy, chewy, and packed with that iconic candy crunch we all secretly crave.
Ingredients
- 2½ cups all-purpose flour
- 1 teaspoon baking soda
- 1 teaspoon salt
- 1 cup unsalted butter, softened to room temperature
- ¾ cup granulated sugar
- ¾ cup packed light brown sugar
- 2 large eggs, at room temperature
- 2 teaspoons vanilla extract
- 3 cups chopped Butterfinger candy bars (approximately 12–15 fun-size bars)
Instructions
- Preheat oven to 350°F (175°C) and line two baking sheets with parchment paper. Chop Butterfinger bars into approximately ¼-inch pieces.
- In a medium bowl, whisk together flour, baking soda, and salt until well combined. Set aside.
- In a large bowl using an electric mixer, beat the softened butter, granulated sugar, and brown sugar together on medium-high speed until light and fluffy, about 3-4 minutes.
- Add eggs one at a time, beating well after each addition. Mix in the vanilla extract until just combined.
- Gradually add the dry ingredient mixture to the wet ingredients, mixing on low speed just until combined.
- Using a rubber spatula, gently fold in about 2½ cups of the chopped Butterfinger pieces, reserving the remaining ½ cup for topping.
- Drop rounded balls of dough (about 2 tablespoons each) onto the prepared baking sheets, spacing them about 2 inches apart. Press a few pieces of the reserved chopped Butterfinger onto the tops of each dough ball.
- Bake for 10-12 minutes until the edges are set and lightly golden while the centers still look slightly underdone.
- Allow cookies to cool on the baking sheets for 5 minutes before transferring to wire racks to cool completely.
- Store in an airtight container at room temperature for up to 5 days or freeze for up to 3 months.


