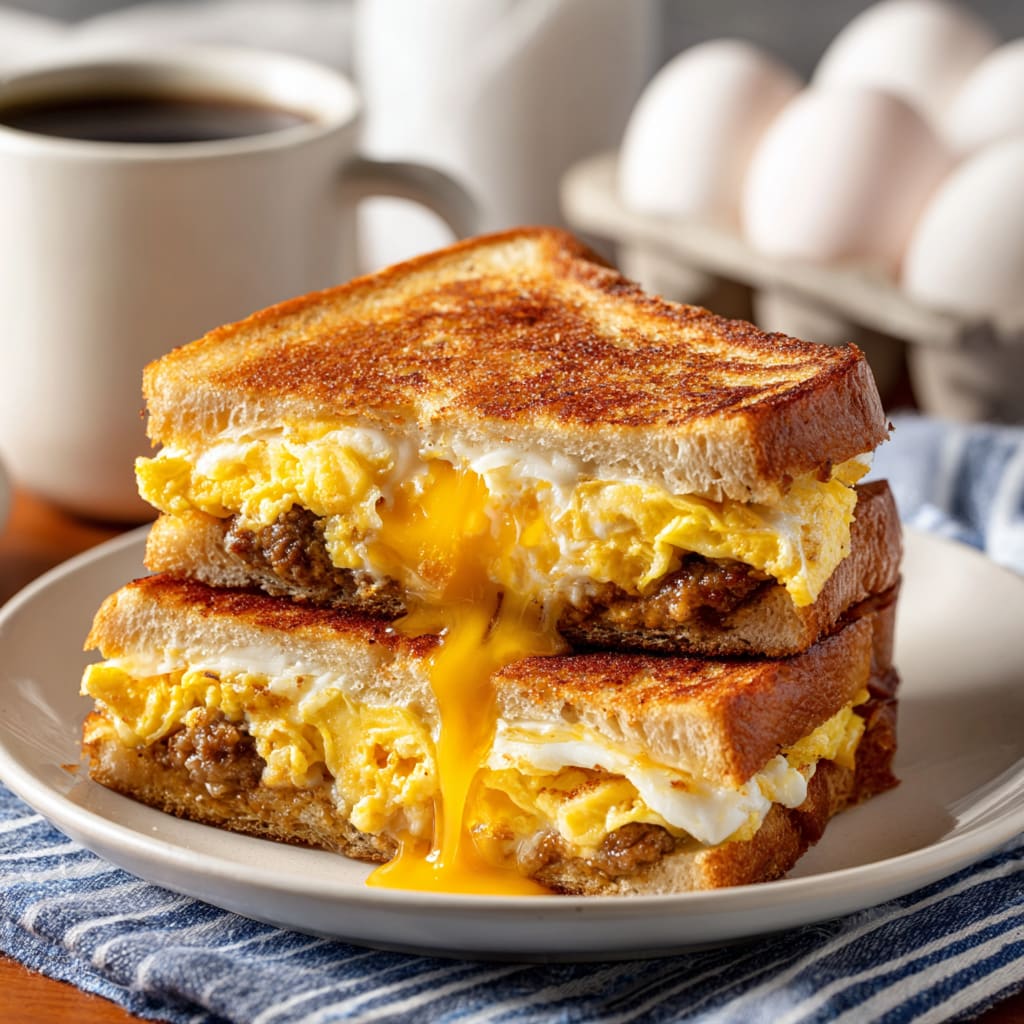
Imagine biting into a perfectly golden-brown sandwich, where the exterior crackles with buttery crispness while the interior reveals a stretchy, molten cheese paradise. That’s the magic of a Brick Grilled Cheese – a sandwich that takes the humble grilled cheese to extraordinary heights by using a weighted technique for the ultimate crispy exterior and gooey center. Unlike standard grilled cheese, the “brick method” ensures even heat distribution and perfect browning every time. You’ll learn how this simple technique transforms an everyday sandwich into a restaurant-worthy experience, with tips for cheese selection, bread choices, and creative variations that will make this your new go-to comfort food.
Why You’ll Love This Recipe
The Brick Grilled Cheese isn’t just another sandwich—it’s an elevated experience that delivers on every level. First, the brick technique creates the perfect textural contrast: a shatteringly crisp exterior that gives way to an interior of molten, stretchy cheese that pulls into those Instagram-worthy cheese pulls. The evenly distributed weight ensures perfect contact with the pan, eliminating those disappointing pale spots and creating a consistent golden crust.
What makes this recipe truly special is its versatility. It works with virtually any cheese and bread combination you have on hand, making it perfect for weeknight dinners or impromptu lunches. The process is deceptively simple yet delivers professional results—even novice cooks can achieve sandwich perfection.
The technique also allows for a slower melt, giving the bread time to achieve that coveted deep golden color while ensuring the cheese reaches the ideal gooey consistency. No more burnt bread with cold cheese centers! This Brick Grilled Cheese method will transform how you approach this classic comfort food forever.
Ingredients
• 2 slices quality bread (sourdough, country white, or brioche work best)
• 2-3 tablespoons (28-42g) unsalted butter, softened
• 4 ounces (113g) cheese blend (combination of medium and high-melt cheeses)
– 2 ounces (56g) sharp cheddar, grated
– 1 ounce (28g) low-moisture mozzarella, grated
– 1 ounce (28g) gruyère or fontina, grated
• ¼ teaspoon (1g) garlic powder (optional)
• Pinch of kosher salt
• Foil-wrapped brick or heavy cast iron pan (for pressing)
• Non-stick skillet or well-seasoned cast iron pan
The key to an exceptional Brick Grilled Cheese lies in using bakery-quality bread with a tight crumb structure and a cheese blend that combines both flavor and superior melting properties. Pre-grating the cheese ensures even melting throughout the sandwich.
Pro Tips
The secret to Brick Grilled Cheese perfection lies in three crucial techniques that elevate this sandwich from ordinary to extraordinary:
First, butter management is essential. Rather than spreading cold butter directly on bread (which can tear delicate slices), butter the pan instead of the bread, or melt butter in the pan first. For the outer surfaces, soften butter completely to room temperature for easy spreading and even browning.
Second, temperature control makes or breaks your sandwich. Start with a cold pan and heat it gradually to medium-low (never high) to allow time for the cheese to melt completely as the bread browns slowly. If your bread is browning too quickly while the cheese remains firm, lower the heat immediately and be patient.
Third, the brick technique itself requires finesse. Wrap a clean brick completely in heavy-duty foil (double-wrapped for cleanliness) or use a second heavy cast-iron pan as your weight. Apply the weight only after the first side is down, and press firmly but not so hard that the sandwich loses its structure or fillings squeeze out.
Instructions
Step 1: Prepare Your Workspace
Begin by setting out all ingredients at room temperature for 15-20 minutes before cooking. This especially applies to the butter and cheese – room temperature cheese melts more evenly, while softened butter spreads without tearing the bread. Grate all cheeses and combine them in a bowl, tossing with optional garlic powder if using.
Step 2: Assemble The Sandwich
Lay your bread slices on a clean work surface. Distribute the cheese mixture evenly over one slice, leaving a small margin at the edges (about ¼ inch) to prevent cheese from leaking during cooking. This border is crucial for creating a sealed Brick Grilled Cheese without messy overflow. Top with the second bread slice and press gently to set the sandwich.
Step 3: Prepare The Pan
Place your skillet over medium-low heat and allow it to warm gradually. Add 1 tablespoon of butter and swirl until melted but not browned. The butter should coat the pan evenly but not sizzle aggressively – if it does, your pan is too hot.
Step 4: Initial Cooking
Place your sandwich in the pan and let it cook undisturbed for 2 minutes. This allows the bottom slice to begin forming a crust before applying any pressure. You’ll notice the bread starting to take on a light golden hue around the edges.
Step 5: Apply The Brick
Carefully place your foil-wrapped brick (or second heavy pan) on top of the sandwich, applying even pressure. Cook for another 2-3 minutes until the bottom is deep golden brown. The weight should be substantial enough to press the sandwich firmly without completely flattening it.
Step 6: Flip And Finish
Remove the brick, add another tablespoon of butter to the pan, and carefully flip the sandwich. Reapply the brick and continue cooking for 2-3 minutes until the second side reaches golden-brown perfection and cheese is completely melted. If needed, you can cover the pan for 30 seconds to help the cheese melt without over-browning the bread.
Step 7: Rest And Serve
Transfer your Brick Grilled Cheese to a cutting board and let it rest for 1 minute before cutting. This brief rest allows the molten cheese to set slightly, giving you clean, impressive cheese pulls when you slice diagonally. Serve immediately while still warm and at peak deliciousness.
Variations
The classic Brick Grilled Cheese is just the beginning – these creative variations will keep this recipe in regular rotation:
Sweet and Savory Upgrade: Transform your sandwich by adding thinly sliced apples or pears with sharp cheddar and a drizzle of honey. The fruit’s natural sweetness cuts through the richness of the cheese, while the honey adds a delicate finishing touch. The brick method ensures these additional ingredients warm through perfectly without making the bread soggy.
Mediterranean-Inspired: Create a sophisticated version by using a combination of feta and mozzarella cheeses, adding a few thin slices of tomato, fresh basil leaves, and a light drizzle of olive oil before grilling. The brick technique helps press these ingredients together into a cohesive, non-drippy sandwich that elevates the humble grilled cheese to dinner-worthy status.
Dietary Adaptations: For gluten-free eaters, use certified gluten-free bread and proceed with the same technique. For dairy-sensitive individuals, quality plant-based cheeses that specifically mention “melting” on the packaging work surprisingly well with the brick method, though you may need to cook them slightly longer at a lower temperature to achieve the desired melt.
Storage/Serving
While Brick Grilled Cheese is undeniably best enjoyed immediately after cooking, proper storage is possible for those rare occasions when you have leftovers. Allow the sandwich to cool completely, then wrap tightly in parchment paper followed by aluminum foil. Refrigerate for up to 2 days. To reheat, unwrap and place in a preheated 350°F (175°C) oven for 5-7 minutes, or use a dry skillet over medium-low heat until warmed through and crispy again.
For serving, presentation elevates the experience. Cut diagonally for the most impressive cheese stretch and serve on a wooden board or warm plate. Pair your Brick Grilled Cheese with classic accompaniments like a small ramekin of tomato soup for dipping, a side of tangy pickle spears to cut through the richness, or a simple green salad dressed with vinaigrette to balance the meal.
For a casual gathering, consider creating a Brick Grilled Cheese bar where guests can select their own bread, cheese combinations, and add-ins before you cook each sandwich to perfection using the brick technique.
FAQs
Can I make Brick Grilled Cheese without an actual brick?
Absolutely! While the technique is named for using a brick, any heavy, heat-safe object works perfectly. A cast iron skillet, granite pizza stone, or even a pot filled with water will provide the necessary weight. The key is even pressure distribution across the sandwich.
Why is my cheese not melting completely?
This typically happens when using cold cheese or cooking at too high a temperature. Ensure your cheese is at room temperature before starting, grate it rather than slice it, and cook over medium-low heat. If needed, cover the pan briefly during cooking to create steam that helps melt the cheese.
What’s the best bread for Brick Grilled Cheese?
Choose bread with a tight crumb structure that can withstand pressure. Sourdough, country white, brioche, or Texas toast are excellent choices. Avoid very holey artisan breads as cheese will leak through during cooking.
Can I prepare Brick Grilled Cheese in advance for a crowd?
For groups, assemble multiple sandwiches ahead of time and refrigerate for up to 2 hours. Cook as needed, allowing a few extra minutes of cooking time to compensate for the chilled ingredients.
How do I prevent my Brick Grilled Cheese from becoming greasy?
Use good quality butter applied in a moderate amount. Rather than increasing butter, focus on even heat distribution and pressure from your brick. Patting high-moisture cheeses (like mozzarella) with paper towels before adding them can also reduce excess moisture in the final sandwich.

Break Grilled Cheese
- Prep Time: 15 mins
- Cook Time: 30 mins
- Total Time: 45 mins
- Yield: 4 servings 1x
- Category: Breakfast
- Method: Cooking
- Cuisine: Americaine
Description
Looking to break grilled cheese naturally? Discover the best tips and solutions for a perfect grilled cheese sandwich. Try it now!
Ingredients
- 2 slices quality bread (sourdough, country white, or brioche work best)
- 2–3 tablespoons (28-42g) unsalted butter, softened
- 4 ounces (113g) cheese blend (combination of medium and high-melt cheeses) – 2 ounces (56g) sharp cheddar, grated – 1 ounce (28g) low-moisture mozzarella, grated – 1 ounce (28g) gruyère or fontina, grated
- ¼ teaspoon (1g) garlic powder (optional)
- Pinch of kosher salt
- Foil-wrapped brick or heavy cast iron pan (for pressing)
- Non-stick skillet or well-seasoned cast iron pan
Instructions
- Step 1: Prepare Your Workspace Begin by setting out all ingredients at room temperature for 15-20 minutes before cooking. This especially applies to the butter and cheese – room temperature cheese melts more evenly, while softened butter spreads without tearing the bread. Grate all cheeses and combine them in a bowl, tossing with optional garlic powder if using.
- Step 2: Assemble The Sandwich Lay your bread slices on a clean work surface. Distribute the cheese mixture evenly over one slice, leaving a small margin at the edges (about ¼ inch) to prevent cheese from leaking during cooking. This border is crucial for creating a sealed **Brick Grilled Cheese** without messy overflow. Top with the second bread slice and press gently to set the sandwich.
- Step 3: Prepare The Pan Place your skillet over medium-low heat and allow it to warm gradually. Add 1 tablespoon of butter and swirl until melted but not browned. The butter should coat the pan evenly but not sizzle aggressively – if it does, your pan is too hot.
- Step 4: Initial Cooking Place your sandwich in the pan and let it cook undisturbed for 2 minutes. This allows the bottom slice to begin forming a crust before applying any pressure. You’ll notice the bread starting to take on a light golden hue around the edges.
- Step 5: Apply The Brick Carefully place your foil-wrapped brick (or second heavy pan) on top of the sandwich, applying even pressure. Cook for another 2-3 minutes until the bottom is deep golden brown. The weight should be substantial enough to press the sandwich firmly without completely flattening it.
- Step 6: Flip And Finish Remove the brick, add another tablespoon of butter to the pan, and carefully flip the sandwich. Reapply the brick and continue cooking for 2-3 minutes until the second side reaches golden-brown perfection and cheese is completely melted. If needed, you can cover the pan for 30 seconds to help the cheese melt without over-browning the bread.
- Step 7: Rest And Serve Transfer your **Brick Grilled Cheese** to a cutting board and let it rest for 1 minute before cutting. This brief rest allows the molten cheese to set slightly, giving you clean, impressive cheese pulls when you slice diagonally. Serve immediately while still warm and at peak deliciousness.
Notes
Fresh ingredients will always yield the best flavor results.
Nutrition
- Serving Size: 1 serving
- Calories: 300
- Sugar: 5g
- Sodium: 400mg
- Fat: 10g
- Saturated Fat: 3g
- Unsaturated Fat: 7g
- Trans Fat: 0g
- Carbohydrates: 40g
- Fiber: 5g
- Protein: 15g
- Cholesterol: 50mg