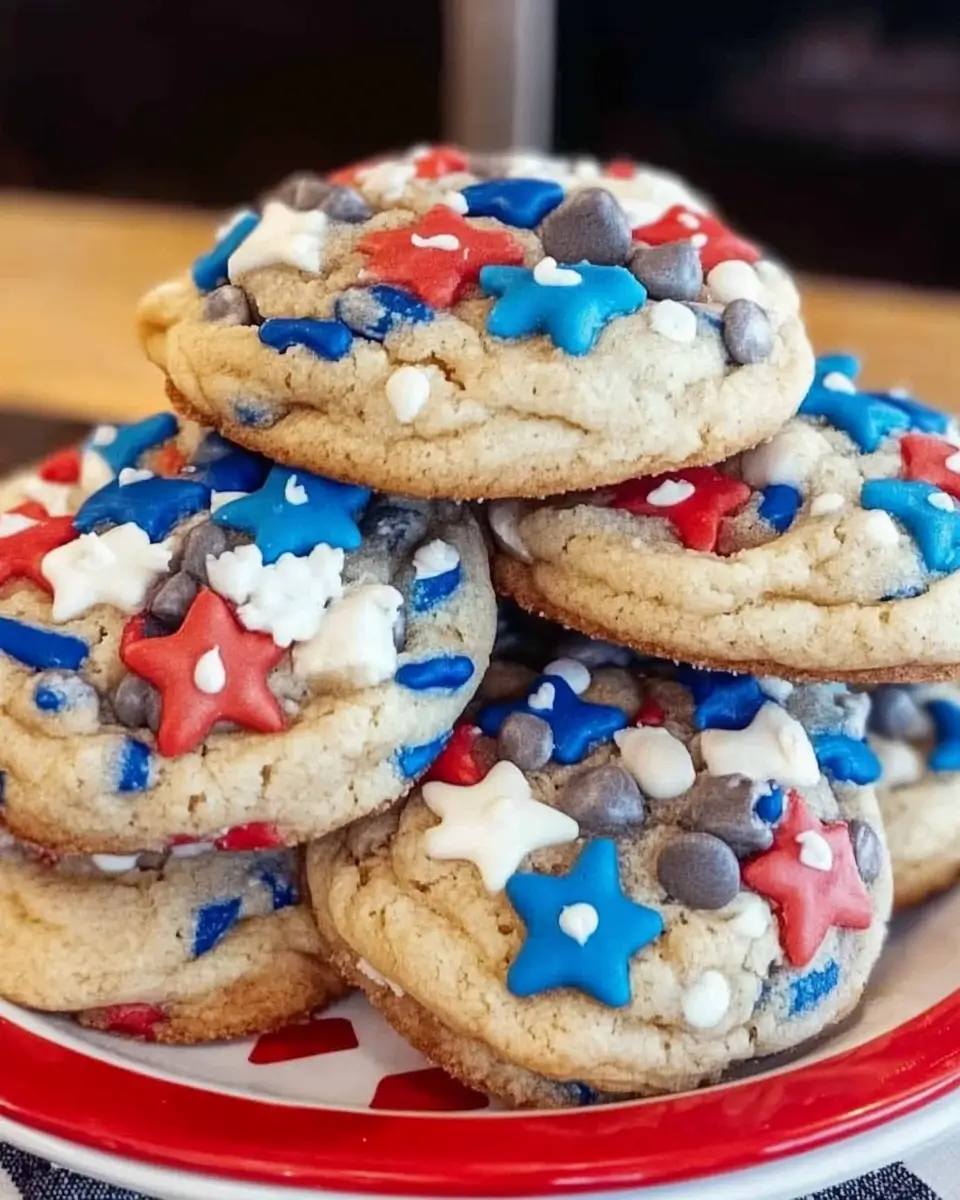
Imagine sinking your teeth into a perfectly sweet, patriotically decorated 4th of July cookie that crumbles just right with each bite. These festive red, white, and blue treats are the ultimate way to celebrate America’s independence while satisfying your sweet tooth. 4th of July cookies combine classic cookie comfort with eye-catching patriotic designs that make them the star of any holiday gathering. Whether you’re hosting a backyard barbecue or contributing to a potluck celebration, these cookies will have everyone reaching for seconds. You’ll learn how to create stunning star-spangled treats that taste as amazing as they look!
Why You’ll Love This Recipe
These 4th of July cookies are guaranteed to become your new holiday tradition for several irresistible reasons. First, they strike the perfect balance between a soft, chewy center and slightly crisp edges, creating that ultimate cookie texture that pleases everyone. The vanilla-forward base provides the ideal canvas for the vibrant red, white, and blue decorations that make these cookies truly special.
What makes this recipe particularly appealing is its versatility—you can customize the decorations based on your skill level, from simple sprinkles to more elaborate star designs. They’re also make-ahead friendly, allowing you to prep the dough or even bake the cookies a day before your celebration.
Perhaps best of all, these patriotic cookies deliver that nostalgic homemade flavor that store-bought versions simply can’t match. The buttery richness paired with festive colors creates both a visual and flavor experience that captures the spirit of Independence Day perfectly.
Ingredients
For the Cookies:
- 1 cup (226g) unsalted butter, softened
- 1½ cups (300g) granulated sugar
- 2 large eggs, at room temperature
- 2 teaspoons vanilla extract
- 3 cups (375g) all-purpose flour
- 1 teaspoon baking powder
- ½ teaspoon baking soda
- ½ teaspoon salt
For the Decorations:
- 2 cups (240g) powdered sugar
- 3-4 tablespoons milk
- ½ teaspoon clear vanilla extract
- Red and blue food coloring (gel colors work best)
- Patriotic sprinkles, red and blue sanding sugar
- White chocolate chips (optional)
The key to these 4th of July cookies is using room temperature butter and eggs, which ensures a perfectly textured dough. Gel food coloring provides vibrant patriotic colors without thinning your icing. Using clear vanilla extract in the icing helps maintain those bright white areas that make the red, white, and blue pop.
Pro Tips
Perfect Your Cookie Texture
For the ideal 4th of July cookie consistency, chill your dough for at least 30 minutes before baking. This prevents excessive spreading and gives you those slightly raised cookies with soft centers and crisp edges. If you’re in a rush, you can place the shaped dough balls in the freezer for 10 minutes instead. Don’t overbake—remove cookies from the oven when the edges are just turning golden but the centers still look slightly underdone.
Master the Decorating Technique
Allow cookies to cool completely before decorating. For the smoothest icing that sets properly, add milk gradually to your powdered sugar until you reach a consistency that’s thick enough to hold its shape but fluid enough to settle into a smooth surface. When using multiple colors, let each layer set before adding the next to prevent bleeding. Place decorated cookies in a single layer until the icing fully hardens.
Work Ahead Strategically
Plan your 4th of July cookie preparation by making the dough up to 3 days ahead and storing it in the refrigerator. You can even freeze shaped cookie dough for up to a month. For fully decorated cookies, prepare them the day before your celebration to allow icing to set completely, and store them in an airtight container with parchment paper between layers.
Instructions
Step 1: Prepare the Cookie Dough
In a large bowl, cream together the softened butter and granulated sugar until light and fluffy, about 3-4 minutes. This step is crucial for incorporating air into your 4th of July cookies, giving them that perfect texture. Add eggs one at a time, beating well after each addition. Stir in the vanilla extract until fully incorporated. In a separate bowl, whisk together the flour, baking powder, baking soda, and salt. Gradually add the dry ingredients to the wet mixture, mixing just until combined. Overmixing at this stage can make your cookies tough, so be gentle!
Step 2: Chill the Dough
Form the dough into a disc, wrap it in plastic wrap, and refrigerate for at least 30 minutes. This chilling time allows the butter to solidify, which helps the 4th of July cookies maintain their shape during baking rather than spreading too thin. While the dough chills, preheat your oven to 350°F (175°C) and line baking sheets with parchment paper.
Step 3: Shape and Bake
Once chilled, remove the dough and let it sit at room temperature for about 5 minutes to make it easier to work with. Roll the dough on a lightly floured surface to ¼-inch thickness. Use star-shaped or round cookie cutters to create your 4th of July cookies. Transfer the shapes to your prepared baking sheets, spacing them about 2 inches apart. Bake for 8-10 minutes, or until the edges just begin to turn golden. The centers may look slightly underdone, but they’ll continue cooking on the hot baking sheet after removal from the oven.
Step 4: Cool Completely
Let the cookies cool on the baking sheet for 5 minutes before transferring them to a wire rack to cool completely. Patience is key here—attempting to decorate warm cookies will cause your icing to melt and run.
Step 5: Prepare the Icing
In a medium bowl, combine the powdered sugar, 3 tablespoons of milk, and the clear vanilla extract. Stir until smooth, adding more milk if needed to reach a consistency that will settle into a smooth surface when spread but isn’t runny. Divide the icing into three portions, leaving one white, coloring one red, and one blue using gel food coloring.
Step 6: Decorate
Transfer each icing color to separate piping bags or squeeze bottles. For simple designs, pipe outlines on your 4th of July cookies and fill them in, or create patterns like stripes, stars, or fireworks. While the icing is still wet, add sprinkles, sanding sugar, or white chocolate chips for additional decoration and texture. Allow the decorated cookies to set completely, which usually takes 2-4 hours.
Variations
Red, White, and Blue Cookie Sandwiches
Transform these 4th of July cookies into impressive sandwich cookies by making them slightly thinner and baking for 6-7 minutes. Once cooled, spread vanilla buttercream between two cookies, then roll the exposed edges in a mixture of red and blue sprinkles. This creates a festive sandwich with colorful edges and a creamy center that kids especially love.
Marbled Star Cookies
For a spectacular marbled effect, divide your cookie dough into three portions. Leave one plain, dye one red, and one blue. Chill all portions, then break each into small pieces. Press the different colored pieces together gently and roll out. Cut with star-shaped cutters for beautiful swirled 4th of July cookies that look impressive with minimal decorating required.
Gluten-Free Patriotic Option
For guests with dietary restrictions, substitute the all-purpose flour with a high-quality cup-for-cup gluten-free flour blend. Add ¼ teaspoon xanthan gum if your blend doesn’t already include it. The texture will be slightly different but still delicious, making these 4th of July cookies accessible to more of your guests.
Storage and Serving
Storage Options
Store your fully decorated 4th of July cookies in an airtight container at room temperature for up to 5 days. Place parchment paper between layers to prevent sticking and maintain those beautiful decorations. If you need to store them longer, the undecorated cookies freeze beautifully for up to 3 months—just thaw at room temperature before decorating. Avoid refrigerating the cookies as this can make them soggy.
Serving Suggestions
Create a stunning patriotic dessert table by arranging your 4th of July cookies on a tiered stand alongside fresh strawberries and blueberries for a cohesive red, white, and blue theme. Serve with vanilla ice cream for an elevated dessert—the cookies can even be used to make mini ice cream sandwiches for a refreshing treat on hot summer days.
For an extra special presentation, package individual cookies in clear cellophane bags tied with red and blue ribbons as take-home favors for your guests. These make particularly thoughtful gifts for anyone who can’t attend your celebration but would appreciate a festive homemade treat.
FAQs
Can I make these 4th of July cookies ahead of time?
Yes! You can prepare the dough up to 3 days in advance and store it in the refrigerator, or freeze shaped unbaked cookies for up to a month. Fully decorated cookies can be made 1-2 days before serving and stored in an airtight container at room temperature.
How do I prevent my icing colors from bleeding together?
Allow each color to dry completely before adding adjacent colors. Working with a slightly thicker consistency icing and using gel food coloring rather than liquid helps prevent bleeding. For complex designs, you may want to let the first color set overnight before adding others.
Can I use store-bought cookie dough to save time?
Absolutely! While homemade dough offers the best flavor, refrigerated sugar cookie dough works in a pinch. Just roll it out, cut your shapes, and bake according to package directions before decorating.
Why did my cookies spread too much during baking?
If your 4th of July cookies spread excessively, your dough was likely too warm. Make sure to chill it adequately, and don’t skip this step even if you’re short on time. Also check that your oven temperature is accurate, as ovens that run too cool can cause spreading.
How can I get vibrant red and blue colors without using artificial dyes?
For natural alternatives, try using freeze-dried strawberry or raspberry powder for red, and butterfly pea flower powder or spirulina for blue. While these natural colorings won’t be as vibrant as artificial dyes, they can still create lovely patriotic effects.
Conclusion
These 4th of July cookies are celebration food at its finest — the perfect balance of festive appearance and delicious taste that brings joy to holiday gatherings. They’re the kind of treat that creates memories, whether you’re decorating them with children or presenting them as the crowning touch to your Independence Day spread. With their customizable designs and classic flavor, these patriotic cookies are sure to become part of your annual tradition, delighting friends and family for years to come. The combination of buttery sweetness and patriotic spirit makes these cookies not just a dessert, but a delicious way to show your American pride.
Print
4th of July Cookies
Description
These 4th of July cookies are the perfect patriotic treat – sweet, festive, and guaranteed to disappear faster than fireworks light up the night sky!
Ingredients
- 1 cup (226g) unsalted butter, softened
- 1½ cups (300g) granulated sugar
- 2 large eggs, at room temperature
- 2 teaspoons vanilla extract
- 3 cups (375g) all-purpose flour
- 1 teaspoon baking powder
- ½ teaspoon baking soda
- ½ teaspoon salt
- 2 cups (240g) powdered sugar
- 3–4 tablespoons milk
- ½ teaspoon clear vanilla extract
- Red and blue food coloring (gel colors work best)
- Patriotic sprinkles, red and blue sanding sugar
- White chocolate chips (optional)
Instructions
- In a large bowl, cream together the softened butter and granulated sugar until light and fluffy, about 3-4 minutes.
- Add eggs one at a time, beating well after each addition. Stir in the vanilla extract.
- In a separate bowl, whisk together the flour, baking powder, baking soda, and salt.
- Gradually add the dry ingredients to the wet mixture, mixing just until combined.
- Form the dough into a disc, wrap in plastic wrap, and refrigerate for at least 30 minutes.
- Preheat oven to 350°F (175°C) and line baking sheets with parchment paper.
- Roll the chilled dough on a lightly floured surface to ¼-inch thickness and cut with star-shaped or round cookie cutters.
- Transfer shapes to prepared baking sheets, spacing them about 2 inches apart.
- Bake for 8-10 minutes, or until edges just begin to turn golden.
- Cool on the baking sheet for 5 minutes, then transfer to a wire rack to cool completely.
- For the icing, combine powdered sugar, 3 tablespoons milk, and clear vanilla extract in a bowl.
- Divide icing into three portions. Leave one white, color one red, and one blue using gel food coloring.
- Transfer each icing color to piping bags or squeeze bottles and decorate the cooled cookies.
- Add sprinkles or other decorations while the icing is still wet.
- Allow decorated cookies to set completely for 2-4 hours before serving or storing.


